Documentation
Doxe - SaaS Doctors Chamber, Prescription & Appointment Software
Thank you so much for purchasing our item from Codecanyon.
- Created: 8 October 2020
- Author: Codericks
If you have any questions that are beyond the scope of this help file, Please feel free to email via Item Support Page.
Installation
This installation process should take no more than 10 minutes if followed and done correctly.
Watch a video tutorial on how you can install the script with a cPanel based hosting.
or follow these steps
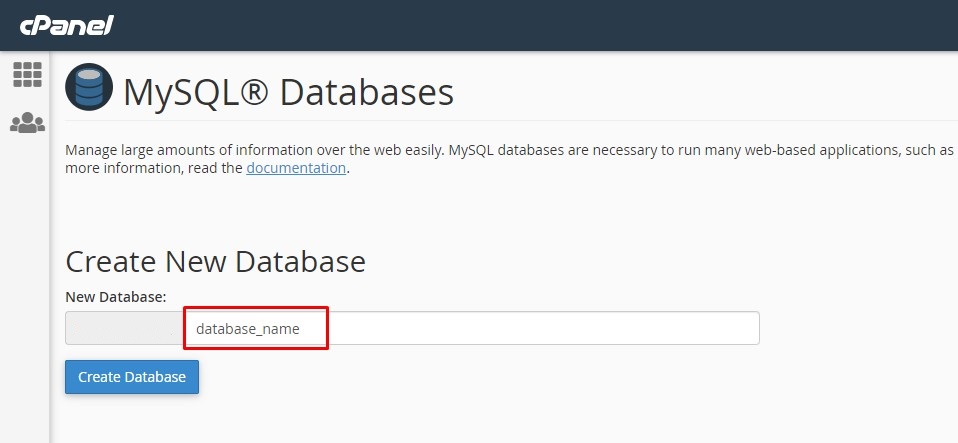
1. Prepare the Database
Go to Cpanel and Click MySQL® Databases

Create New Database
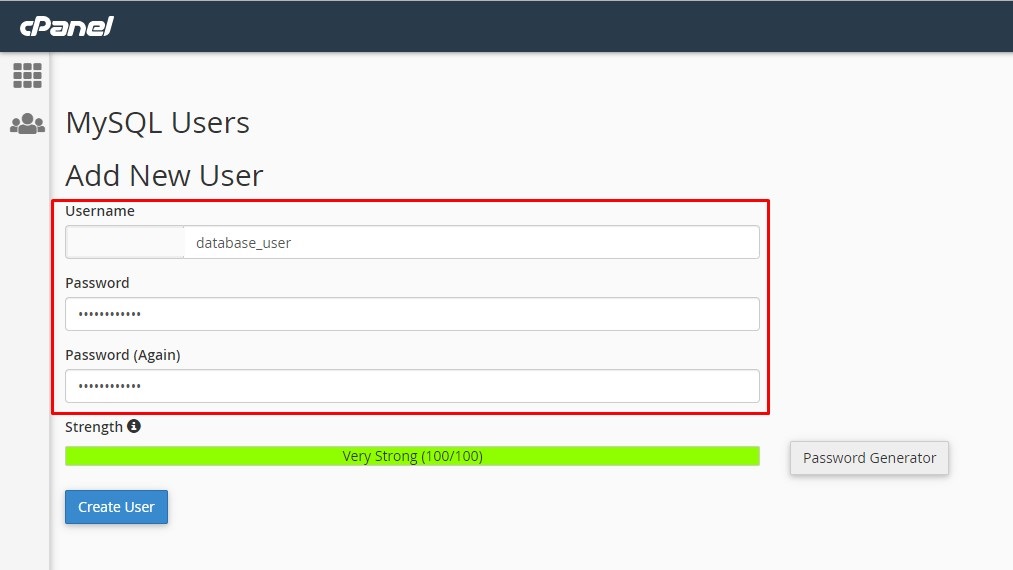
Add New User
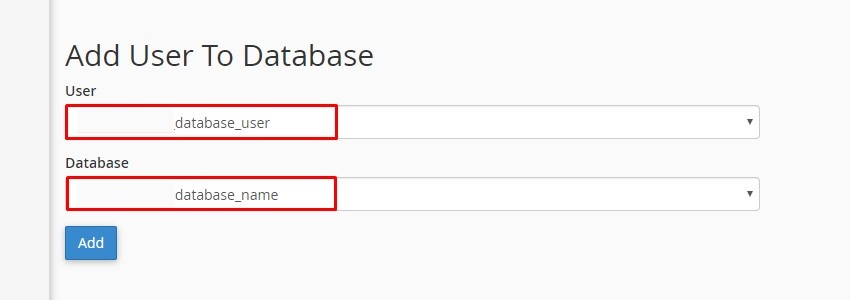
Add User To Database
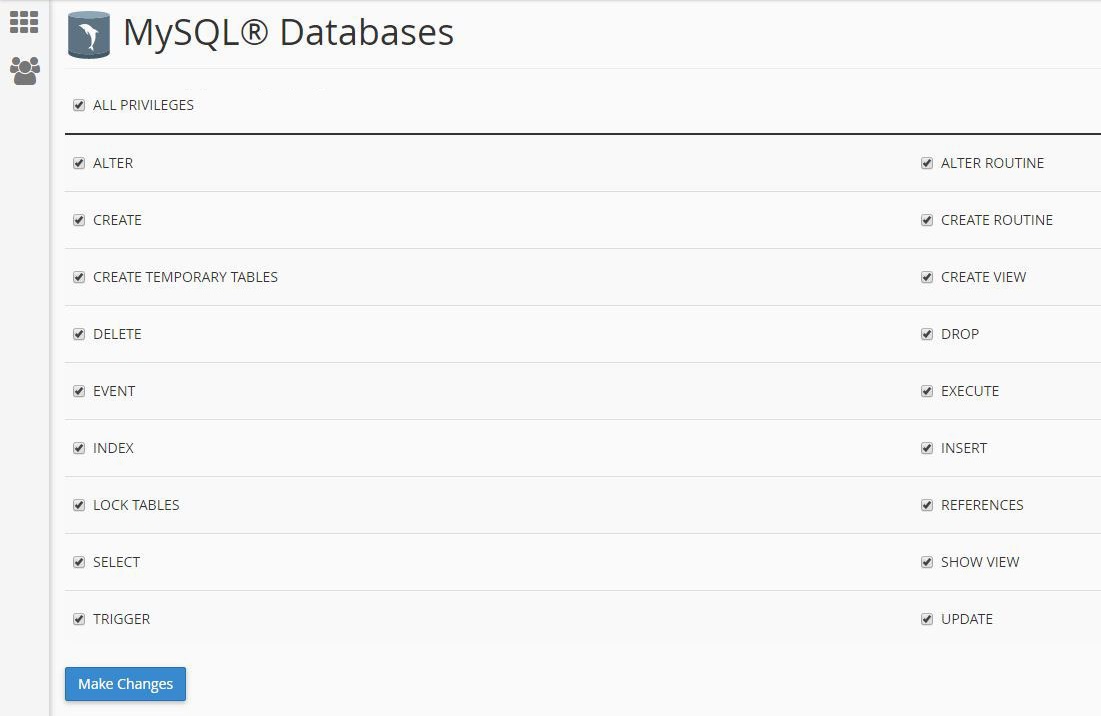
Set User Permissions
2. Upload Script
- Upload script files to your host (The script can be uploaded either on a subdomain, domain or subfolder, depending on your needs.)
3. Start Installation
- Start the installation process add /install after your domain path. (ex: https://yourdomain.com/install)
- Follow the steps in the installation process
After installation, if you get "404 Not Found" to click any link of your site, please re-upload only the .htaccess file on your project root folder
Quick Start
After run project, you will be see the login page like this.
For access use this: www.domain.com/login
Admin
✓ Change Admin Password: If you want to change Admin password you should go to "Change Password" section from left sidebar and change the password.
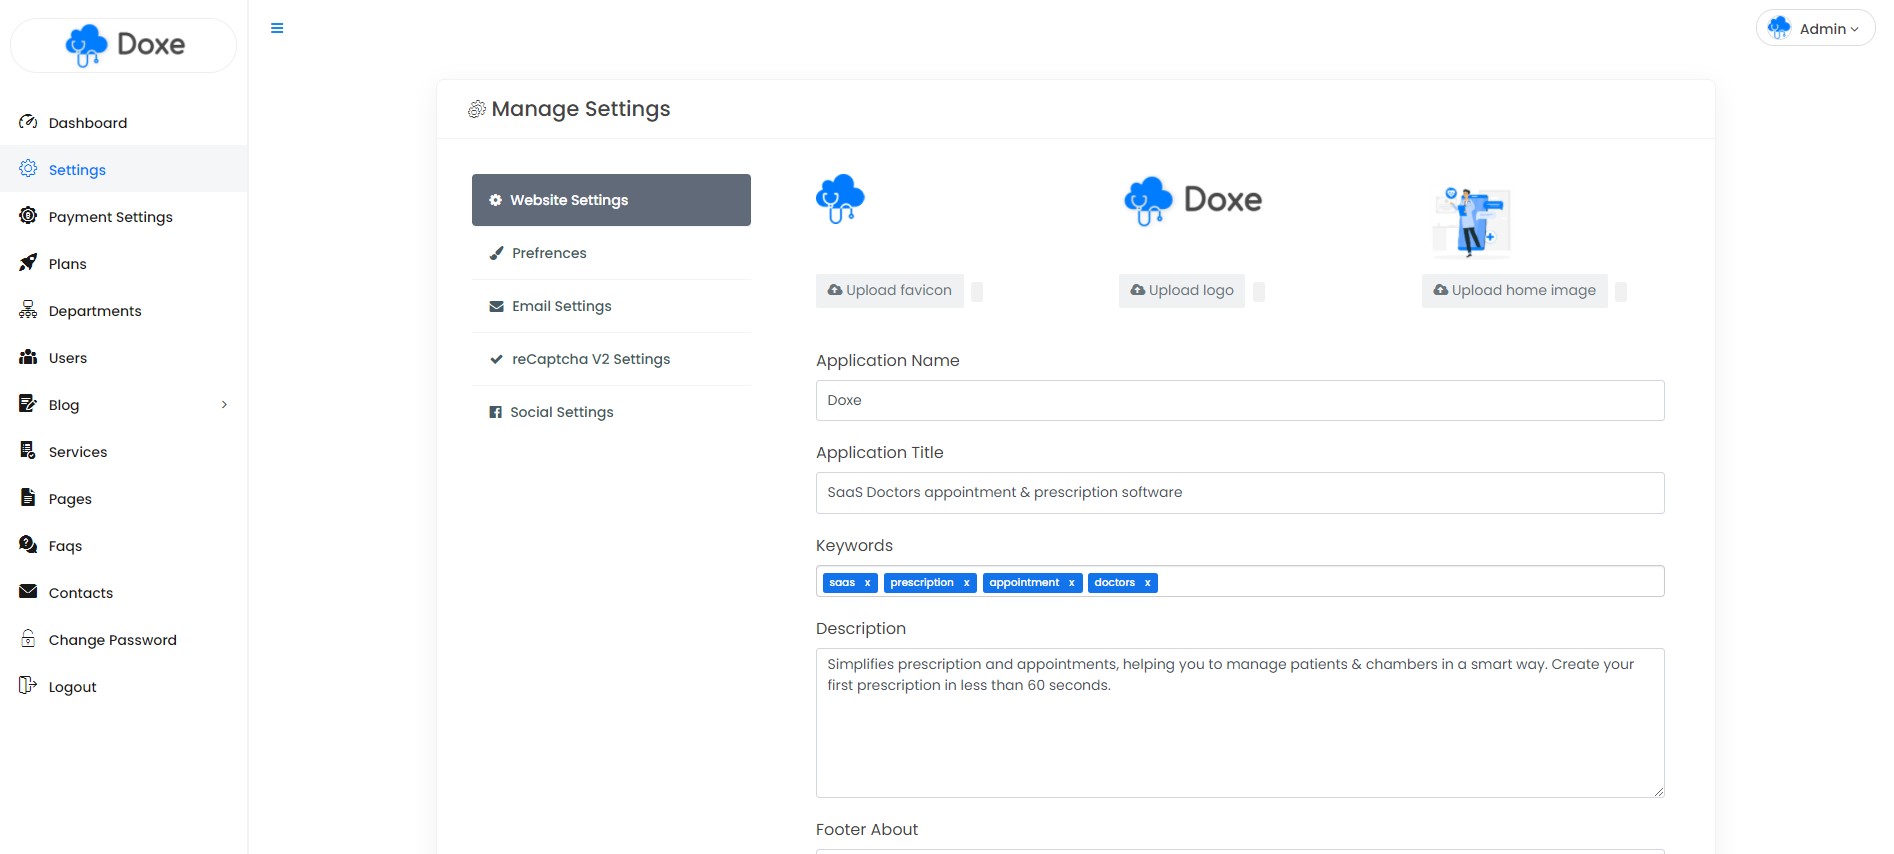
✓ Manage Website Settings: If you want to add your site name, title, email, phone, about, logo, favicon, emails, currency & basic seo options, social links you need to go "Dashboard > Settings" section from left sidebar. you can manage all options here.
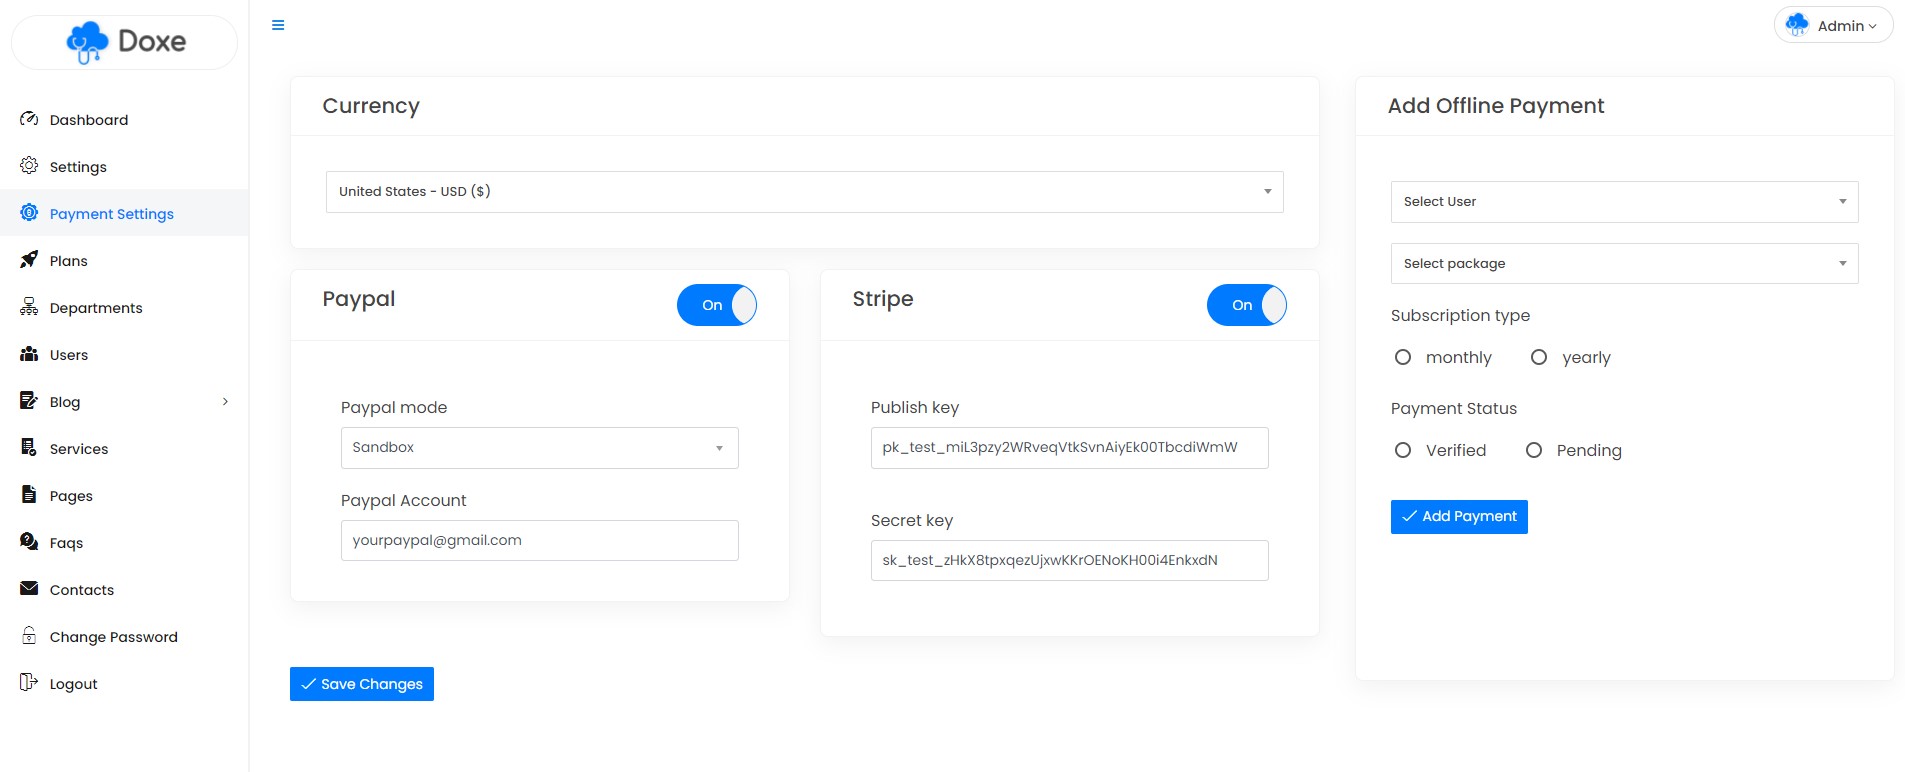
✓ Manage Payment Settings: If you want to manage your paypal & stripe payment options, you need to go "Dashboard > Payment Settings" section from left sidebar. you can also enable/disable payments from here.
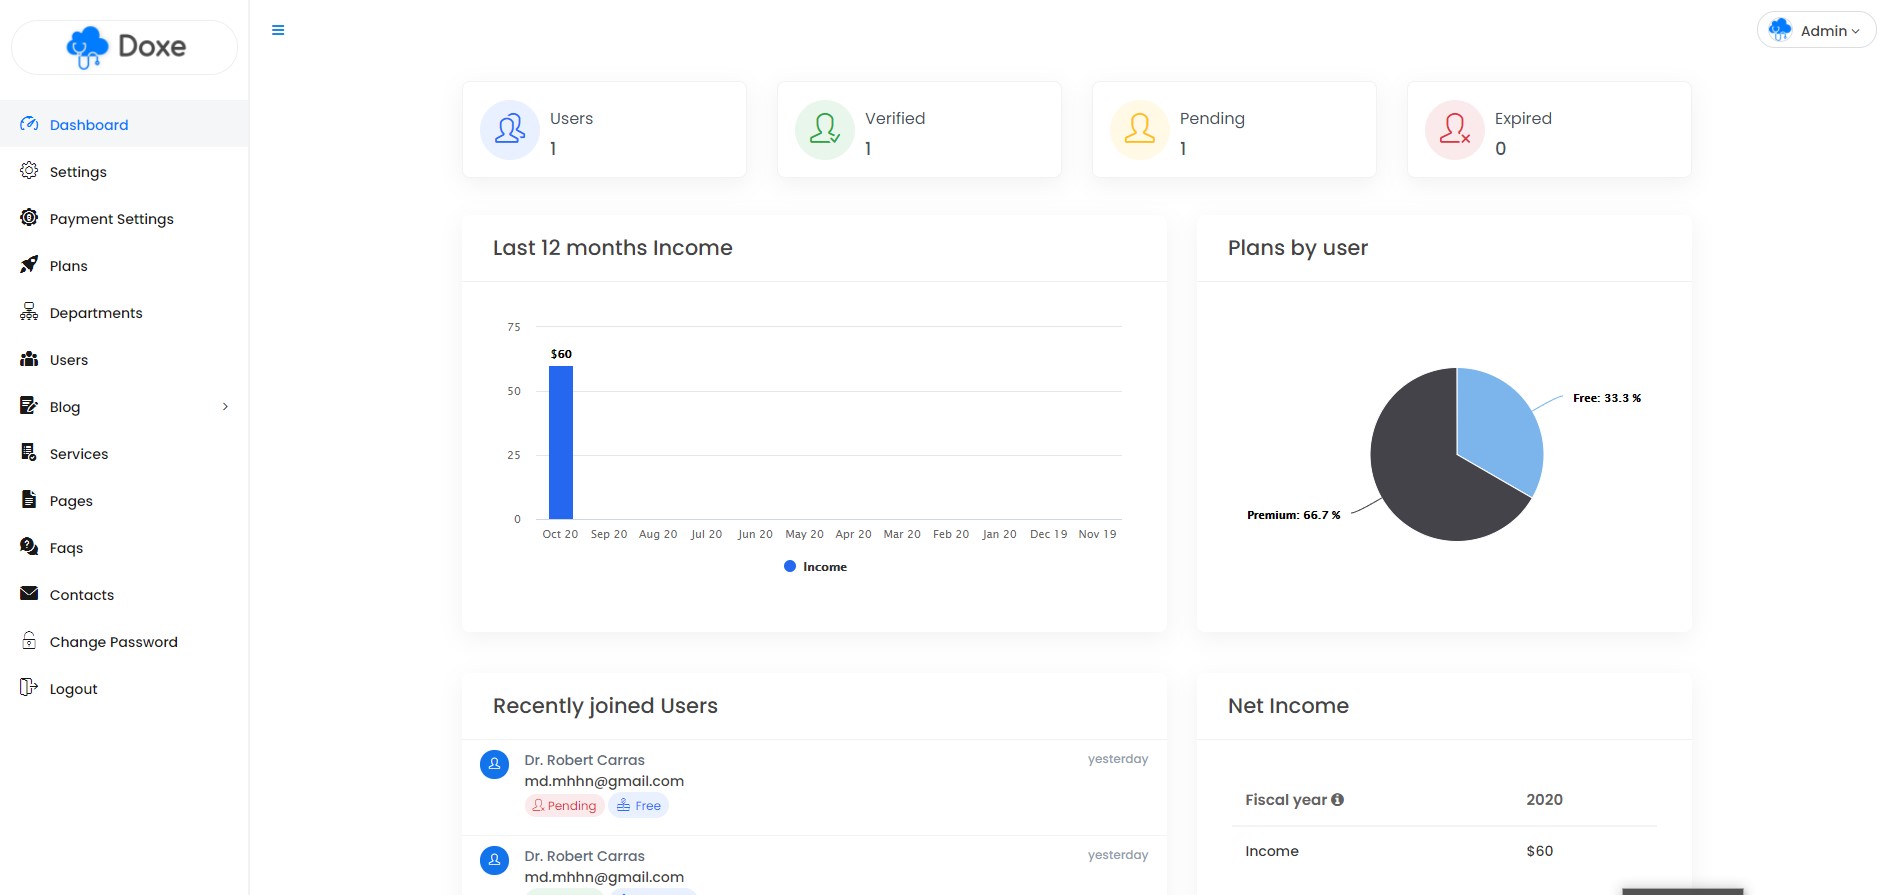
✓ Manage users: If you want to manage registered users you need to go "Dashboard > Users" section from left sidebar. you can manage all users here.
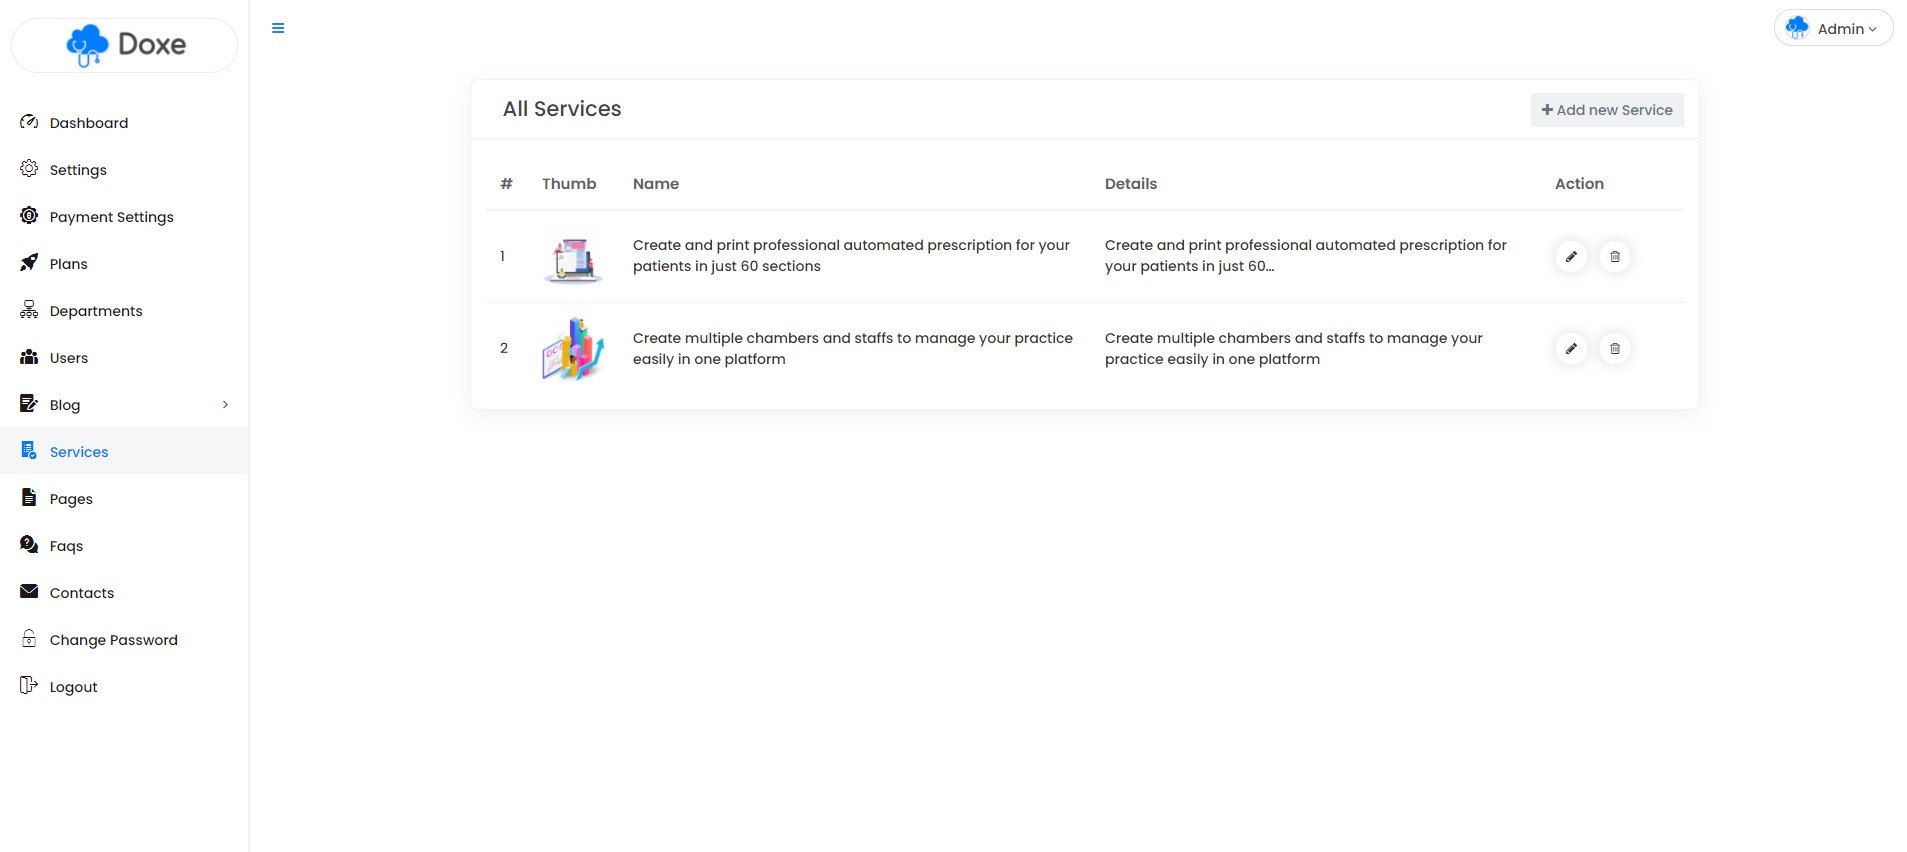
✓ Manage Site Features: If you want to manage your product services you need to go "Dashboard > Service" section from left sidebar. you can manage all option here.
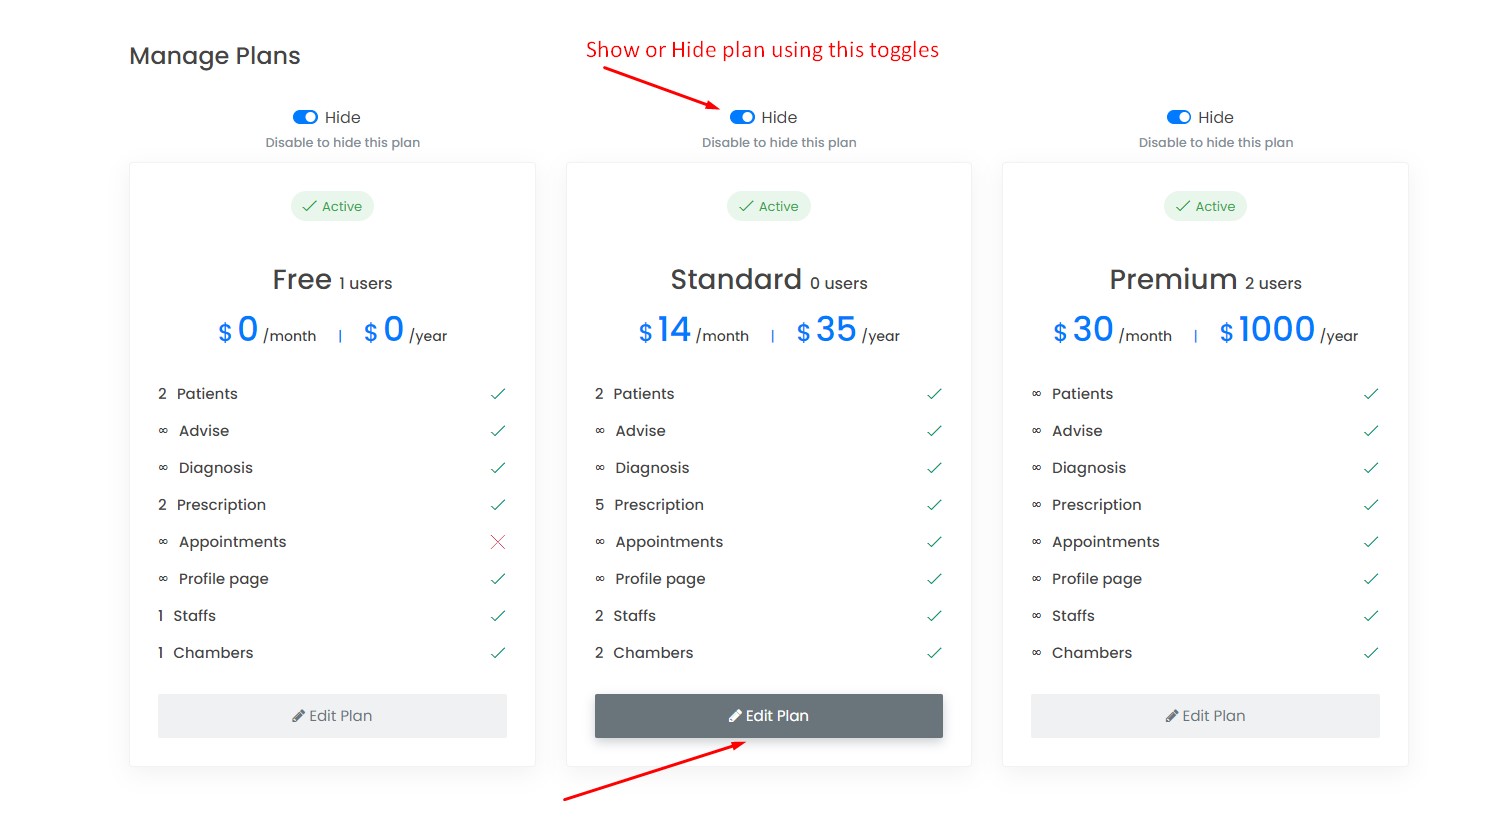
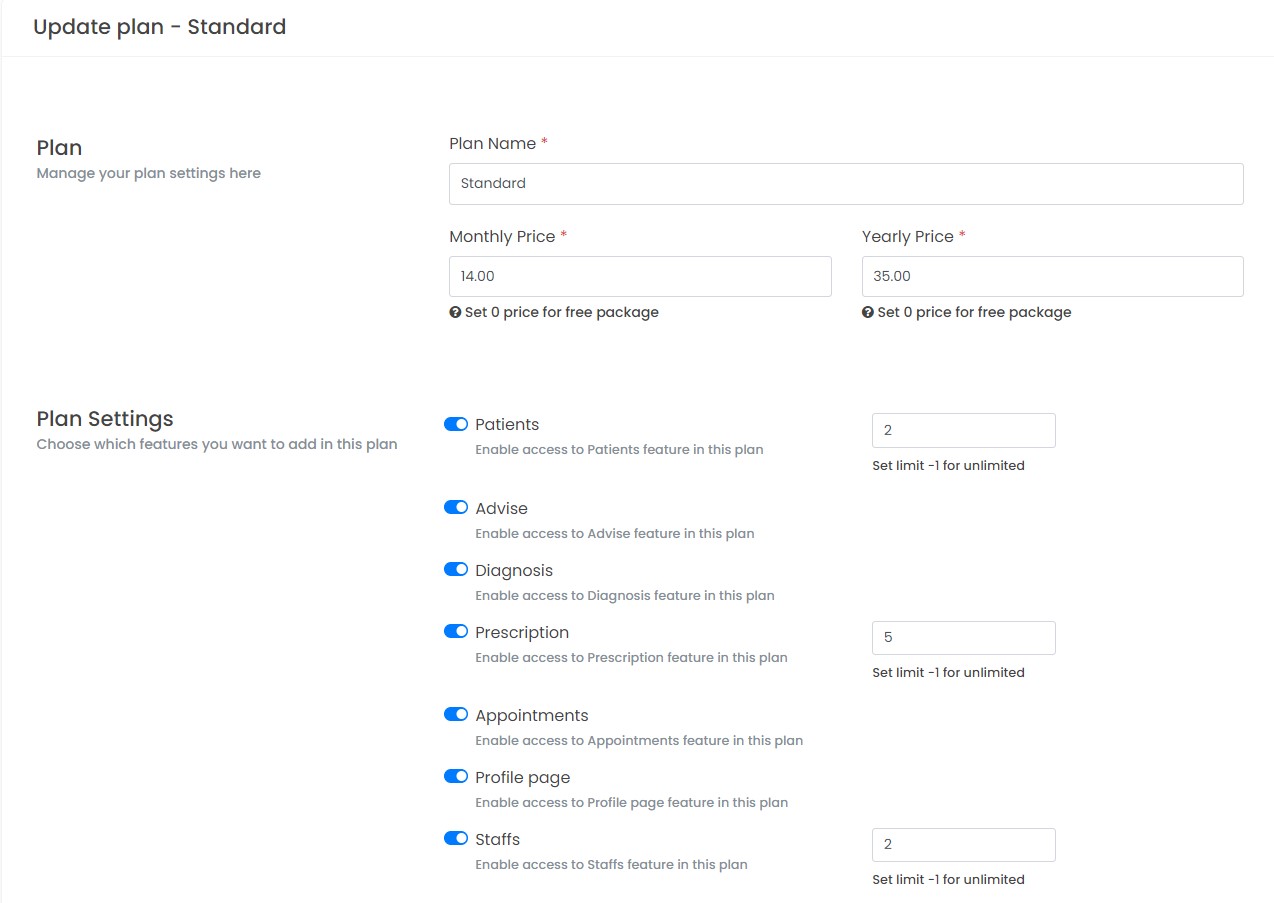
✓ Manage Plans & Assign Feature: If you want to manage your Plans & Features you need to go "Dashboard > Plans" section from left sidebar. you can also assign features to click the "Edit Plan" button manage features for this plan.
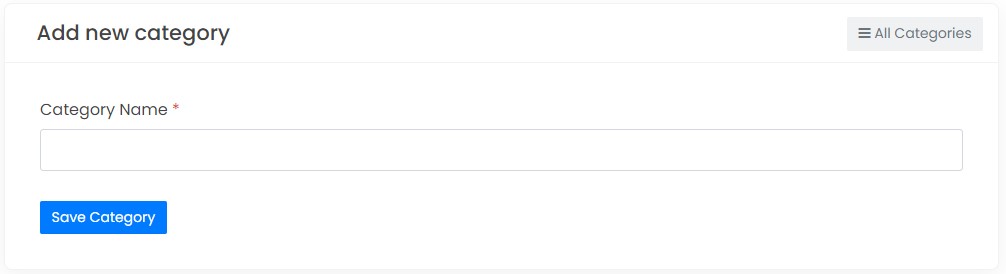
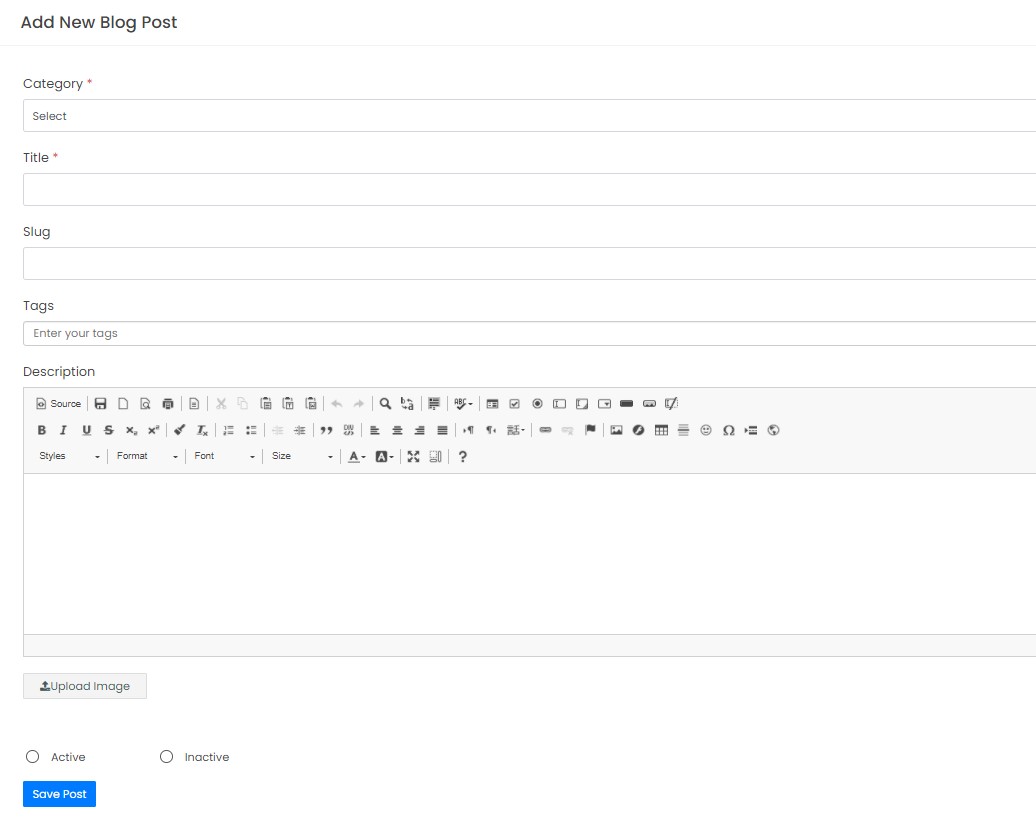
✓ Manage Blogs: If you want to add Blog first you need add Blog Category to go "Blog" section from left sidebar navigation and click on the "Add Category" options then you can add Category here in one page CRUD. And then Clink "Blog" section from left sidebar navigation to add "Blog".
User
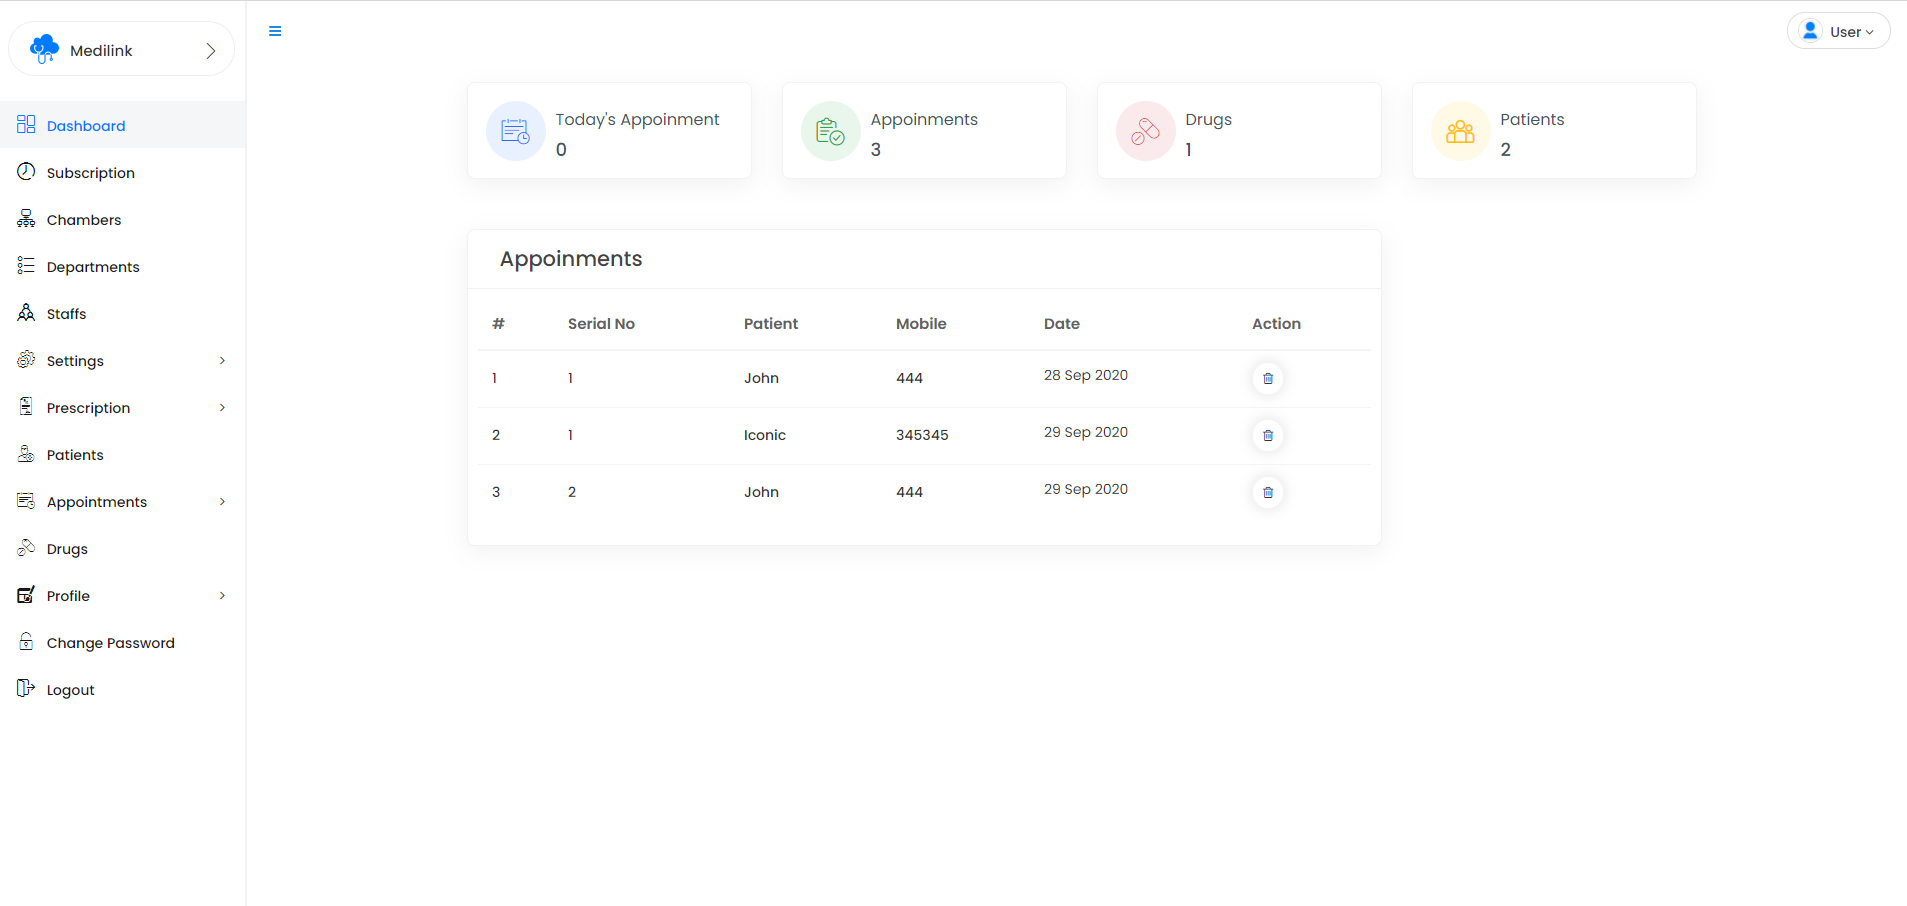
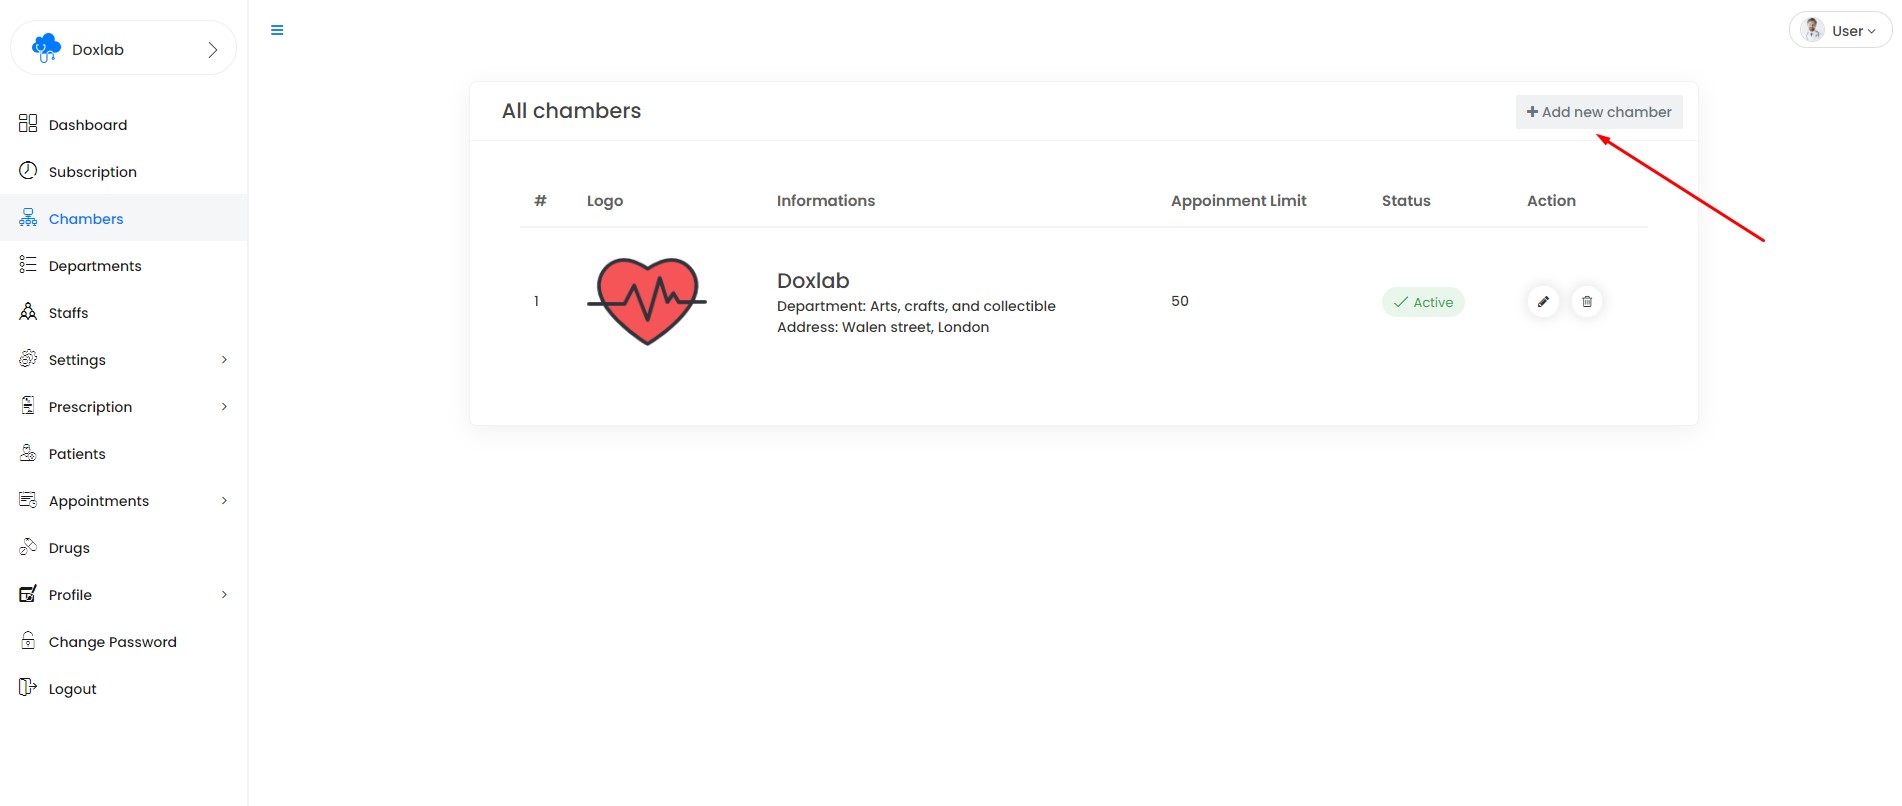
✓ Manage Chambers: If you want to add Chambers you will see from left sidebar "Chambers" menu and here you will see this manage options when you click. And you can manage Chambers CRUD in an one pages.
✓ Manage Staffs: If you want to manage your Staffs you will see from left sidebar "Staffs" menu and here you will see this manage options when you click. And you can manage Staffs CRUD in an one pages.
✓ Manage Patients: If you want to manage your Patients you will see from left sidebar "Patients" menu and here you will see this manage options when you click. And you can manage Patients CRUD in an one pages.
✓ Manage Departments: If you want to manage your Departments you will see from left sidebar "Departments" menu and here you will see this manage options when you click. And you can manage Departments CRUD in an one pages.
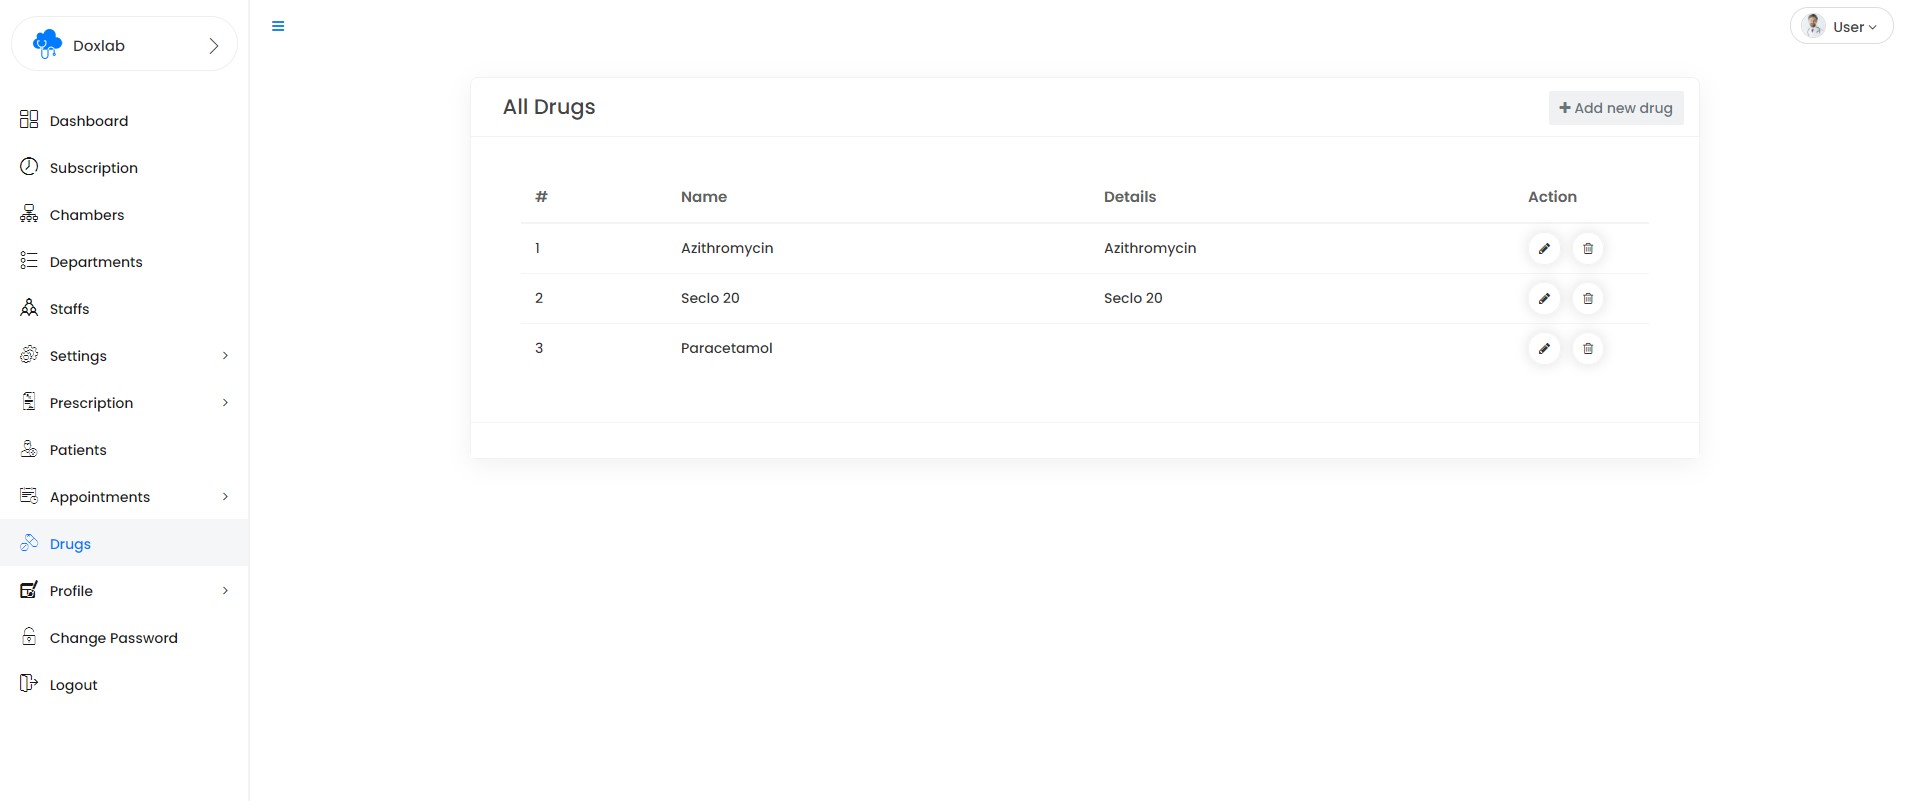
✓ Manage Drugs: If you want to manage your Drugs you will see from left sidebar "Drugs" menu and here you will see this manage options when you click. And you can manage Drugs CRUD in an one pages.
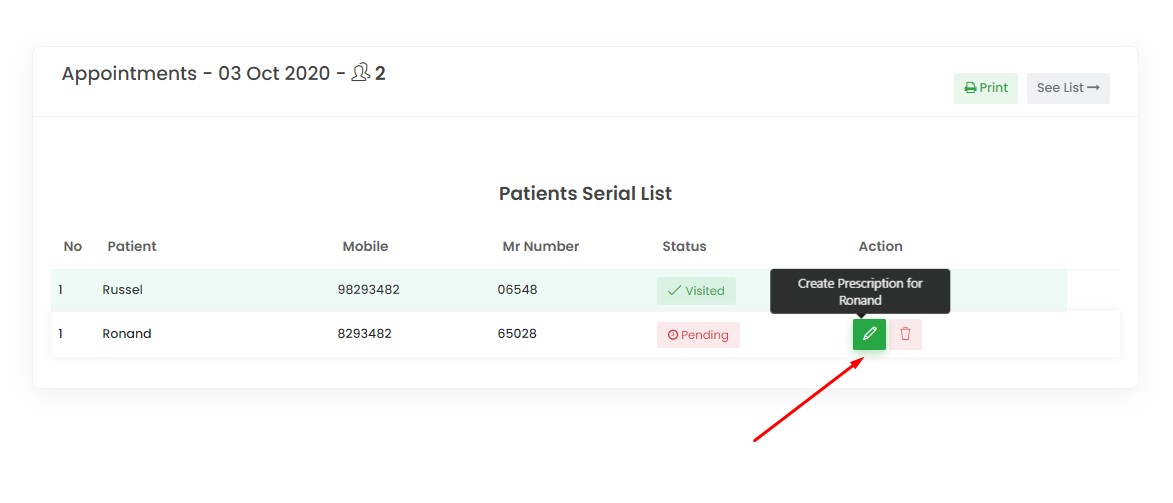
✓ Manage appointments: If you want to manage your appointments you will see from left sidebar "appointments" menu and here you will see this manage options when you click. And you can manage appointments CRUD in an one pages.
✓ Prescriptions Settings: Before creating your first prescrition you can create your "A"
✓ Manage Prescriptions: If you want to manage & add "Prescriptions" you need to click "Prescriptions" section from left sidebar there you see your all Prescriptions list and if you want to create new prescription then click on the "New Prescription" button from top.
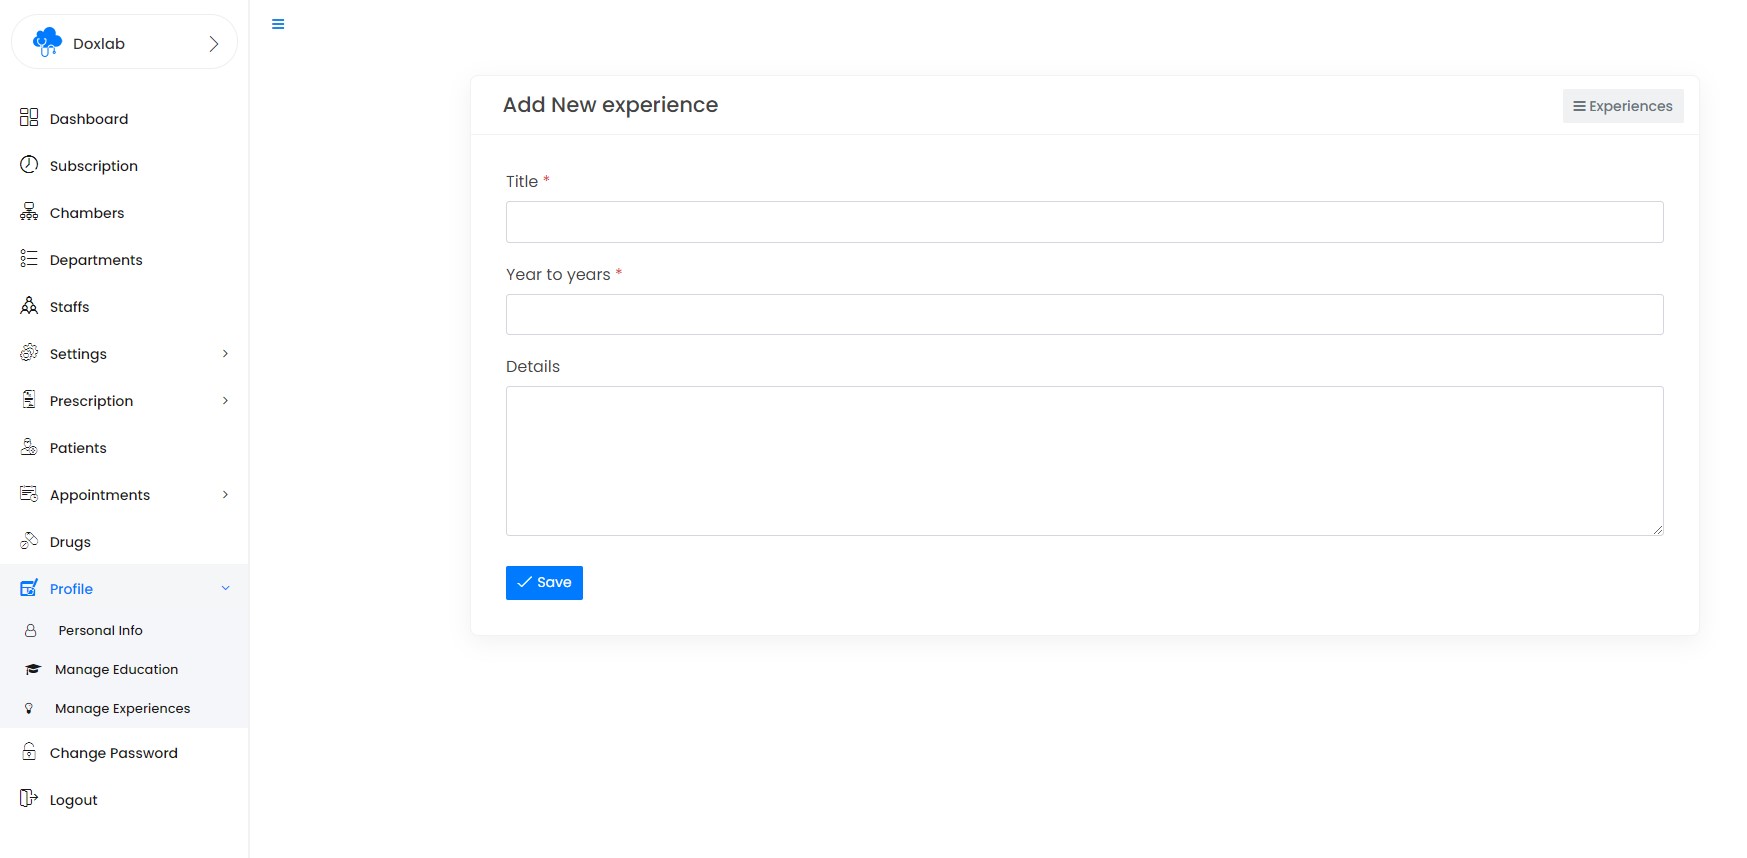
✓ Manage Profile, Education & Experiences: If you want to manage & add "Profile, Education & Experiences" you need to click "Profile" section from left sidebar there you see your all option in there.
Staff
Staff can access only selected chambers which is assigned by the user. They can access Prescription settings, patients, drugs, appointments & dr profiles but they will not delete any data from their panel
Patient
When you create a patient or assign a patient for your prescription & apinments our system automatically generate a patient panel access like below
Username: Patient mobile no
Password: 1234
Patient appointments: After login patient panel they can see their all appointments from left sidebar "appointments" sections
Patient Prescriptions: After creating a prescription for your patients they will see their prescriptions in their panel they can also print prescription from there.
Admin Panel
Manage Website Settings
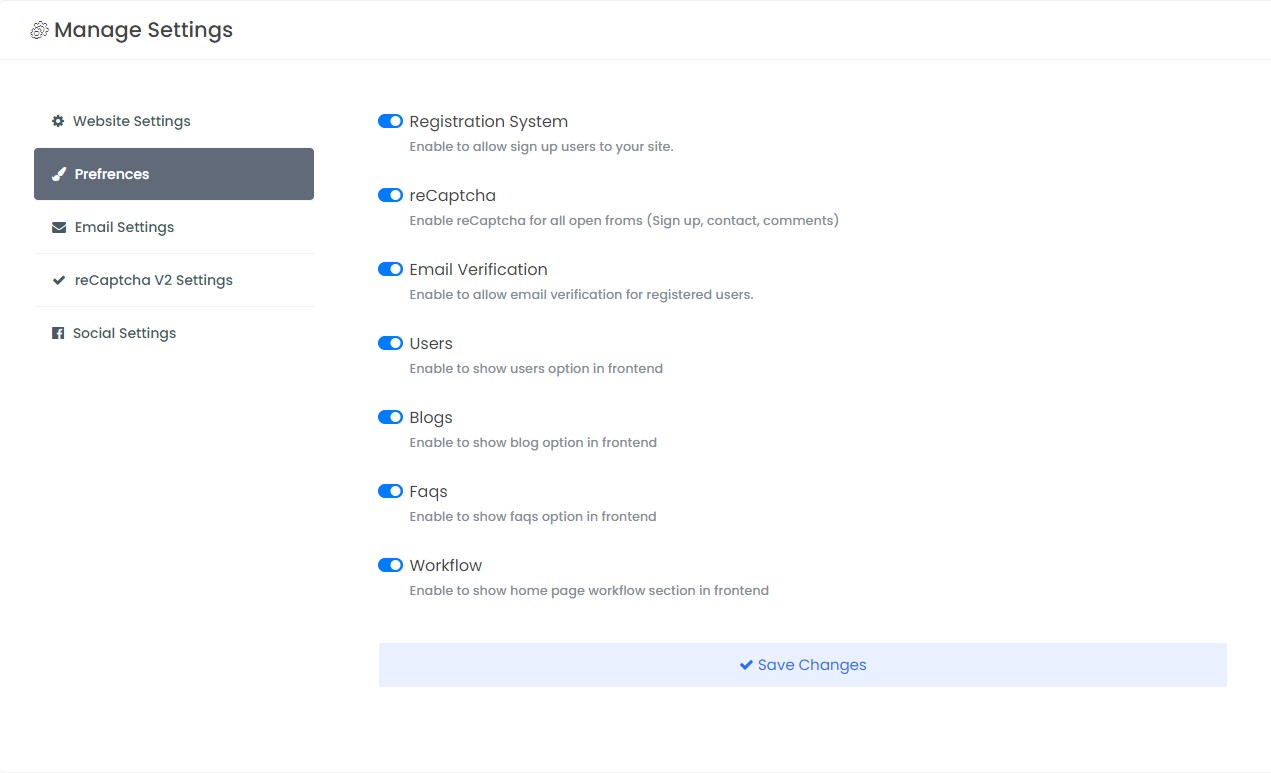
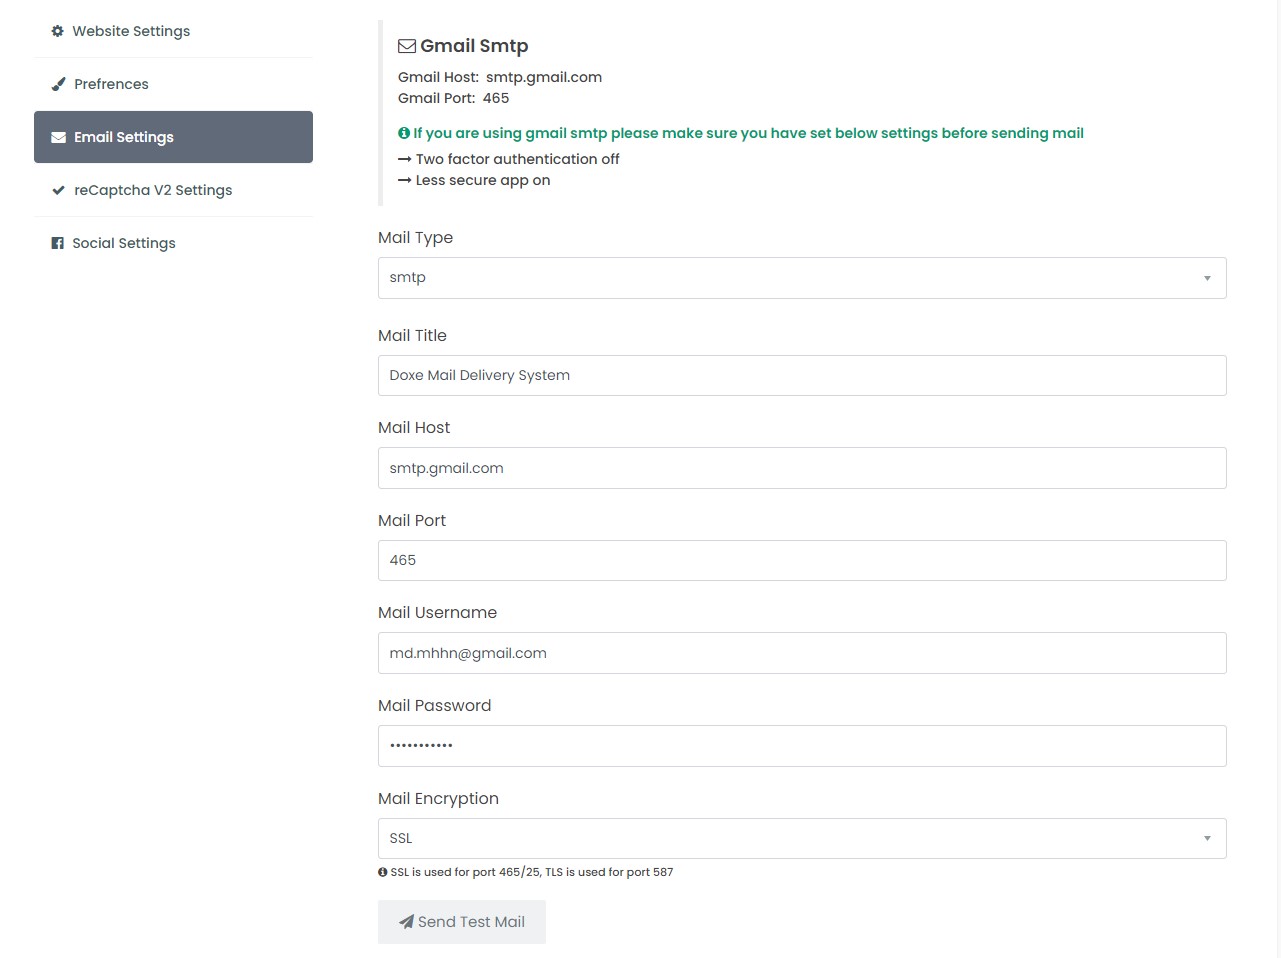
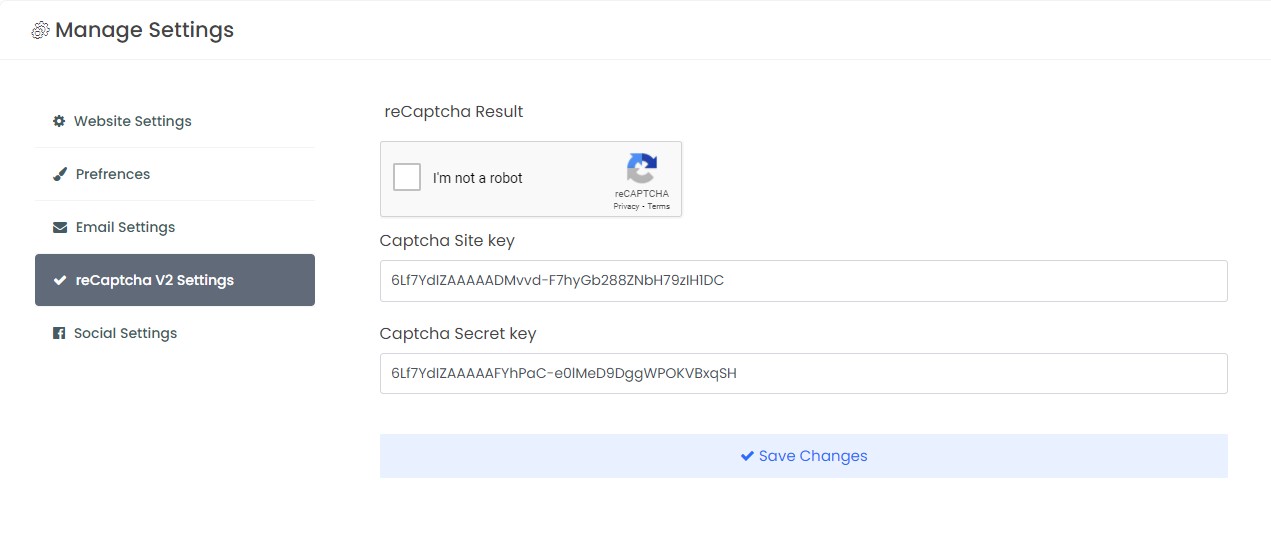
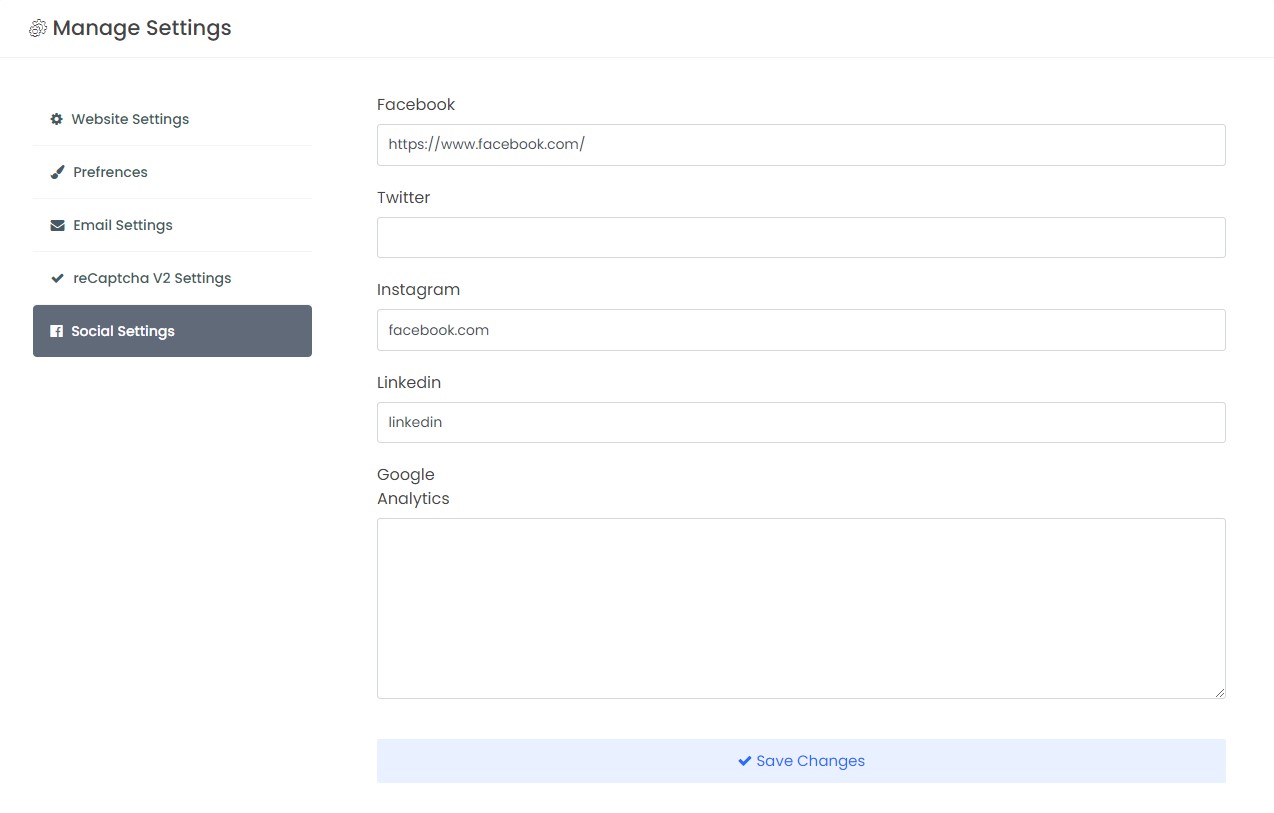
✓ Manage Website Settings: From left sidebar > Dashboard > Settings you can manage site name, title, email, phone, about, logo, favicon, emails, basic seo options, social links, SMTP emails, preferences & reCaptcha.
Payment Settings
✓ Payment Settings: From left sidebar > Dashboard > Payment Settings you can manage currency, paypal & stripe payment method. You can also receive offline payment from this sections.
Manage Users
✓ Manage Users: From left sidebar > Dashboard > Users you can manage all users here.

Manage Service
✓ Manage Services:From left sidebar > Dashboard > Services you can manage your product Services for home pages.
Manage Plans
✓ Manage Plans: From left sidebar > Dashboard > Plans you can manage your site packages & feature limits here.
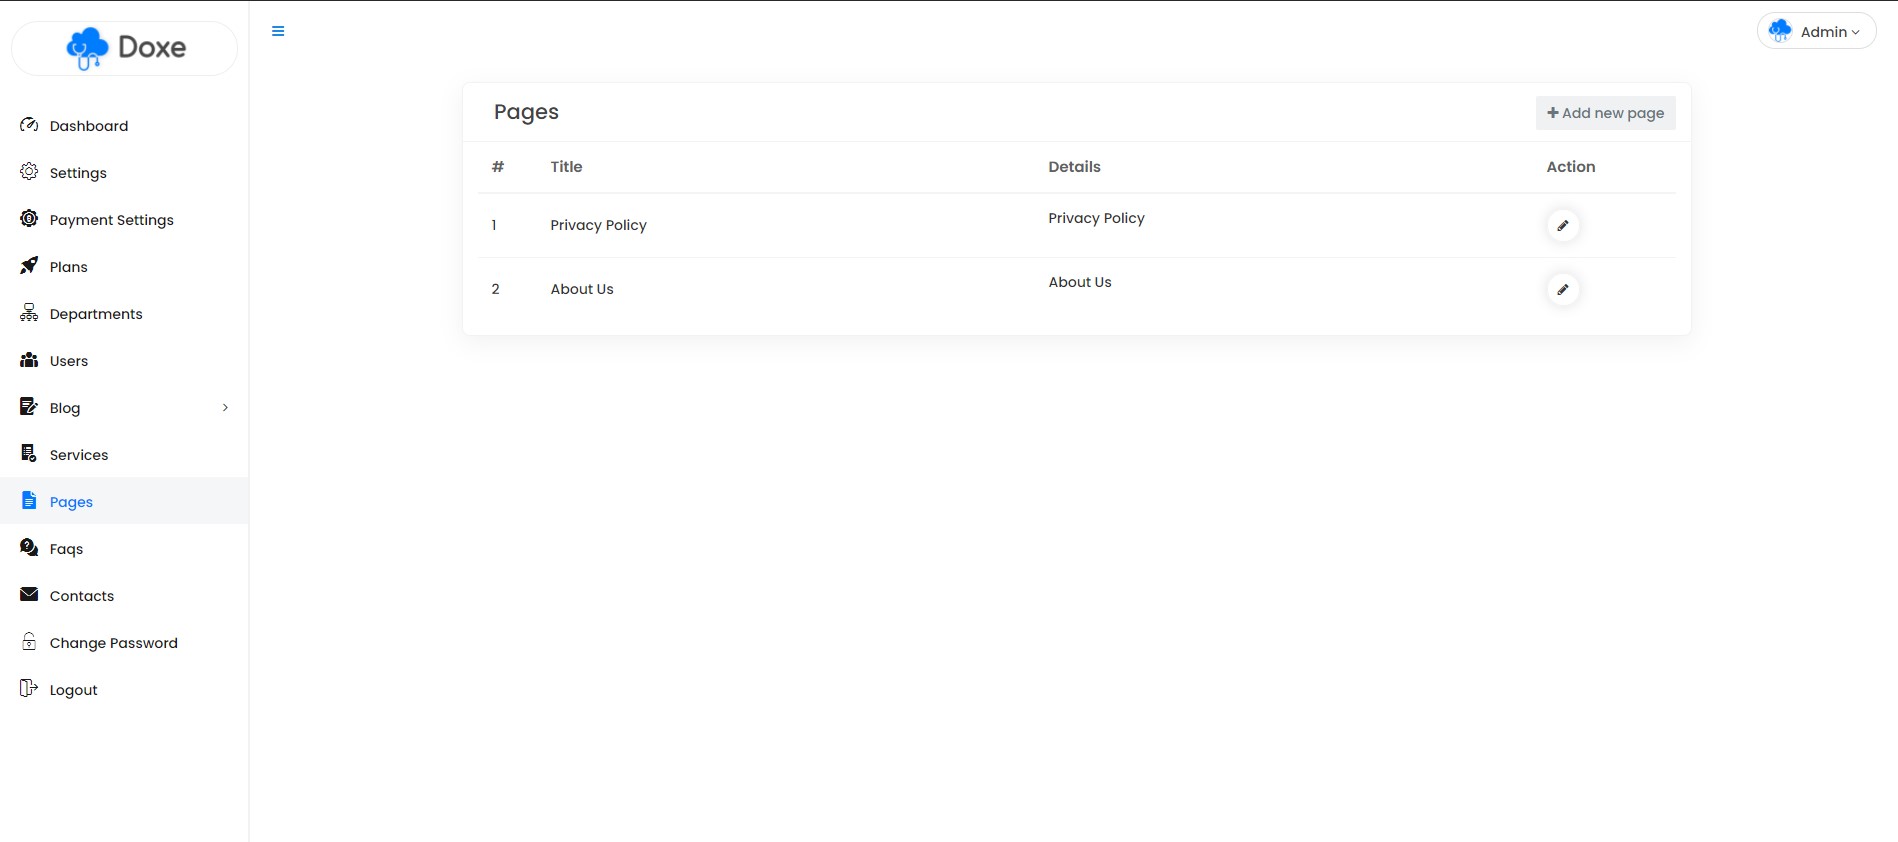
Manage Pages
✓ Manage Pages: From Dashboard > Pages you can add, edit & Delete unlimited pages .
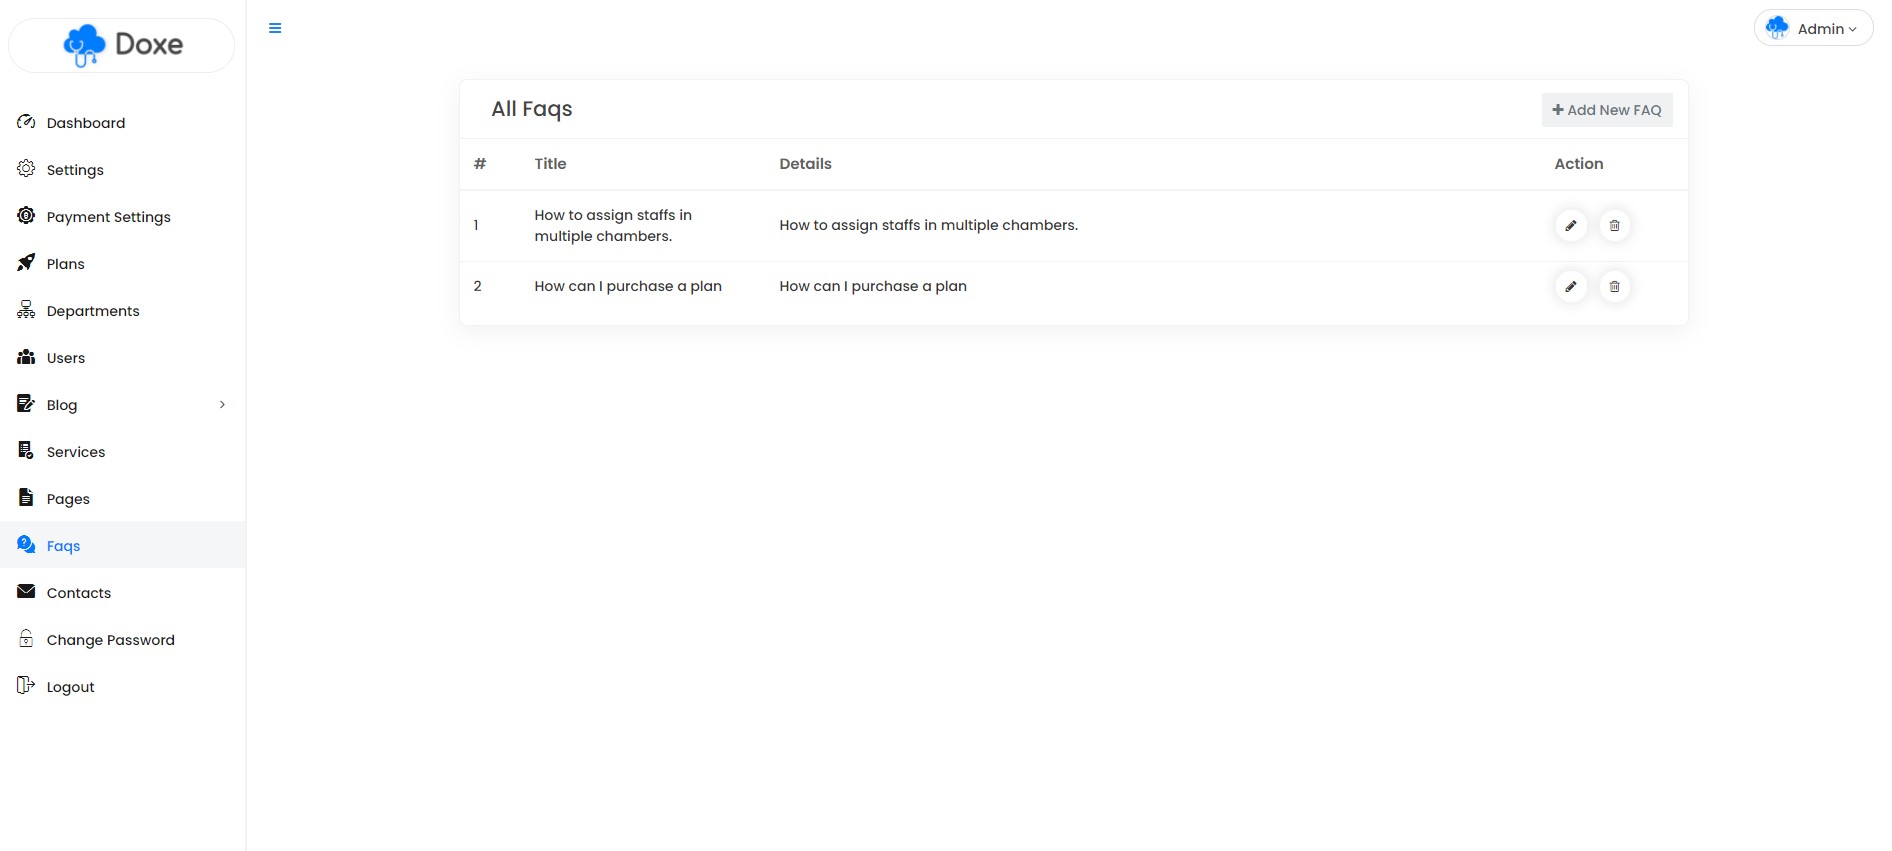
Manage Faqs
✓ Manage Faqs: From Dashboard > Faqs you can add, edit & Delete unlimited Faqs .
Manage Blogs
'Blog' section from dashboard sideber you can add Blog Category from navigation.
✓ Add Blog: From Dashboard > Blog > Blog: you can Add, Edit, Delete, Activate or Deactivate Blog from this option.
User Panel
Subscriptions
'Subscriptions' section from dashboard sidebar you upgrade your plan from here to click select button from any plans.

Manage Chambers
'Chambers' section from dashboard sidebar you can add, edit, delete chambers.
Set default chamber
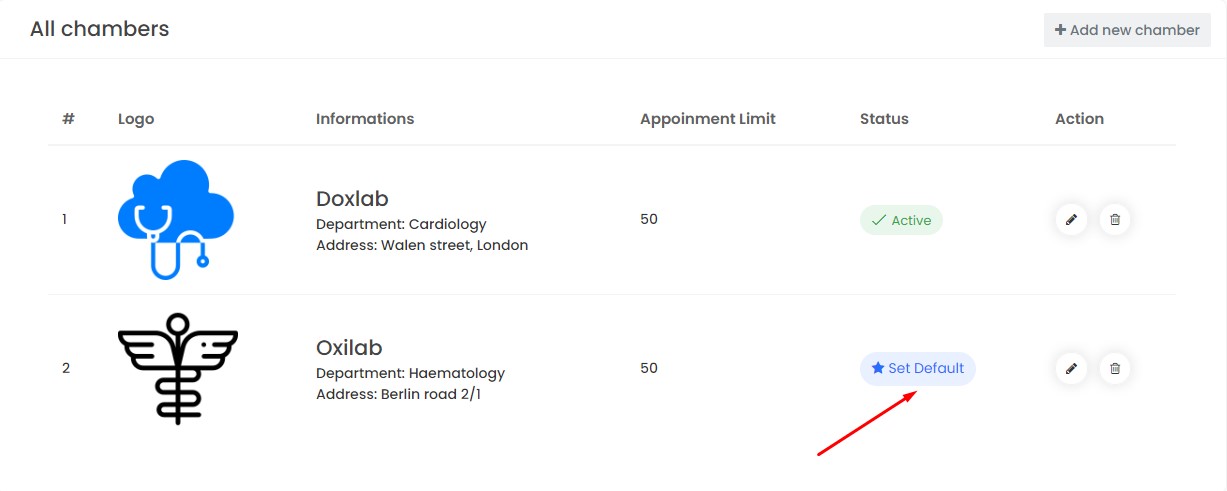
Switch chamber
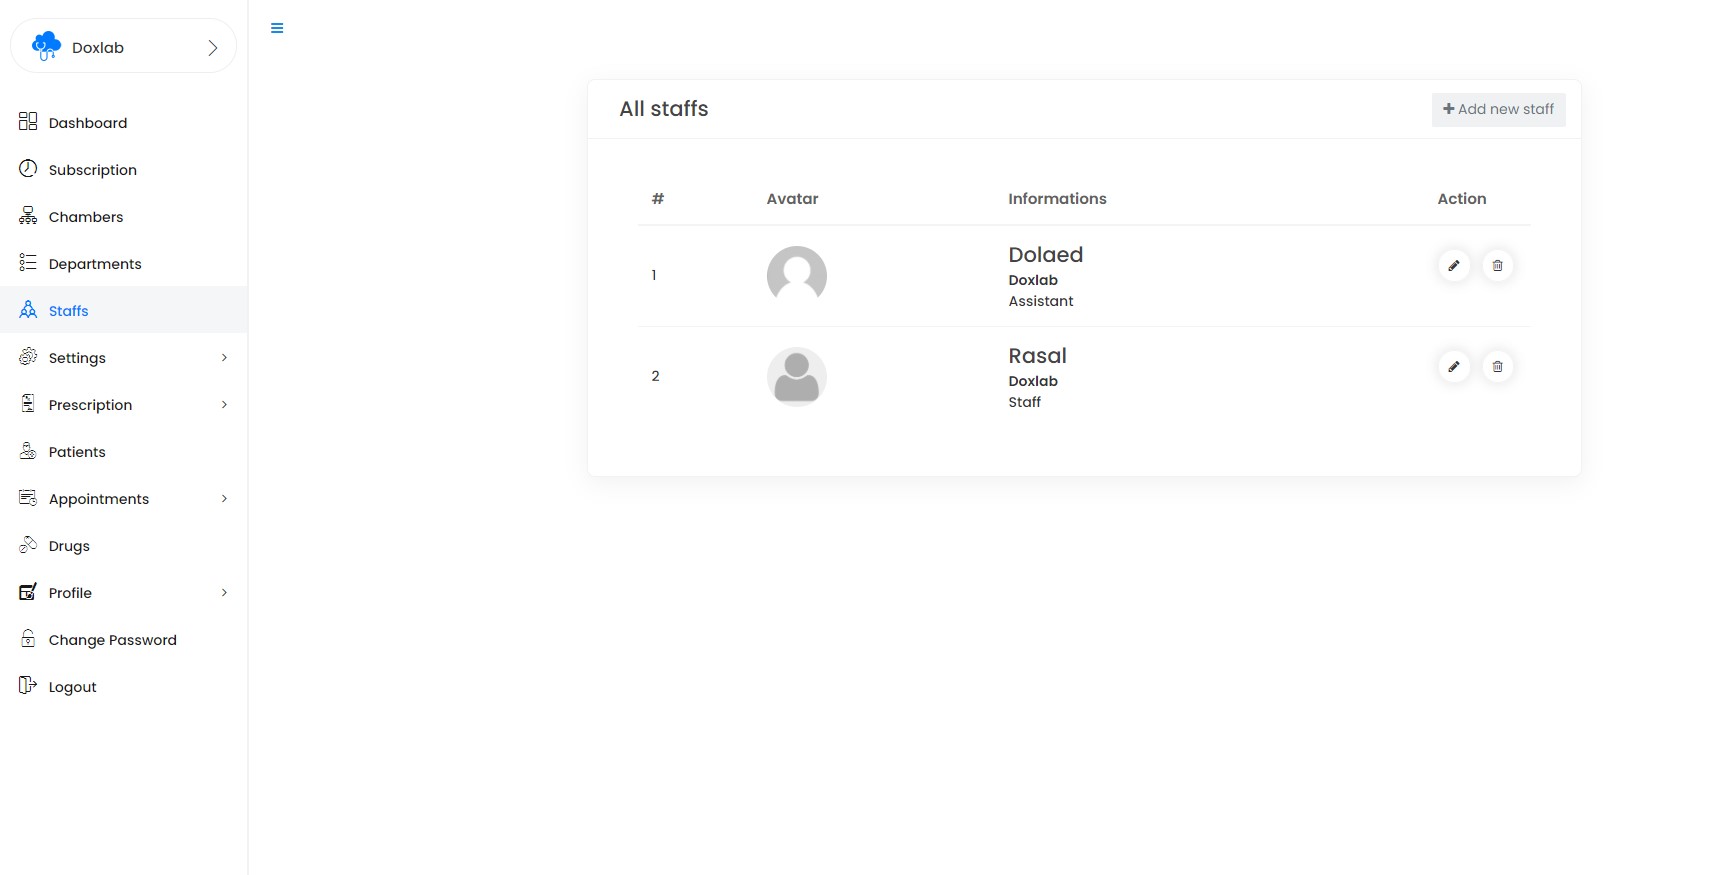
Manage Staffs
''Staffs' section from dashboard sidebar you can add, edit, delete Staffs.
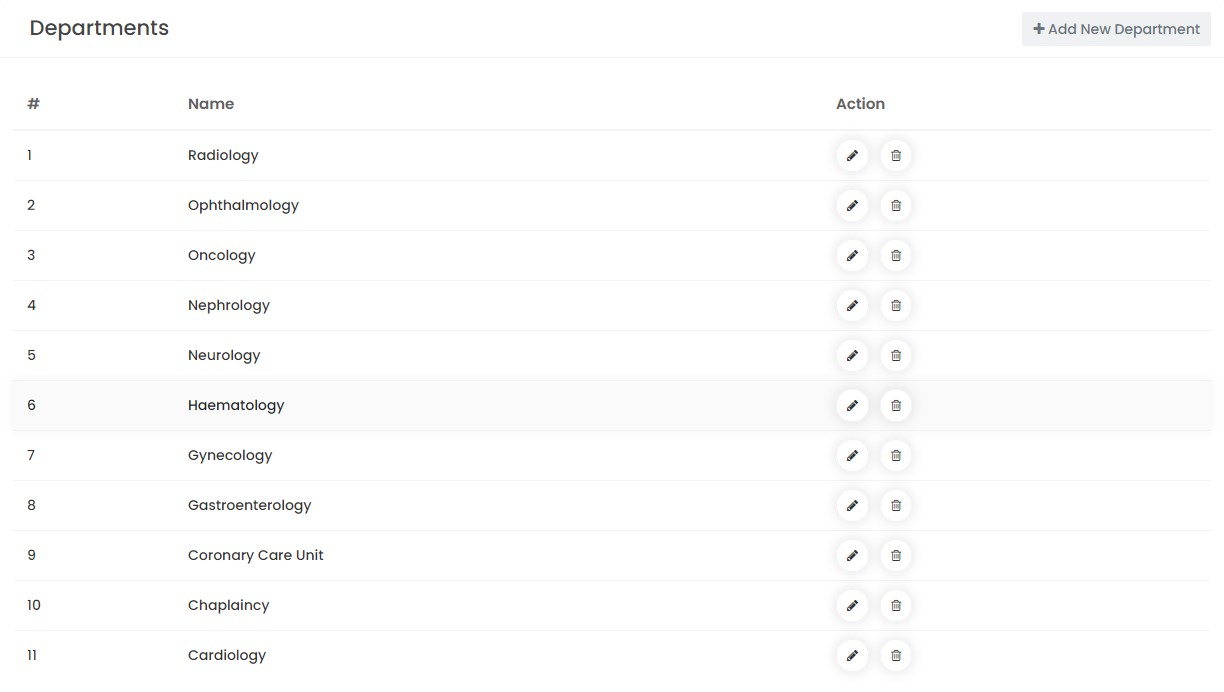
Manage Departments
'Departments' section from dashboard sidebar you can add, edit, delete Departments.
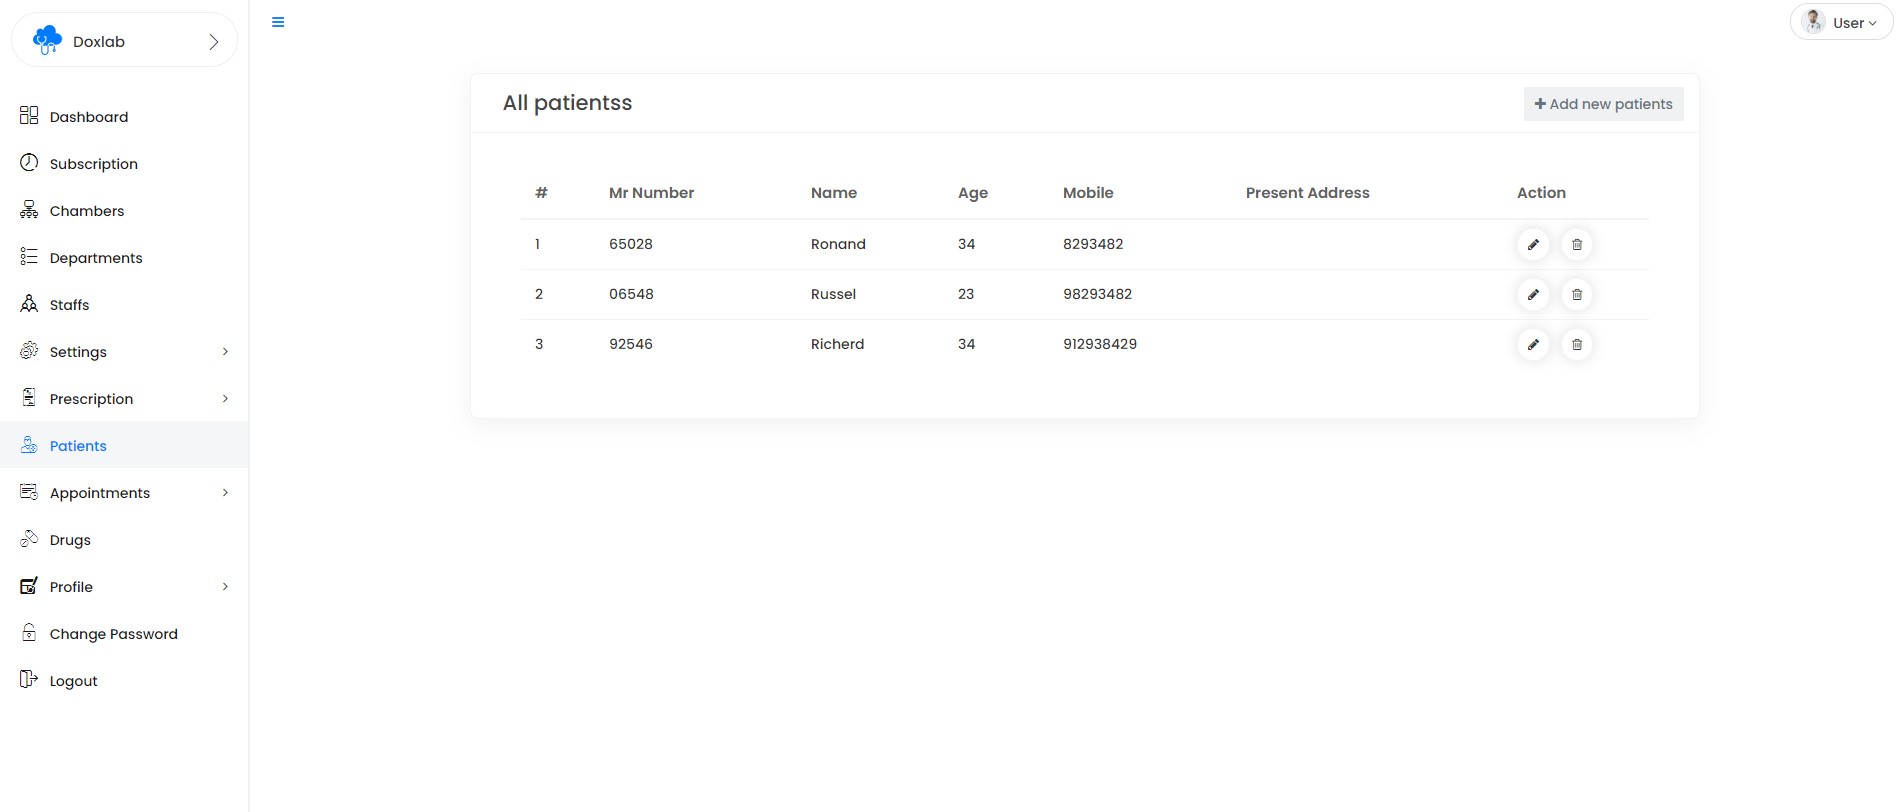
Manage Patients
'Patients' section from dashboard sidebar you can add, edit, delete Patients.
Manage Drugs
'Drugs' section from dashboard sidebar you can add, edit, delete Drugs.
Booking Appointments
Assign appointment Schedule
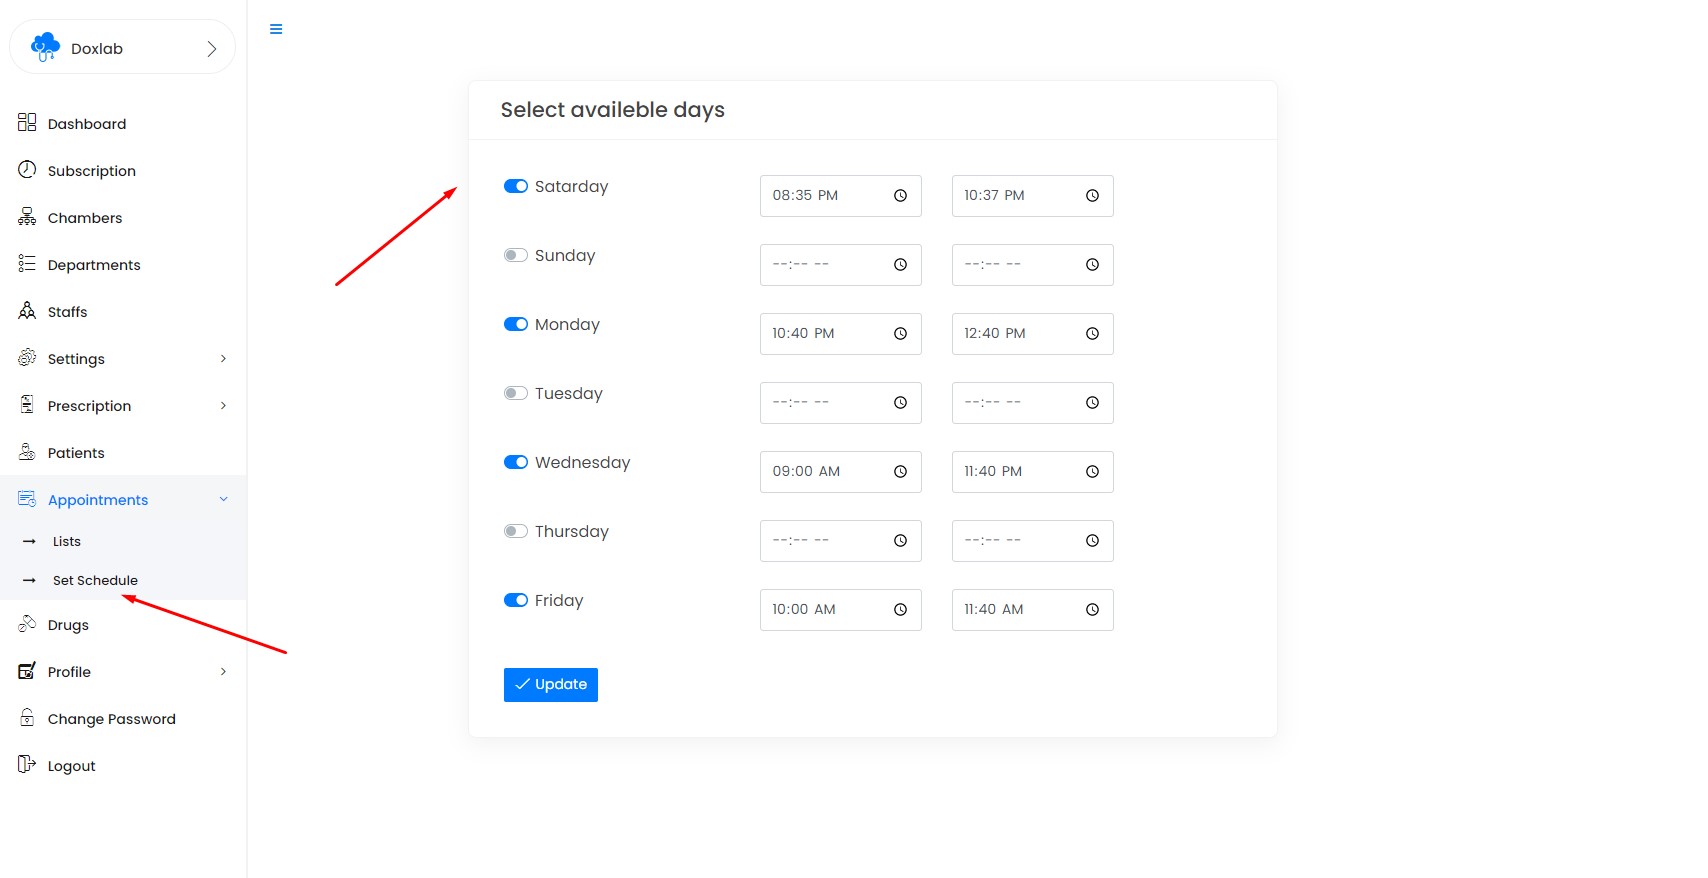
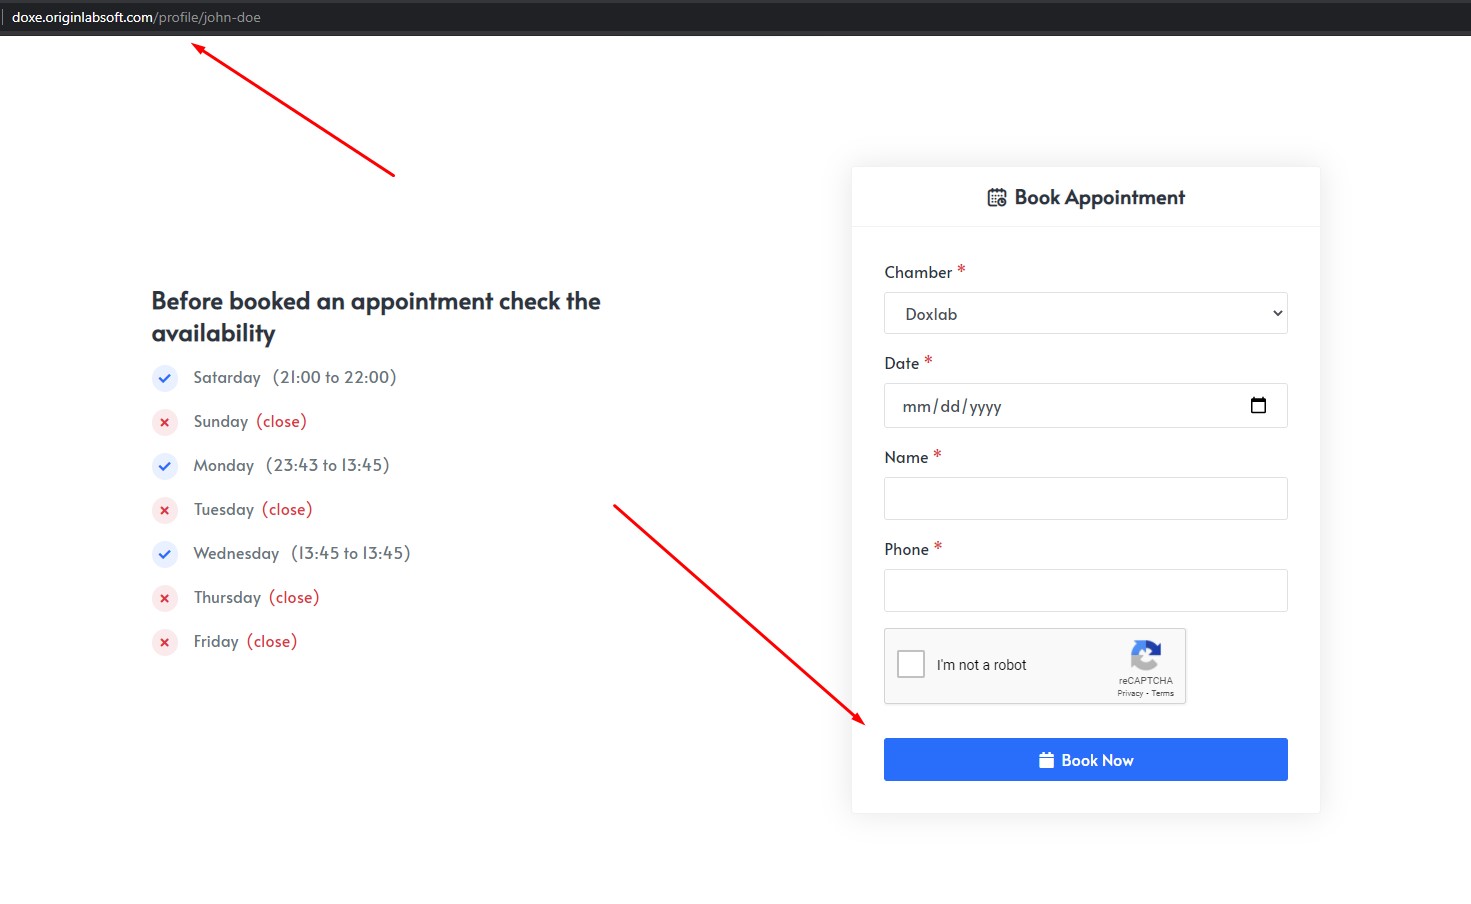
You can also enable/disable appointment from public profile
Your users can can book appointment in 2 ways
1. Using user/doctors profile url
2. Manually assign patient inside user dashboard
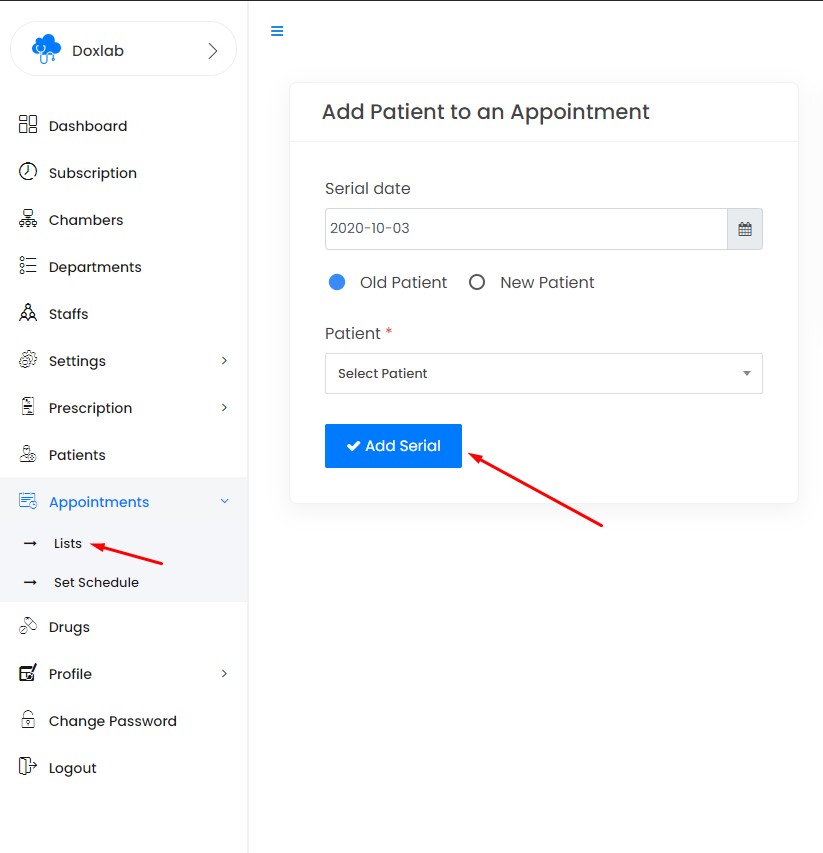
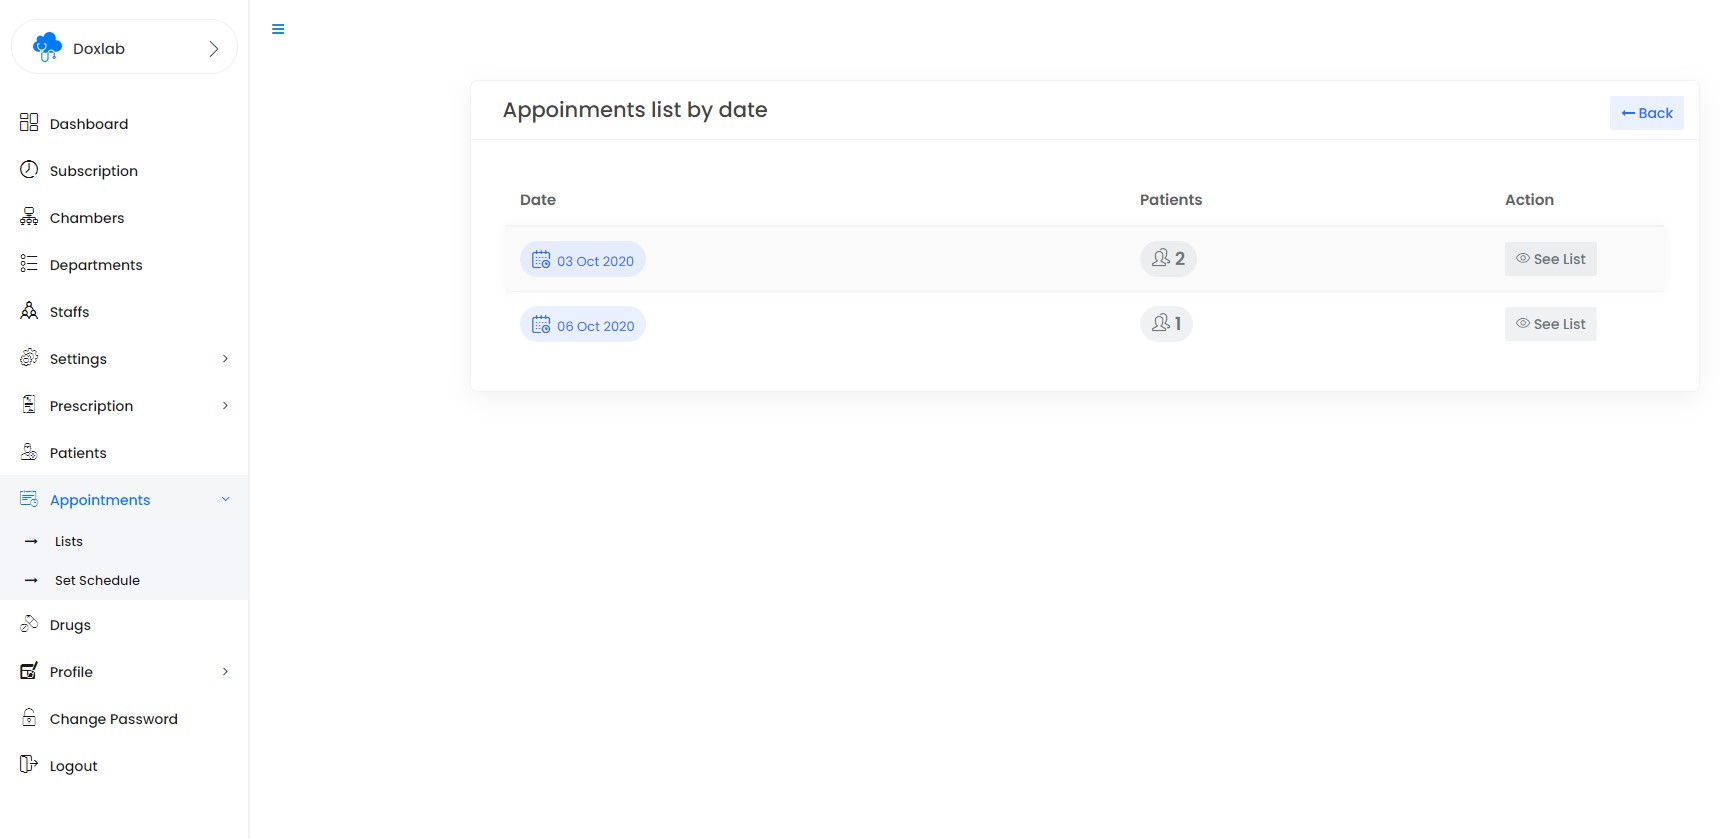
Manage Appointments
Daily Appoinments
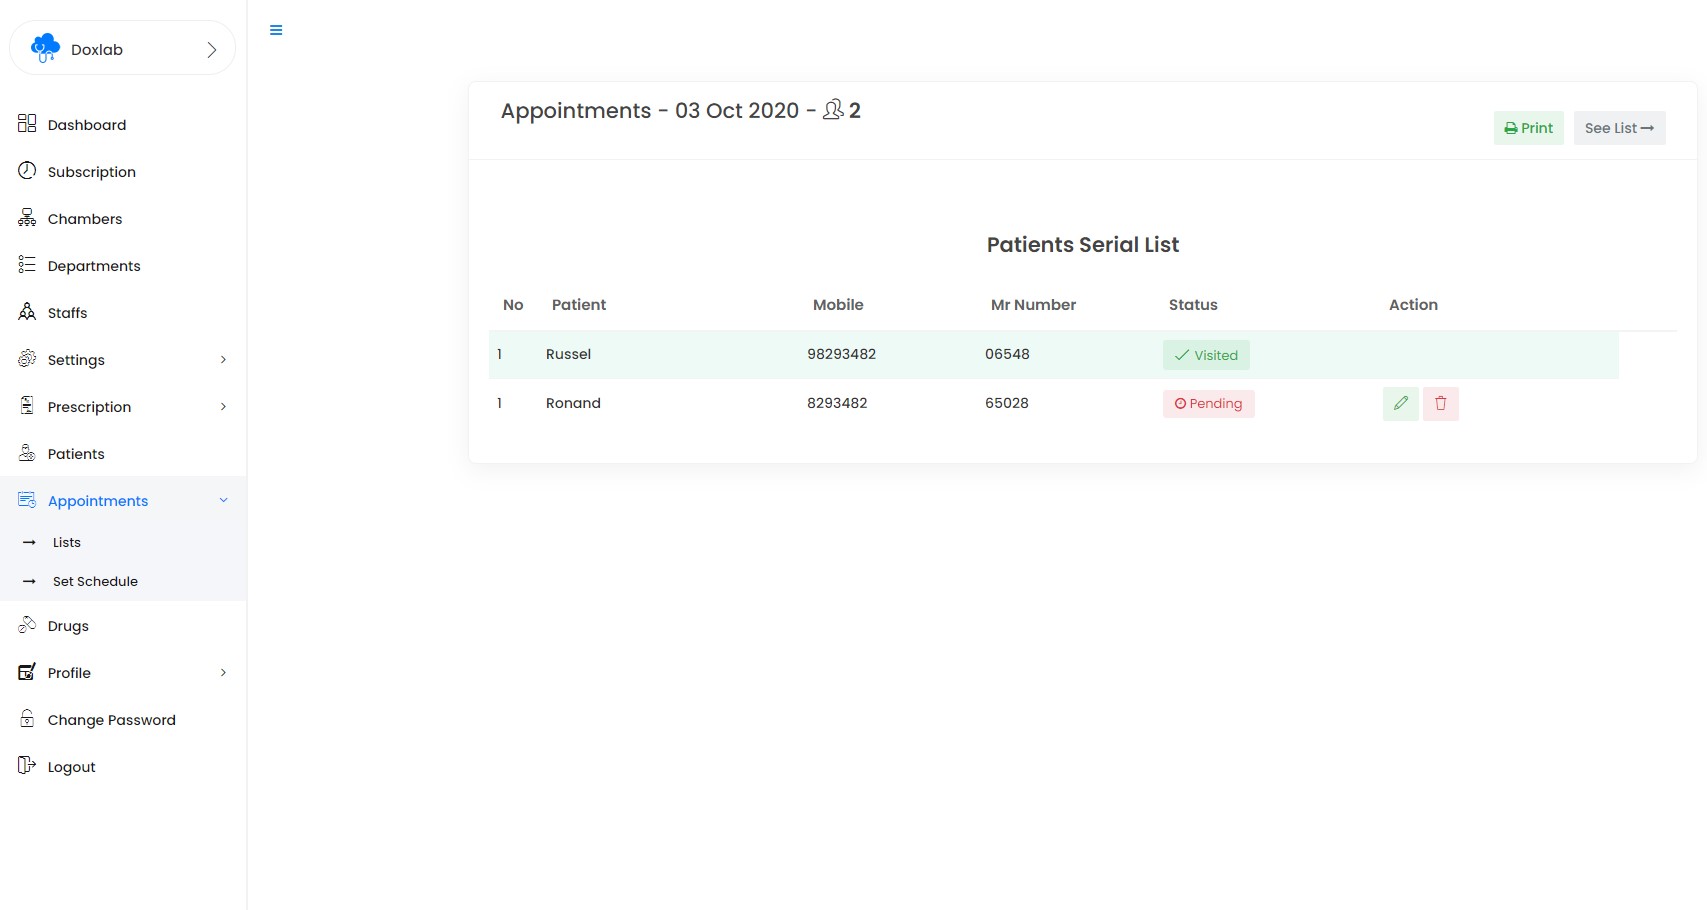
Date wise Appoinments
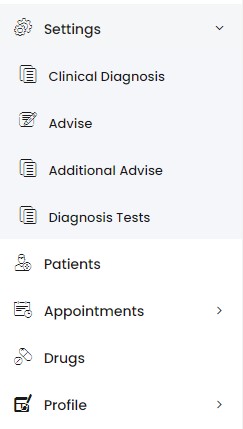
Prescriptions Settings
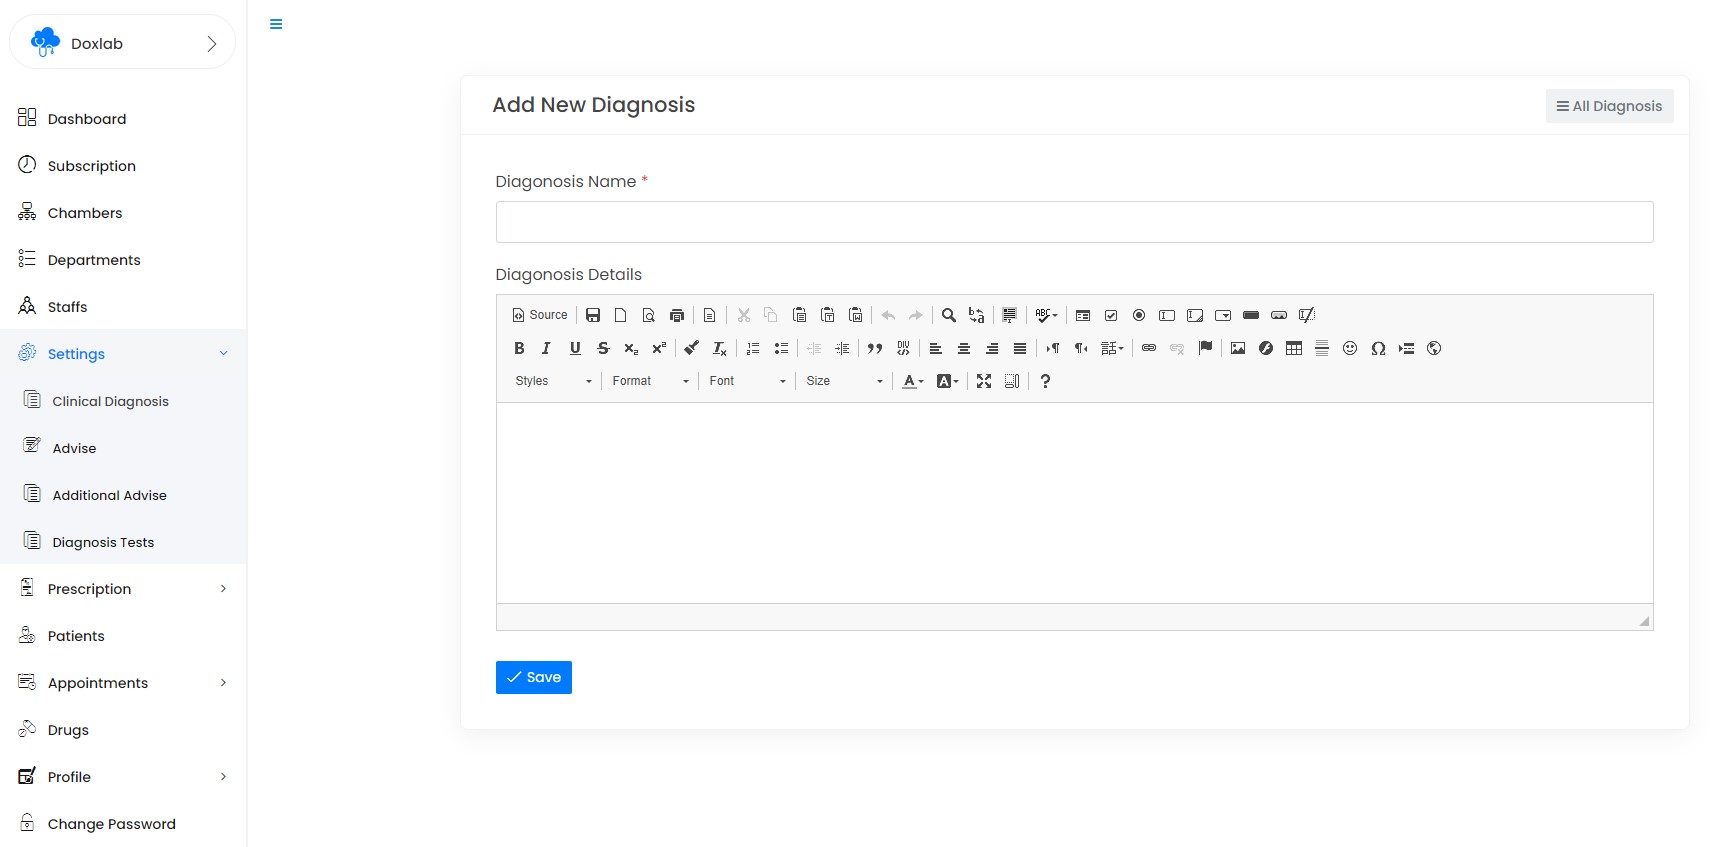
'Prescription Settings' section from dashboard sidebar you can add, edit, delete Clinical Diagnosis, Advises, Additional advise & Diagnosis reports.
Manage Prescriptions
'Prescriptions' section from dashboard sidebar you can add, edit, delete Prescriptions.
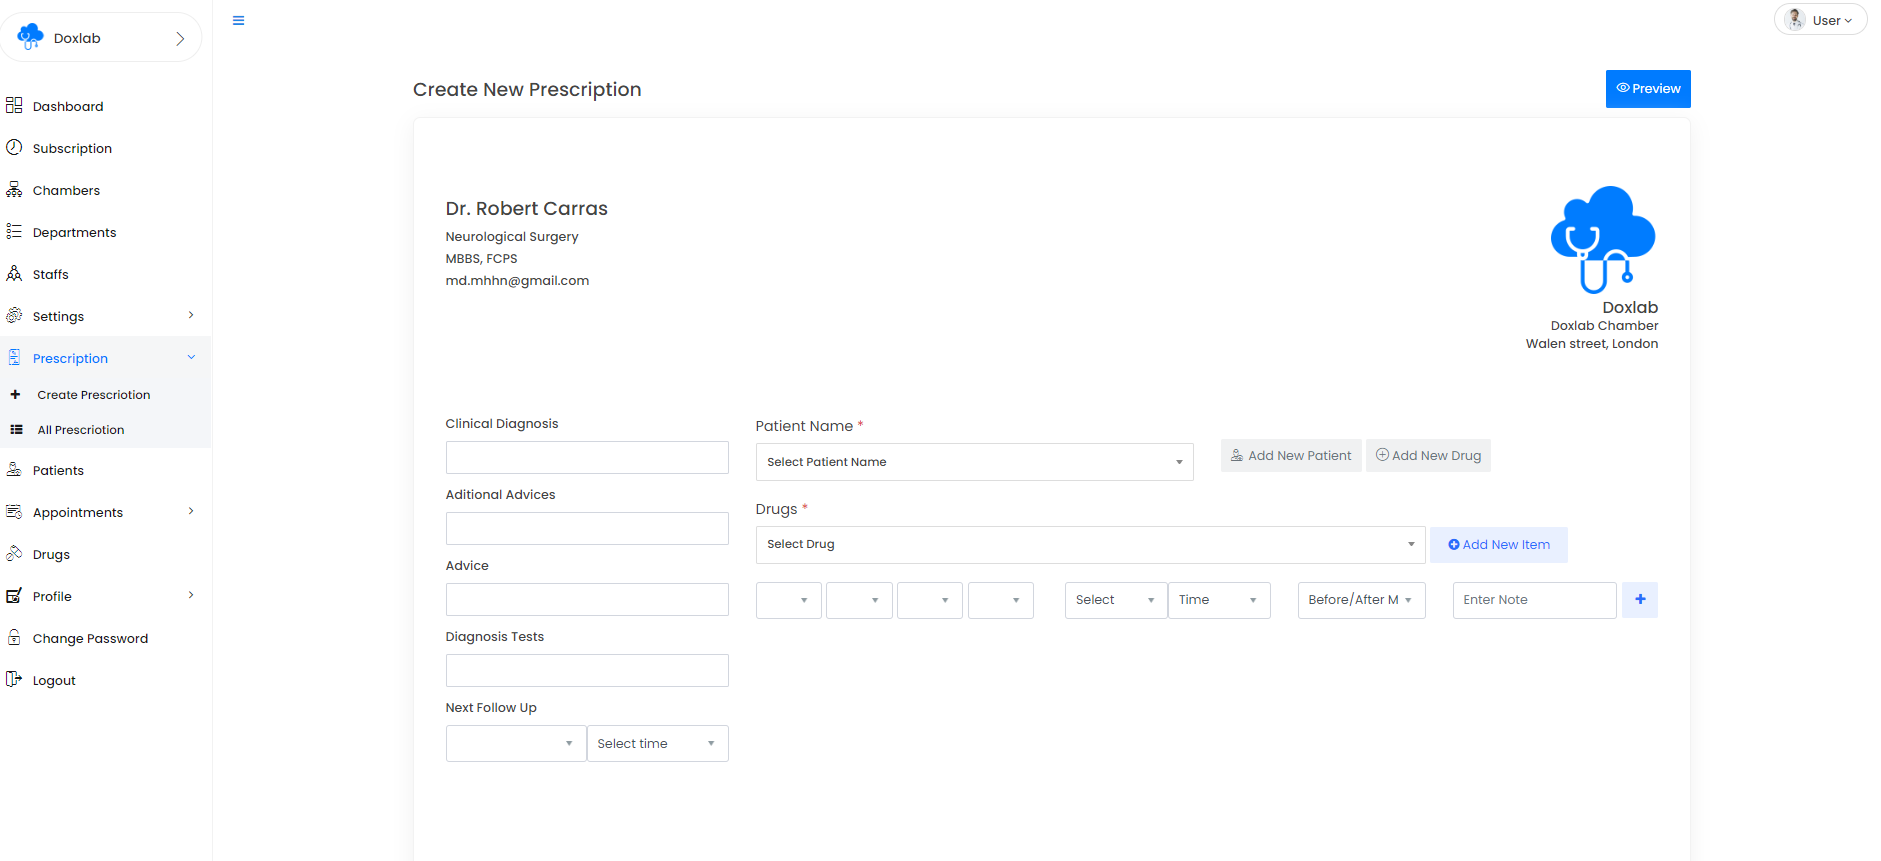
You can also create prescriptions from daily appointments.
Manage Profile
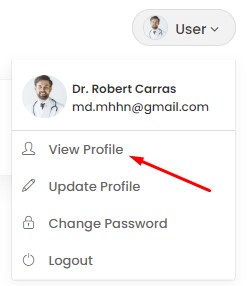
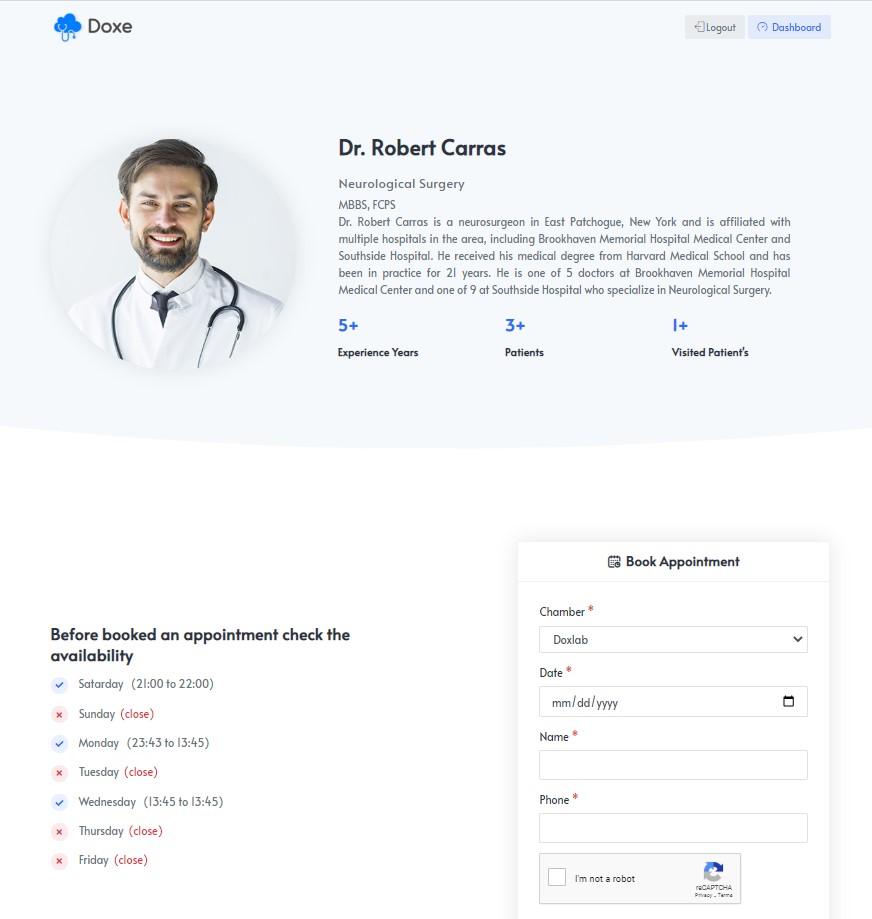
'Profile' section from dashboard sidebar you can manage your profile, educations & experiences. Profile

Educations

Experiences
Zoom Integration
Step 1: (Admin Panel) Obtain Zoom API Keys & Integrate Zoom with Doxe
https://marketplace.zoom.us/Note: We migrated our zoom API App from JWT (Deprecated by ZOOM) to Server to Server OAuth so now you don't need to provide any meeting id and password for start a zoom meeting.
Step 2 (User Panel): Create a zoom meeting and start online consultion with patient
Manage Payouts
Note: Payouts module is only available for extended license holders
Using payouts module admin will receive appointments payment to admin account. And user will send payout request to withdraw their payment using payout method.
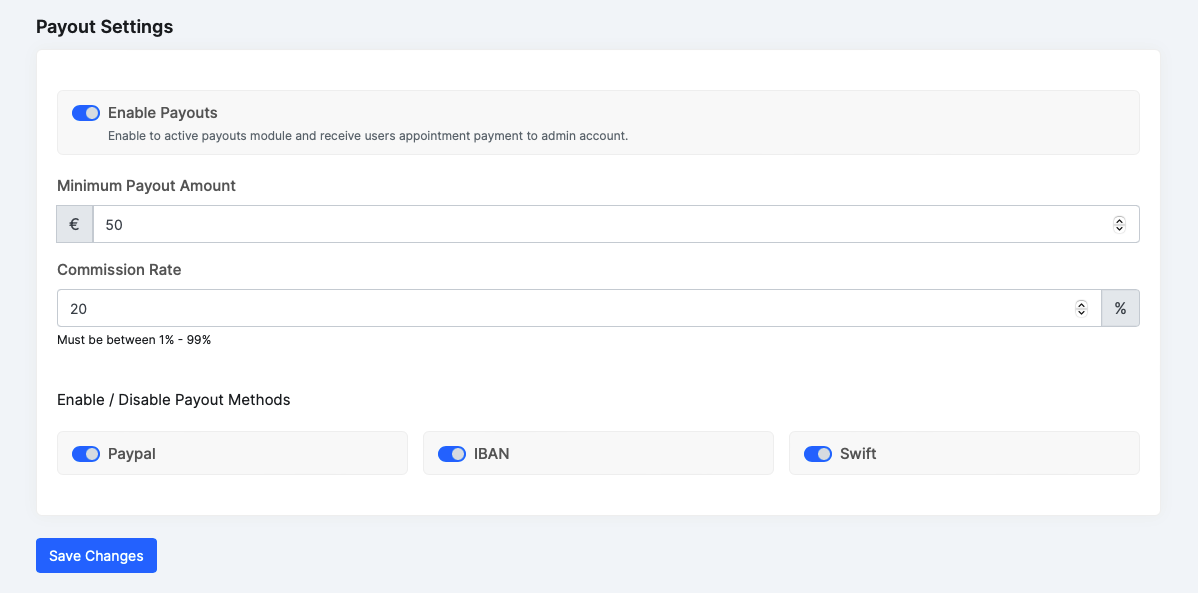
Admin - Payout Settings
Login as admin go to Payouts > Payout Settings from left sidebar, Enable Payout module set Minimum payout amount, Commission rate & Payout methods (payout method will be used for withdraw user payments). Now you are ready to receive users booking payments to directly admin gateways and balance will be added on the Users account (after apply the comission rate).
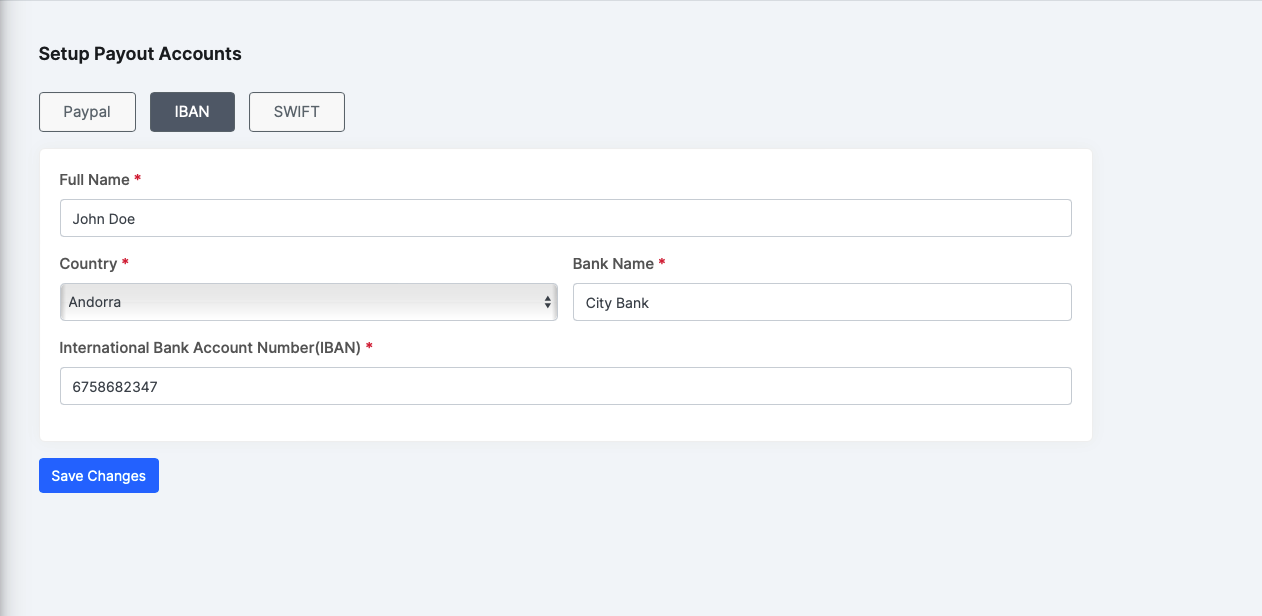
User - Setup Payout Accounts
Go to user panel Payouts > Set Payout Account from left sidebar, users will see their payout methods for setup to withdraw their payments
User - Payouts
Go to user panel Payouts > Payouts from left sidebar, users will see their Payout history, Total Earnings, Withdraw & Balance
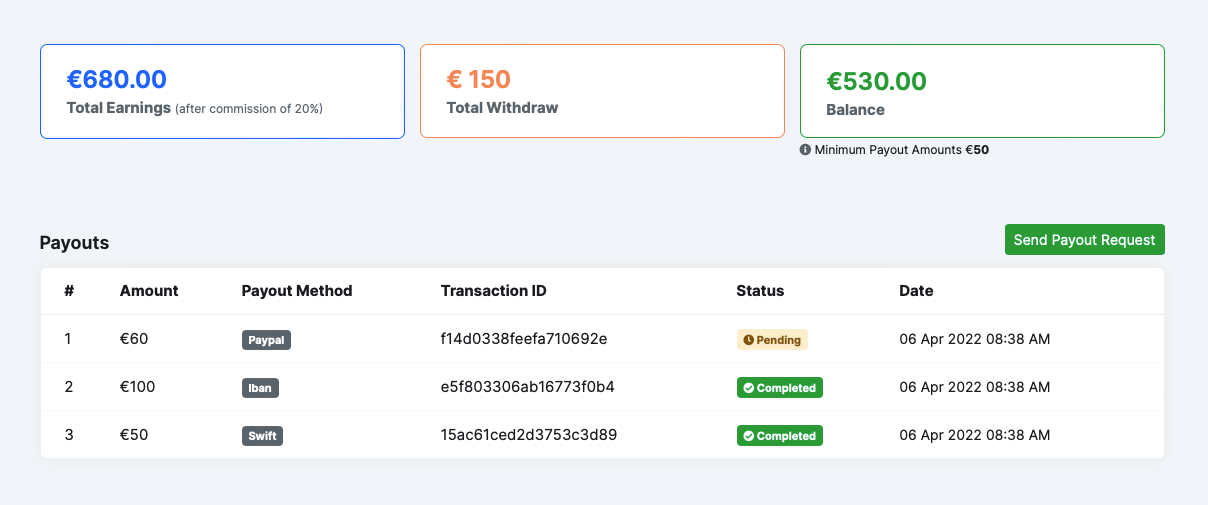
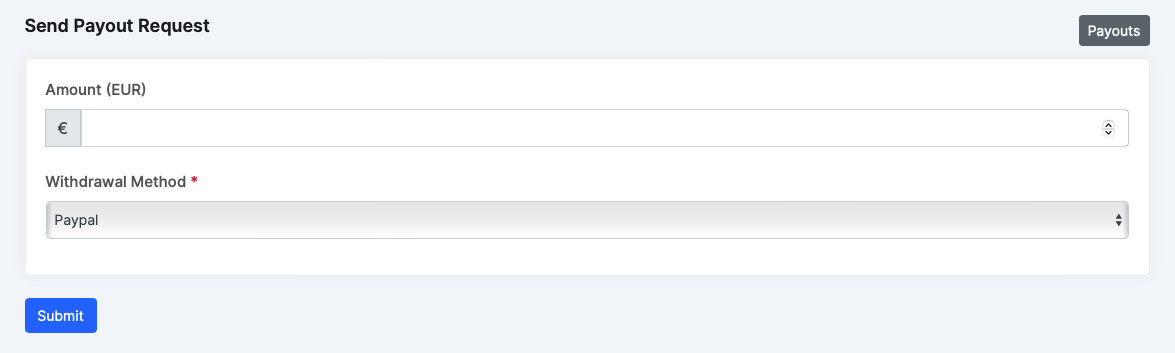
User - Send Payout Request
When users balance is greater than the admin minimum payout amount they will see the Send Payout Request button to send a withdrawal request to admin
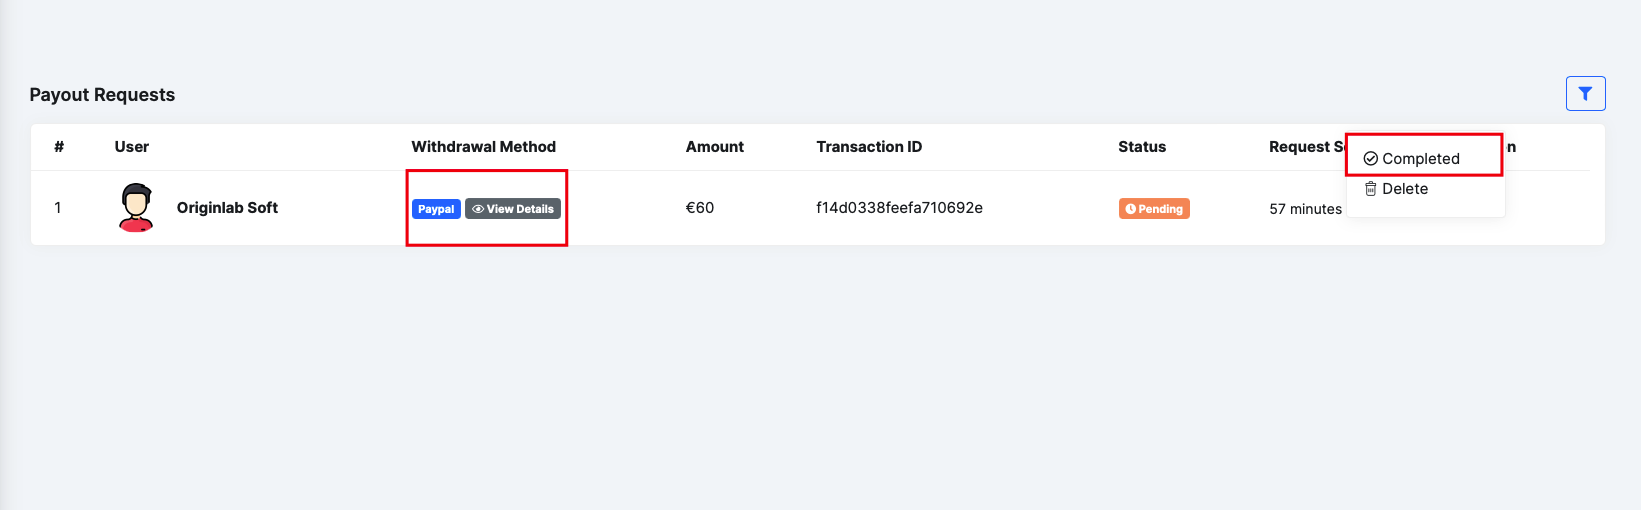
Admin - Payouts Requests
After sending the users payout request admin will see all requests on admin panel > Payouts > Payout Requests from left sidebar, Admin can see withdrawal method detailed info to pay the users and then click the Completed to mark as paid this request, After that users balance will be updated automatically ()
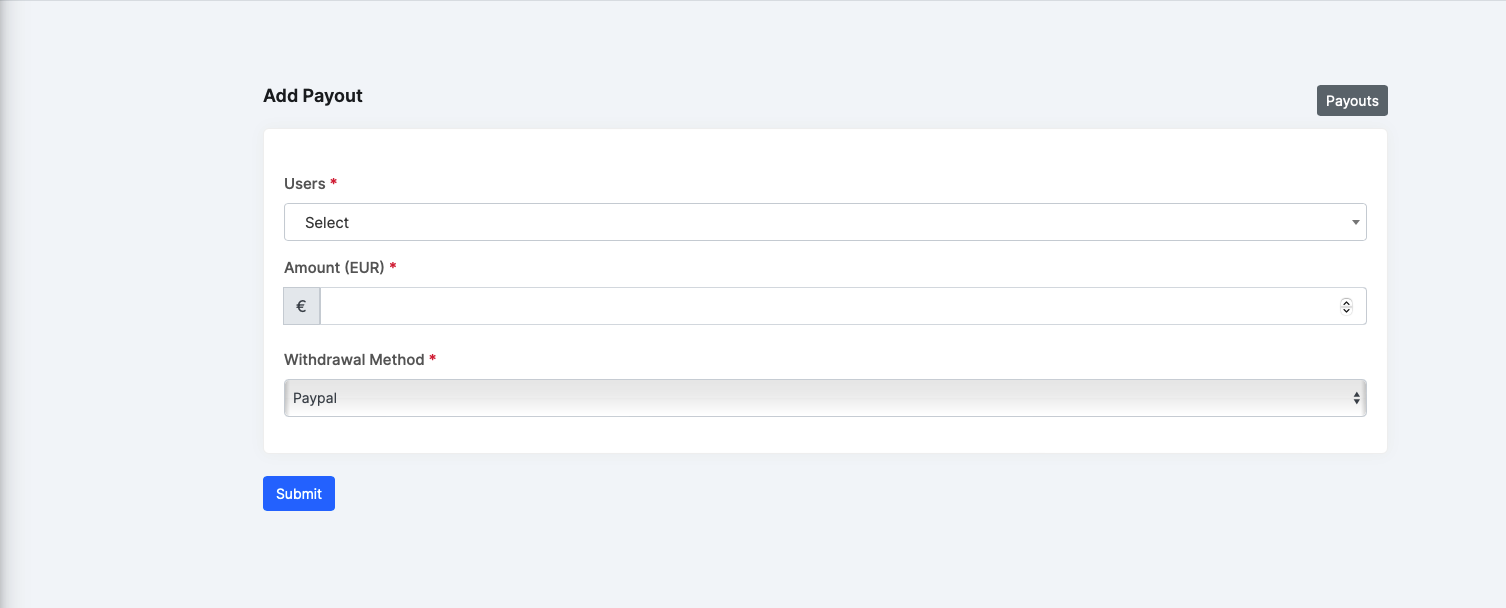
Admin - Add Payout (Manually)
From admin panel > Payouts > Add Payout admin can create a manual user payout request
Custom Domains
Custom domain will allows your users to use their own domain name instead of the default domain url. This feature will provides your users to more control over their online identity and branding their business.
Step 1 (Admin): Login as a admin go to left sidebar > Plans Click Edit for each plan and enable the custom domain feature for each plan, now your users under these packages will access the custom domain feature
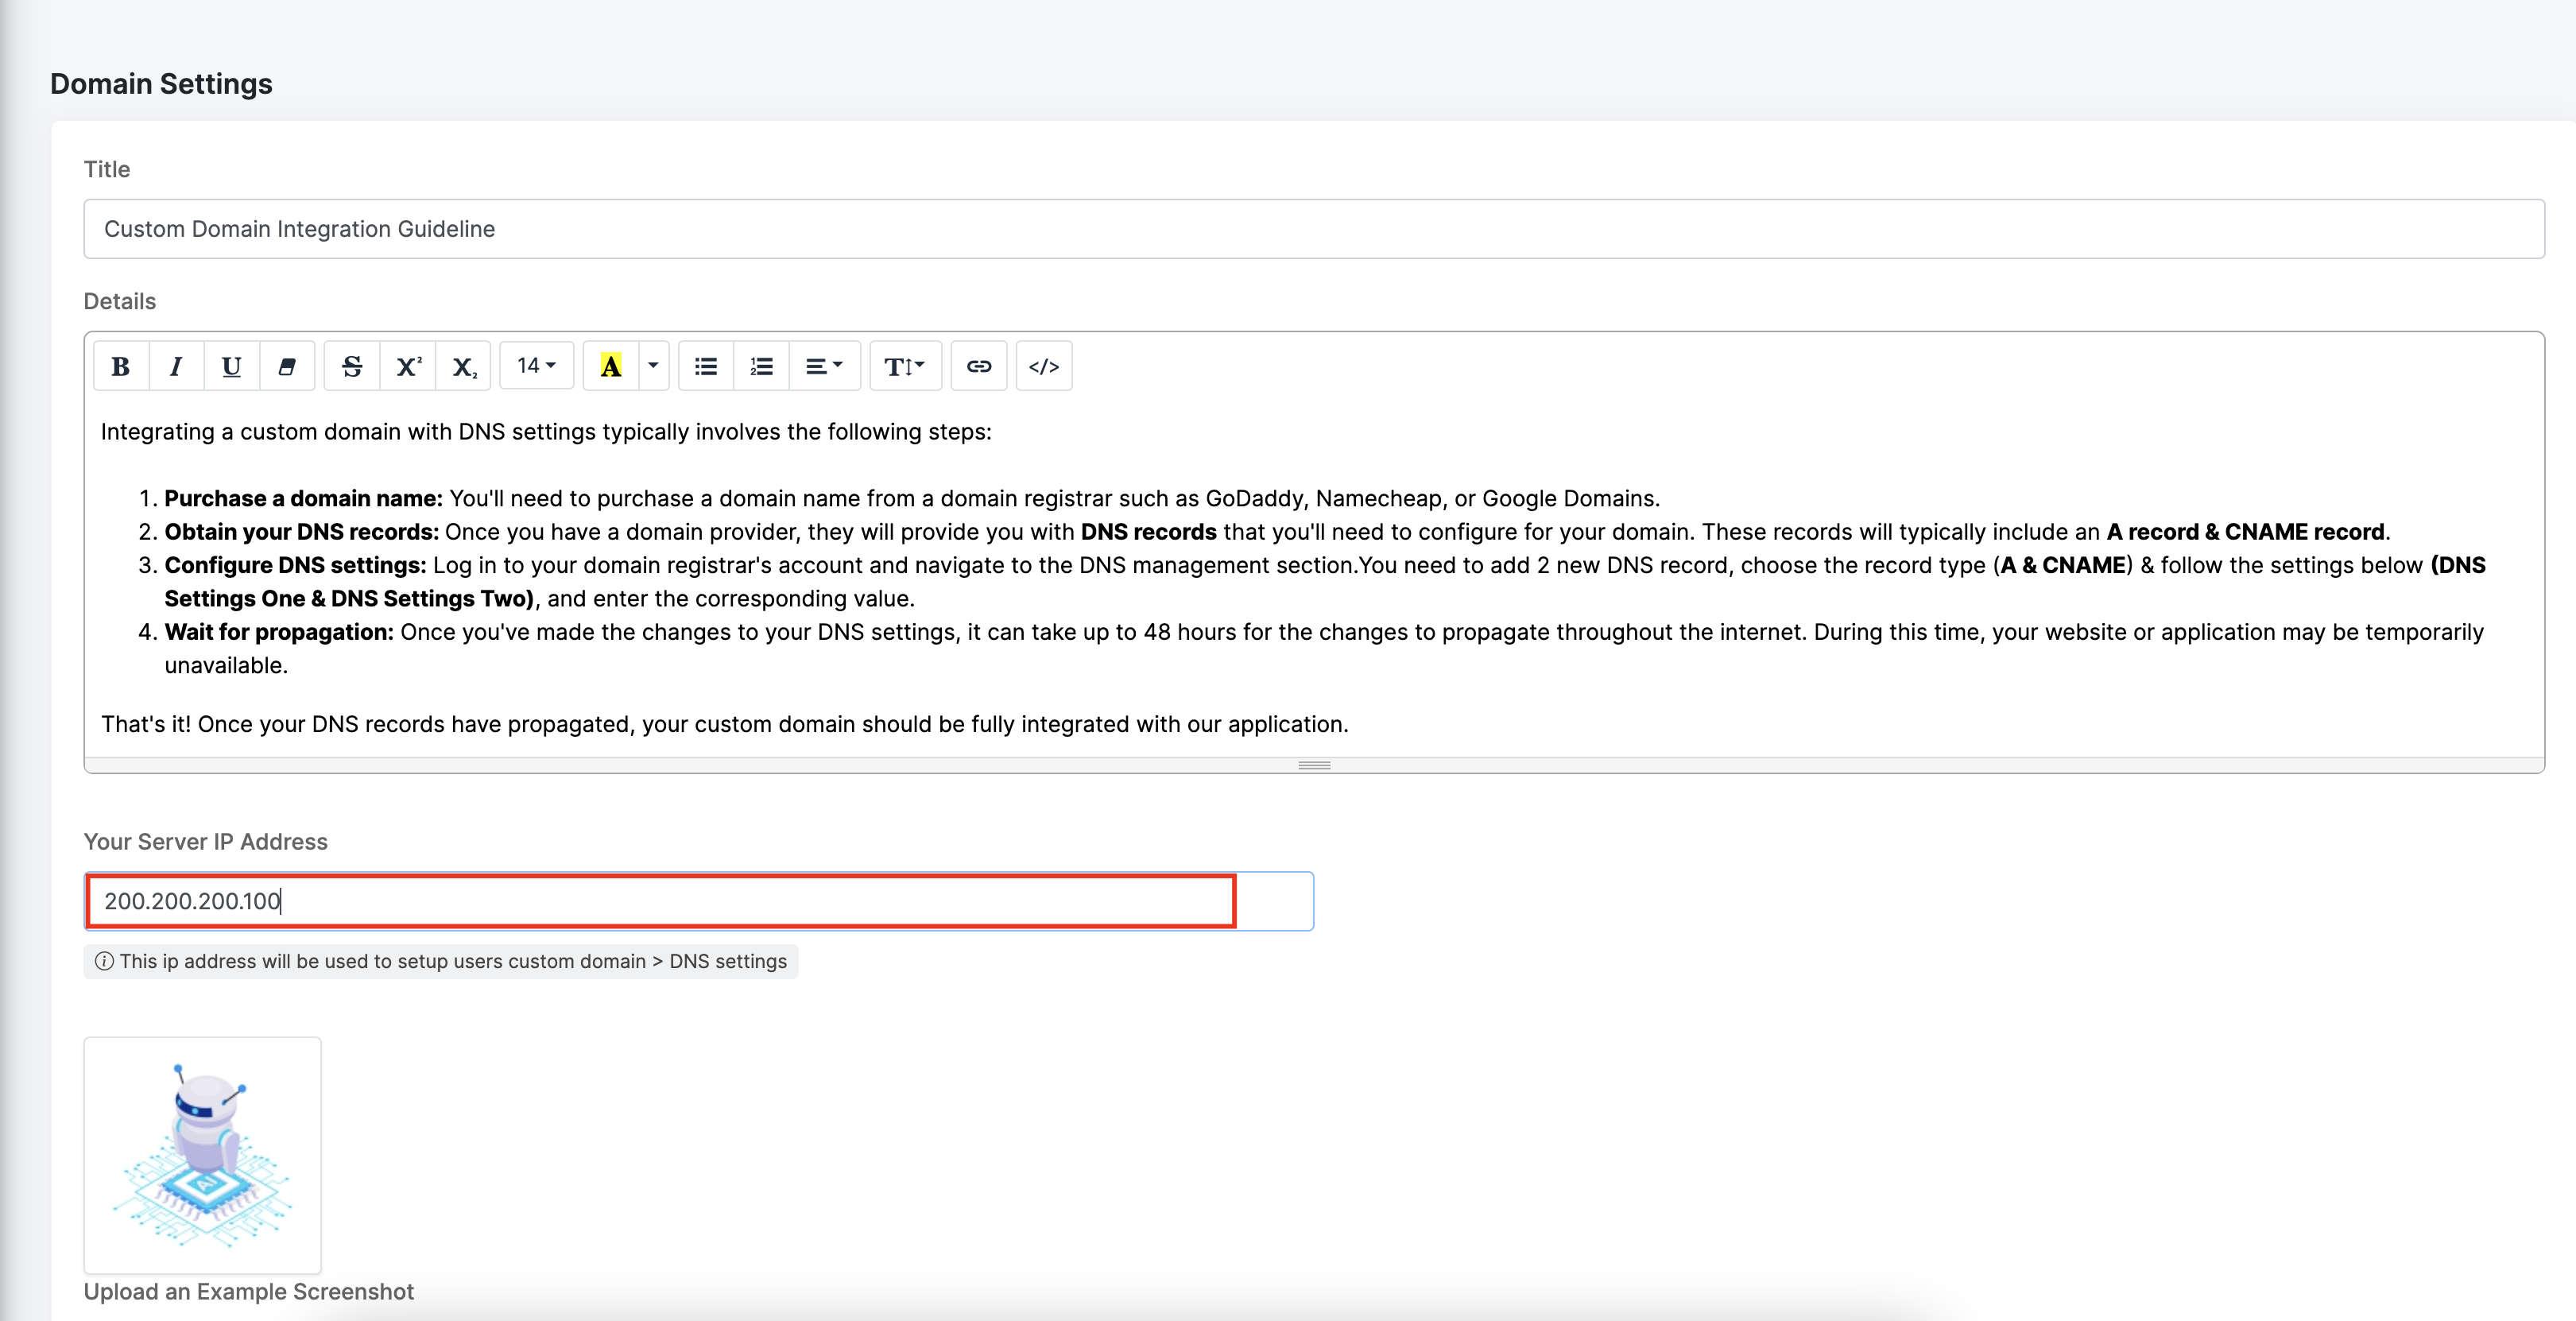
Step 2 (Admin): Now go to left sidebar > Custom Domain > settings Add your cPanel/Server IP address in this form
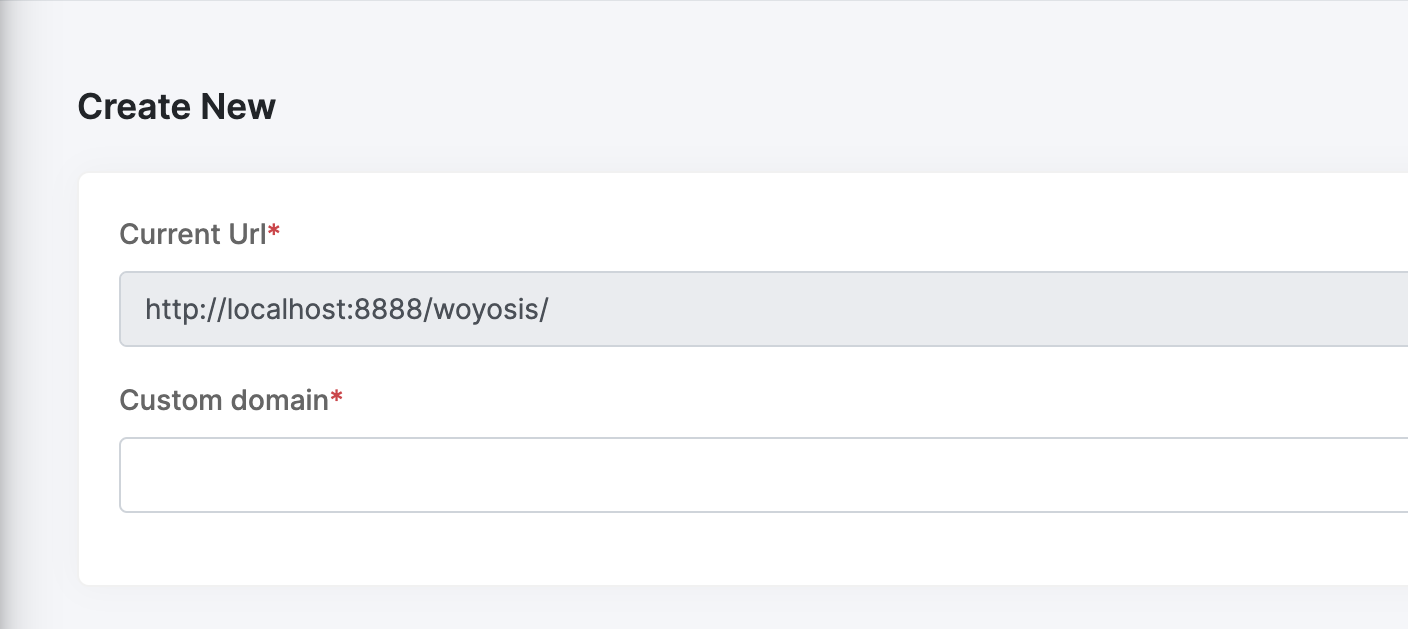
Step 3 (User): Login as a user go to left sidebar > Custom Domain Send a custom domain request to admin once user domain is approved by admin user will be able to use their own domain
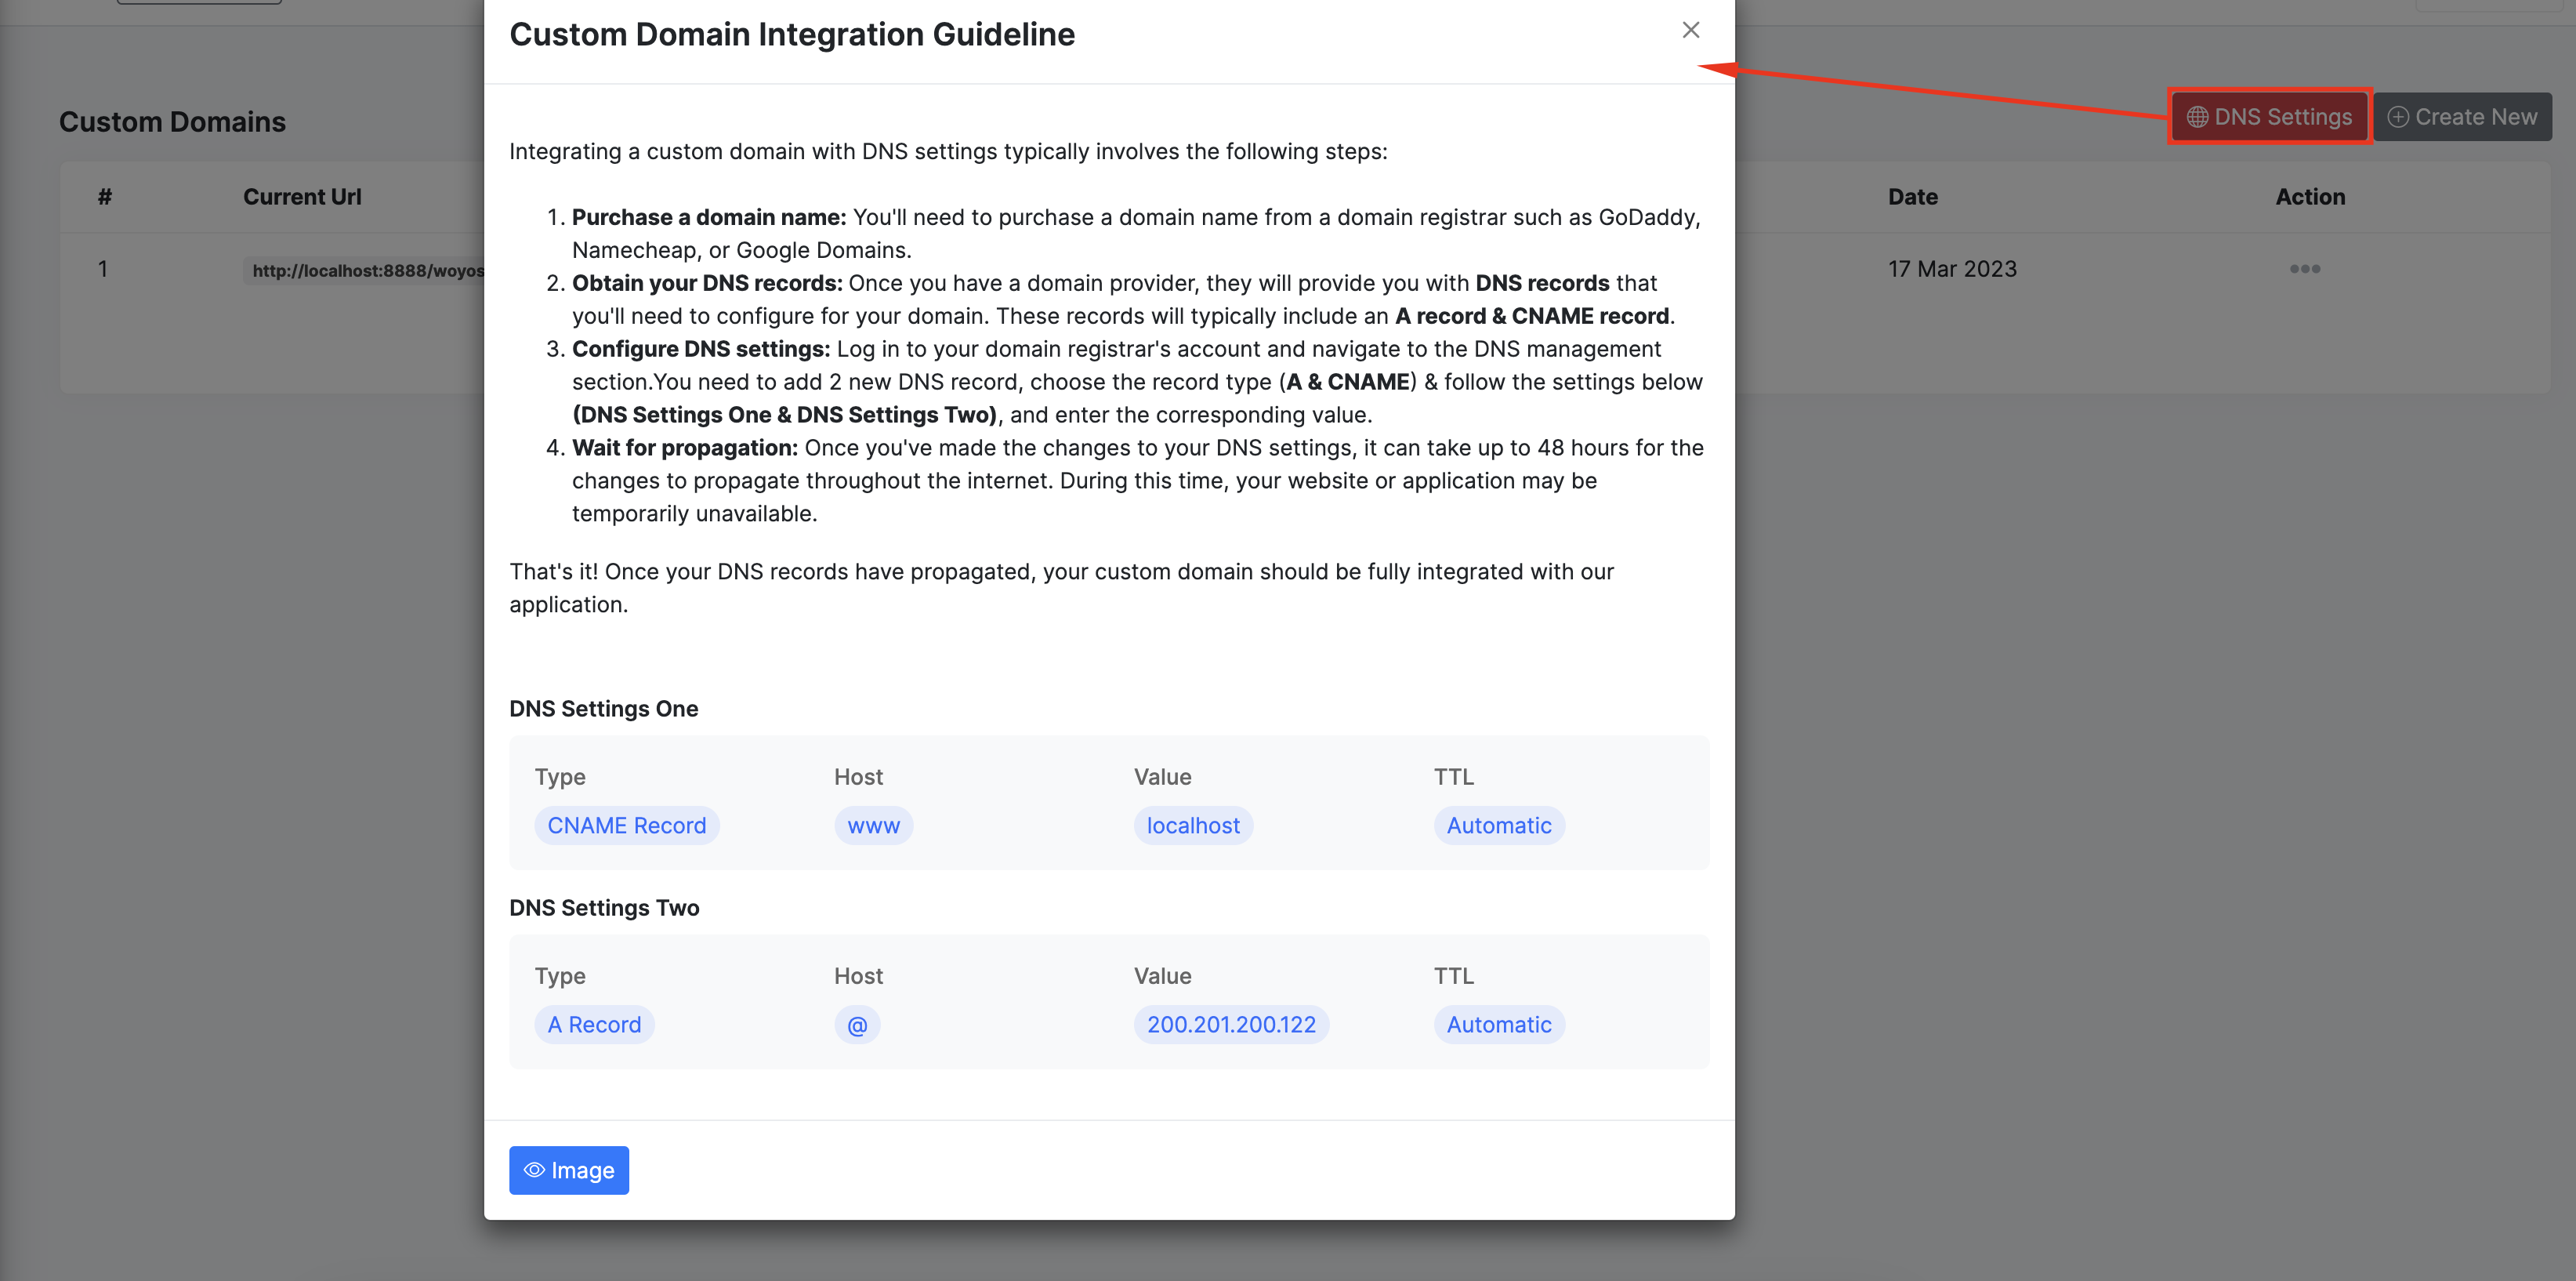
Step 4 (Admin): Login as a admin go to left sidebar > Custom Domain > requests There you will see all your users requesed domain, once yor approved your domain then this will be go for live

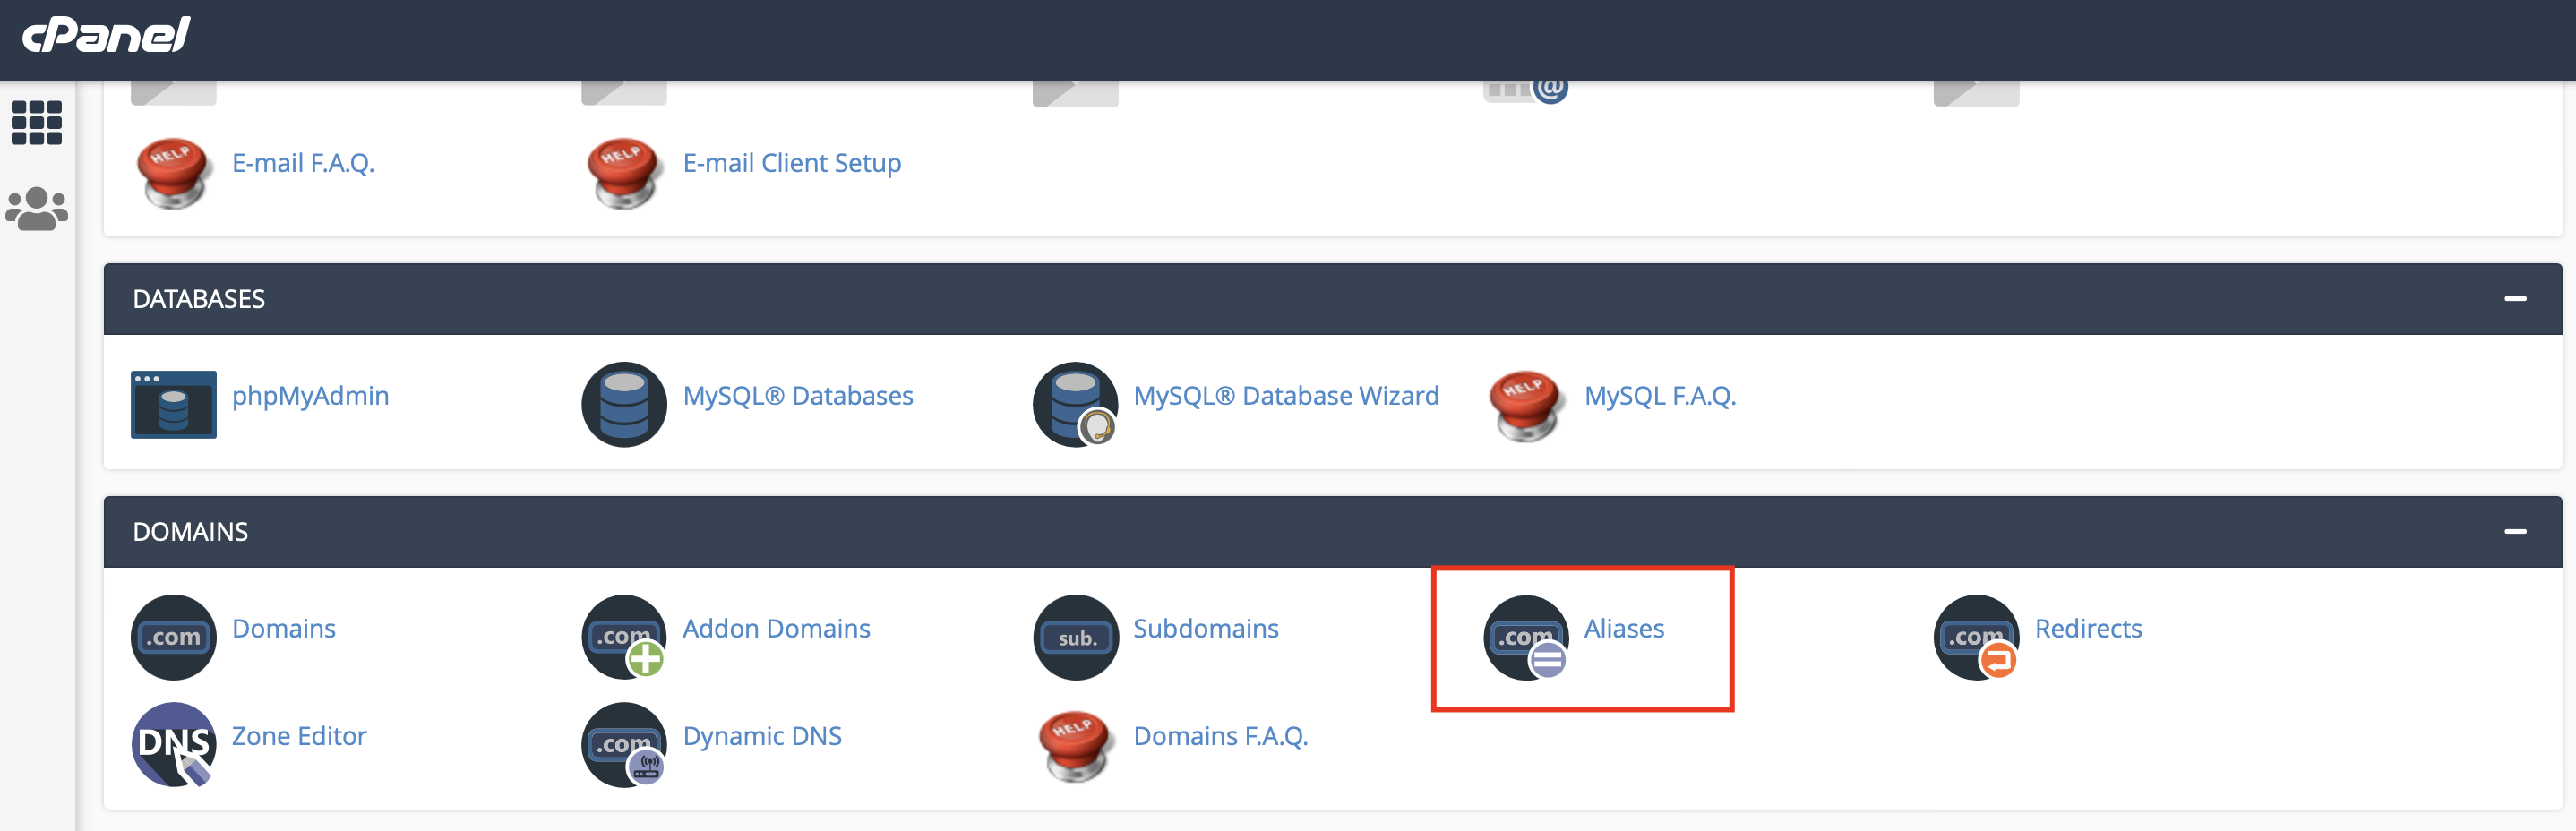
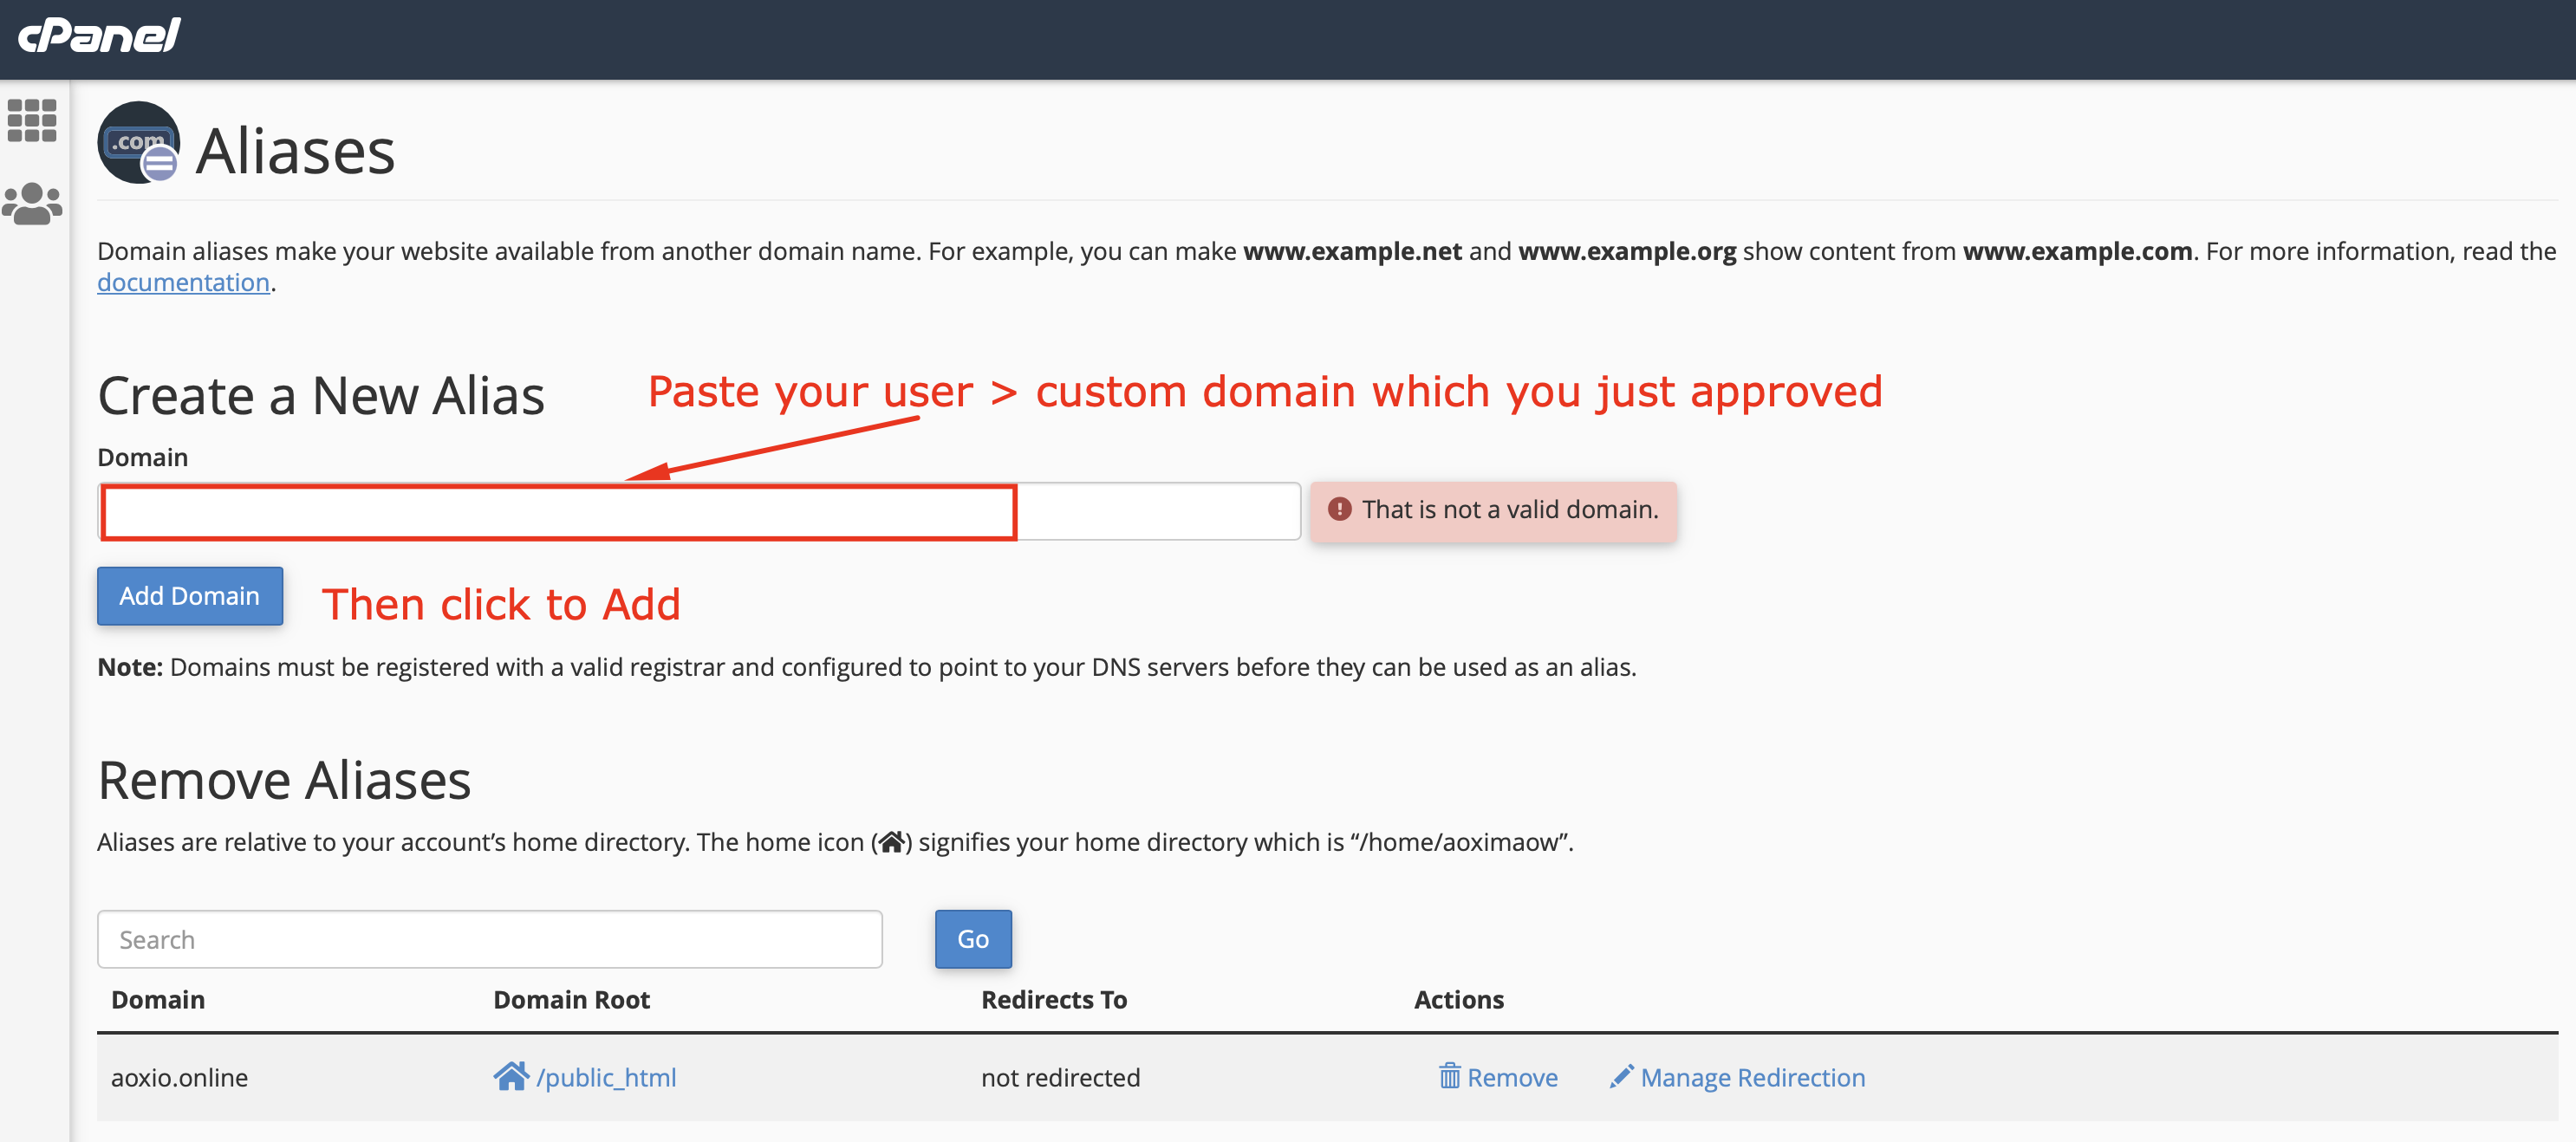
Step 5 (Admin): After approved custom domain request you need to add this user > custom domain as a Domain Aliases Please login to your server go to domains > Aliases section
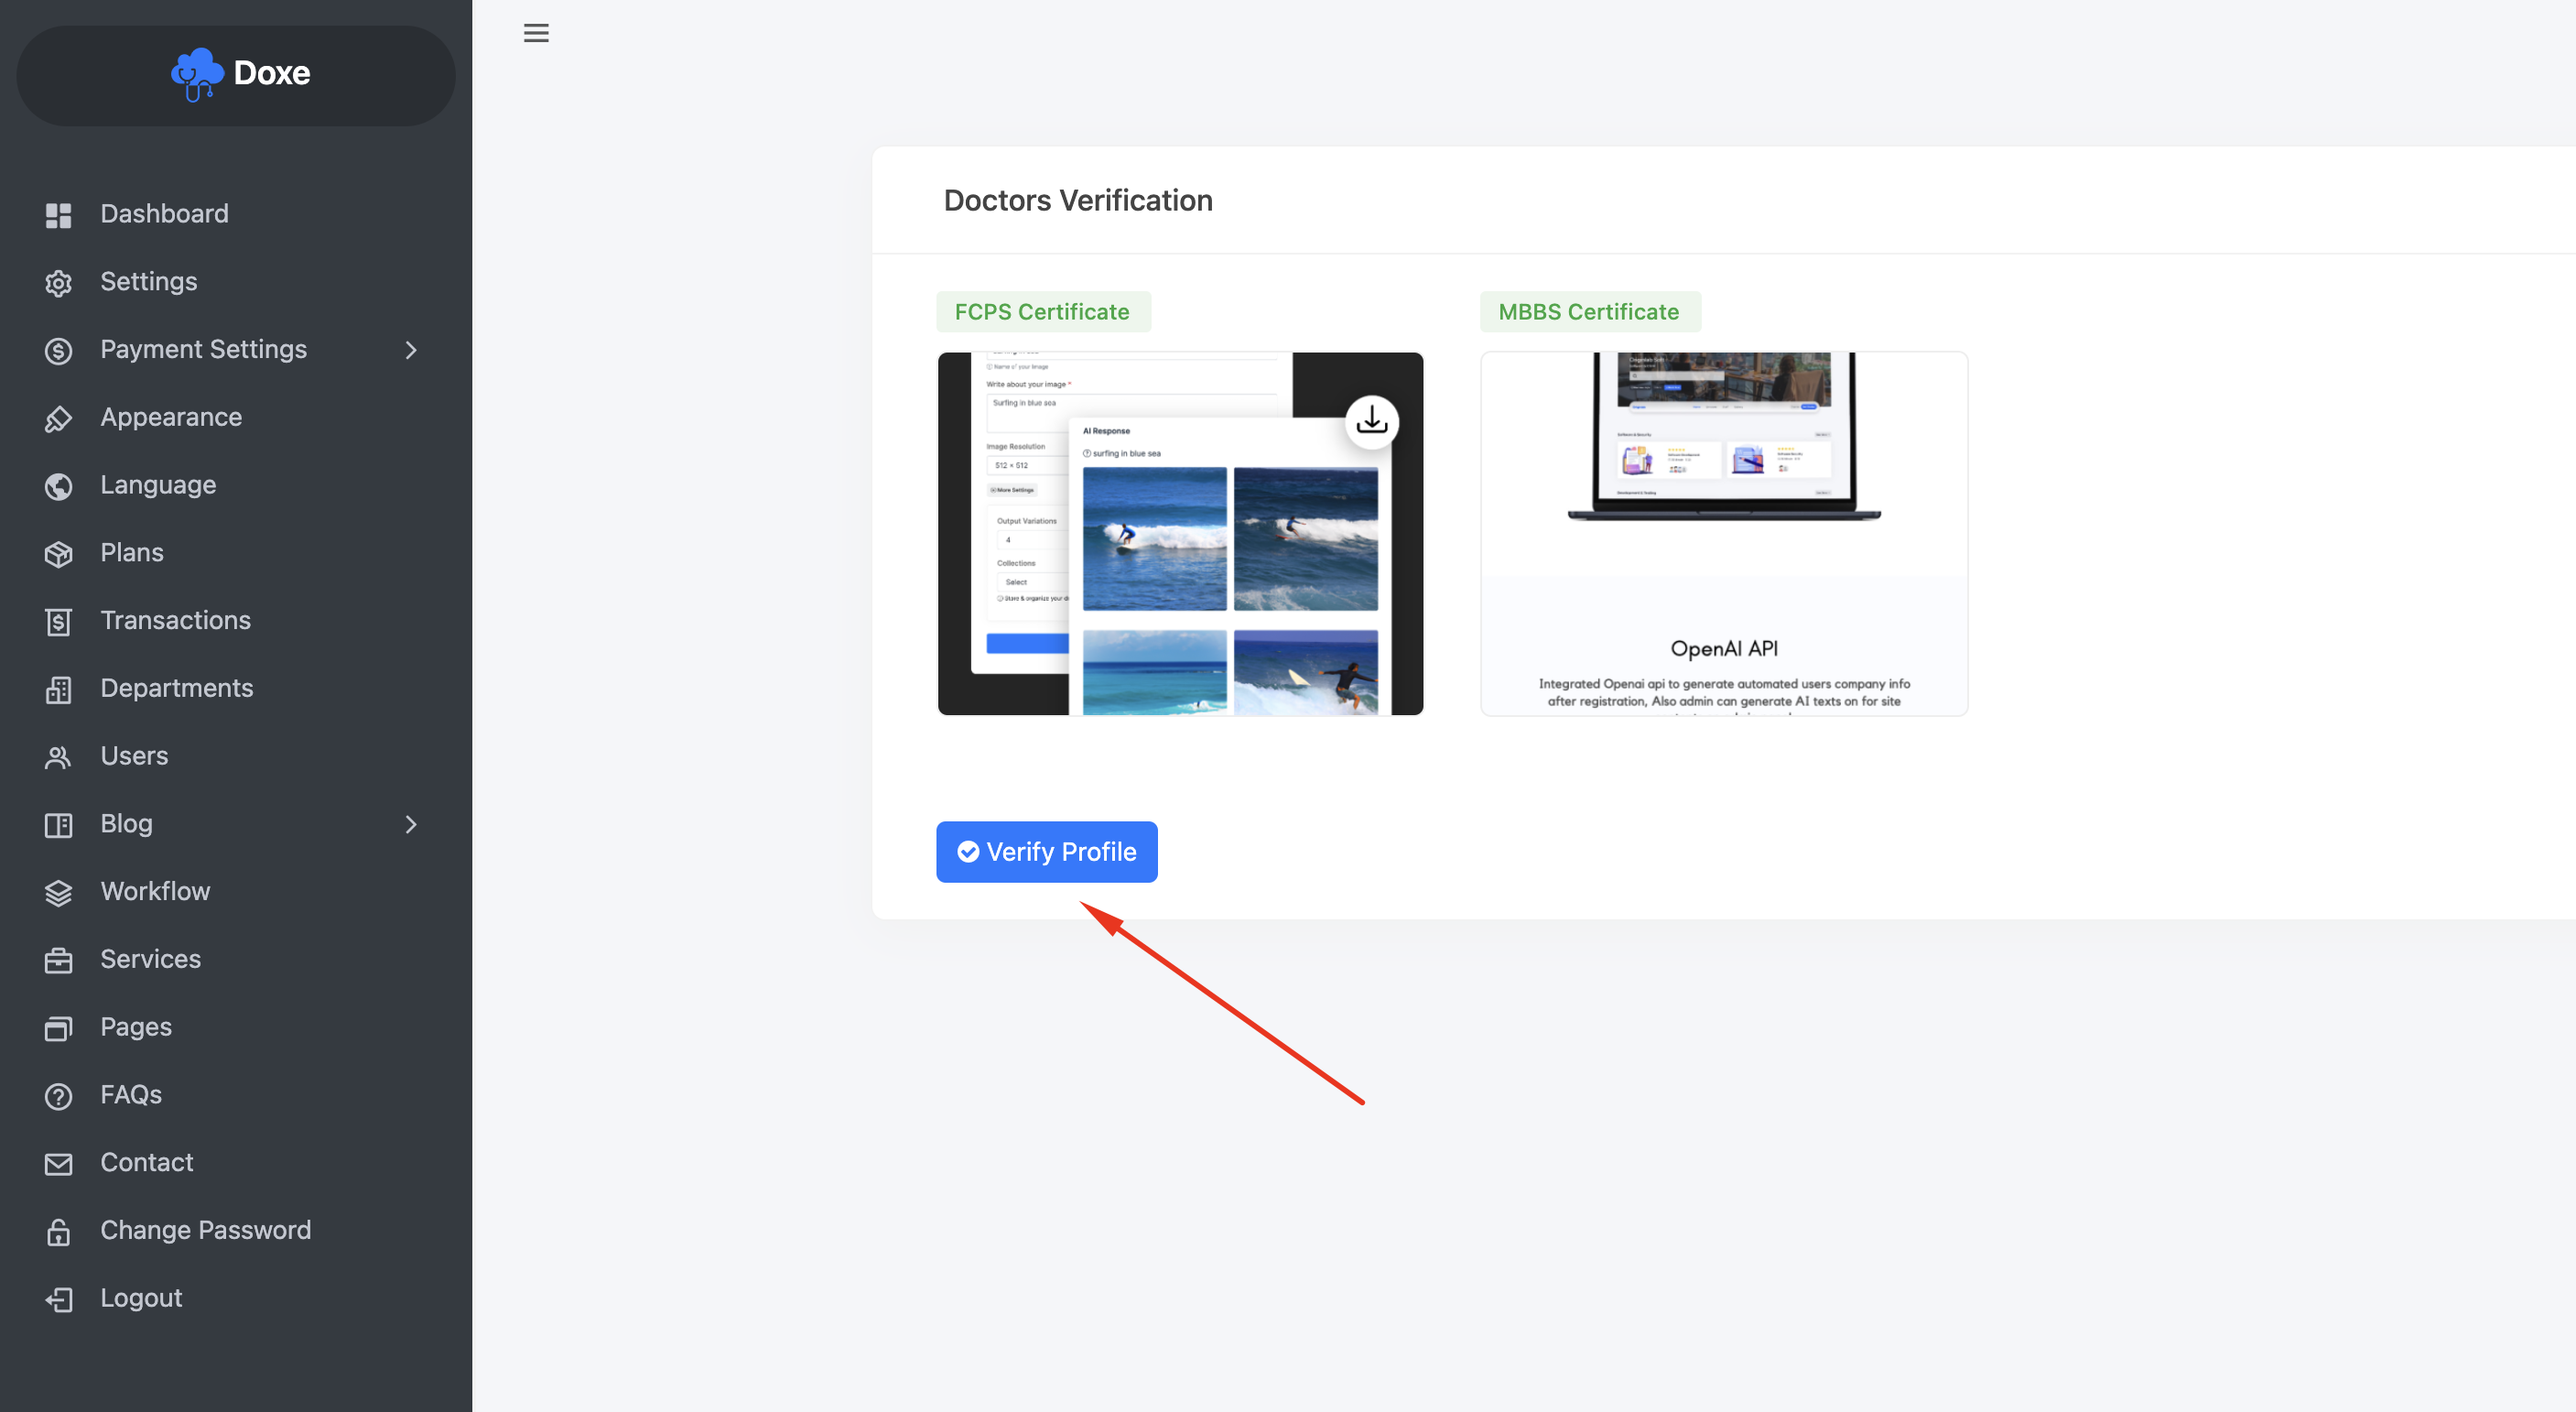
Doctors Verification
Login as a admin go to settings > Doctors Verification tab: Enable the verification toggle to activate the verification system.
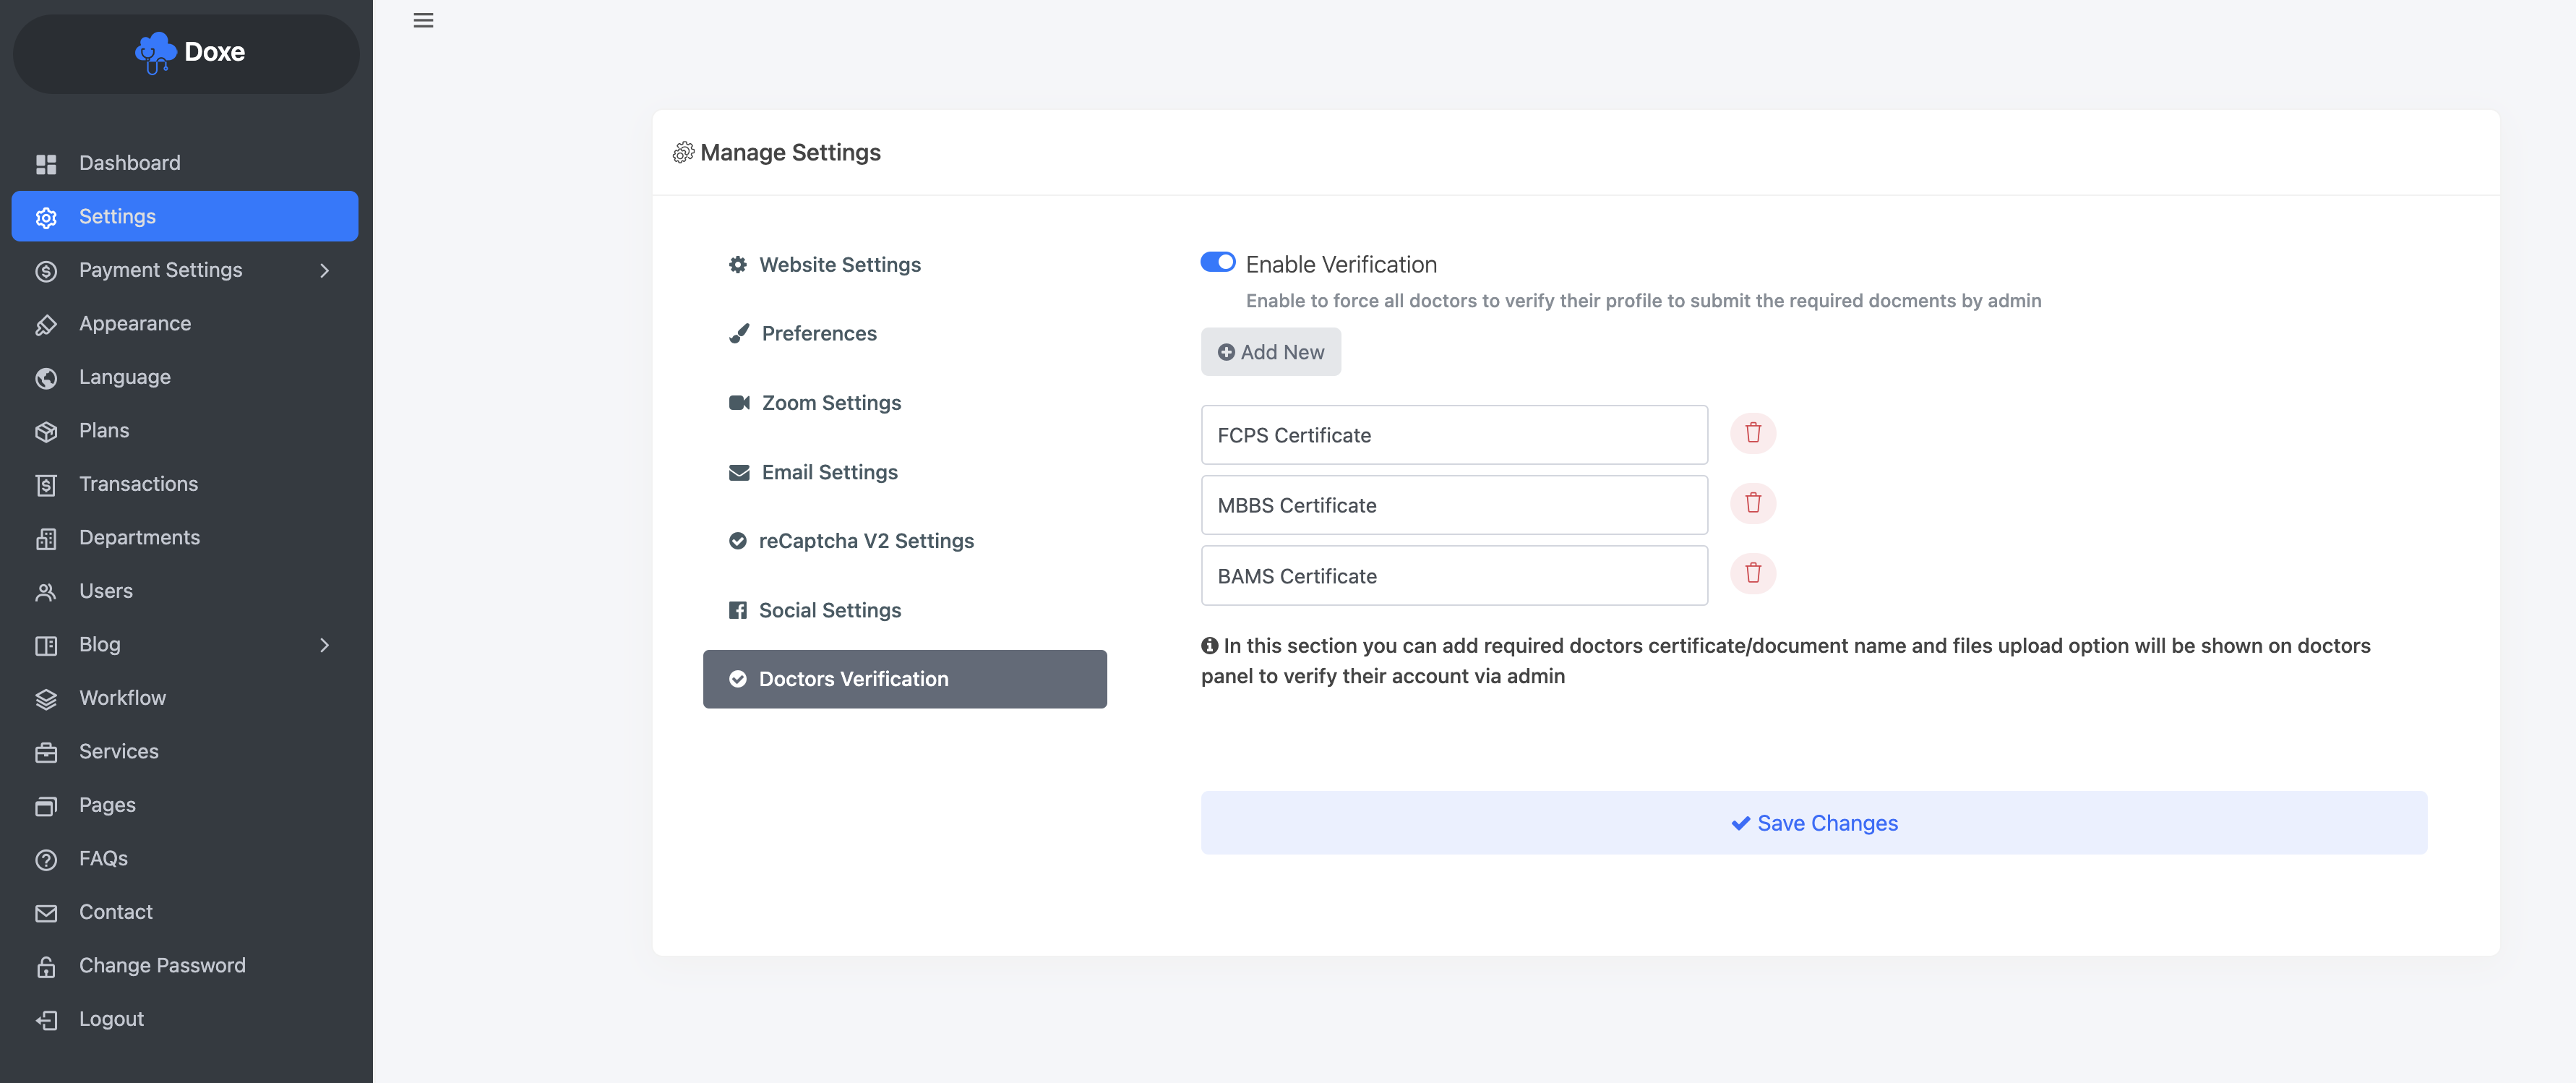
Users will see the verification popup on every page until you submitted the files
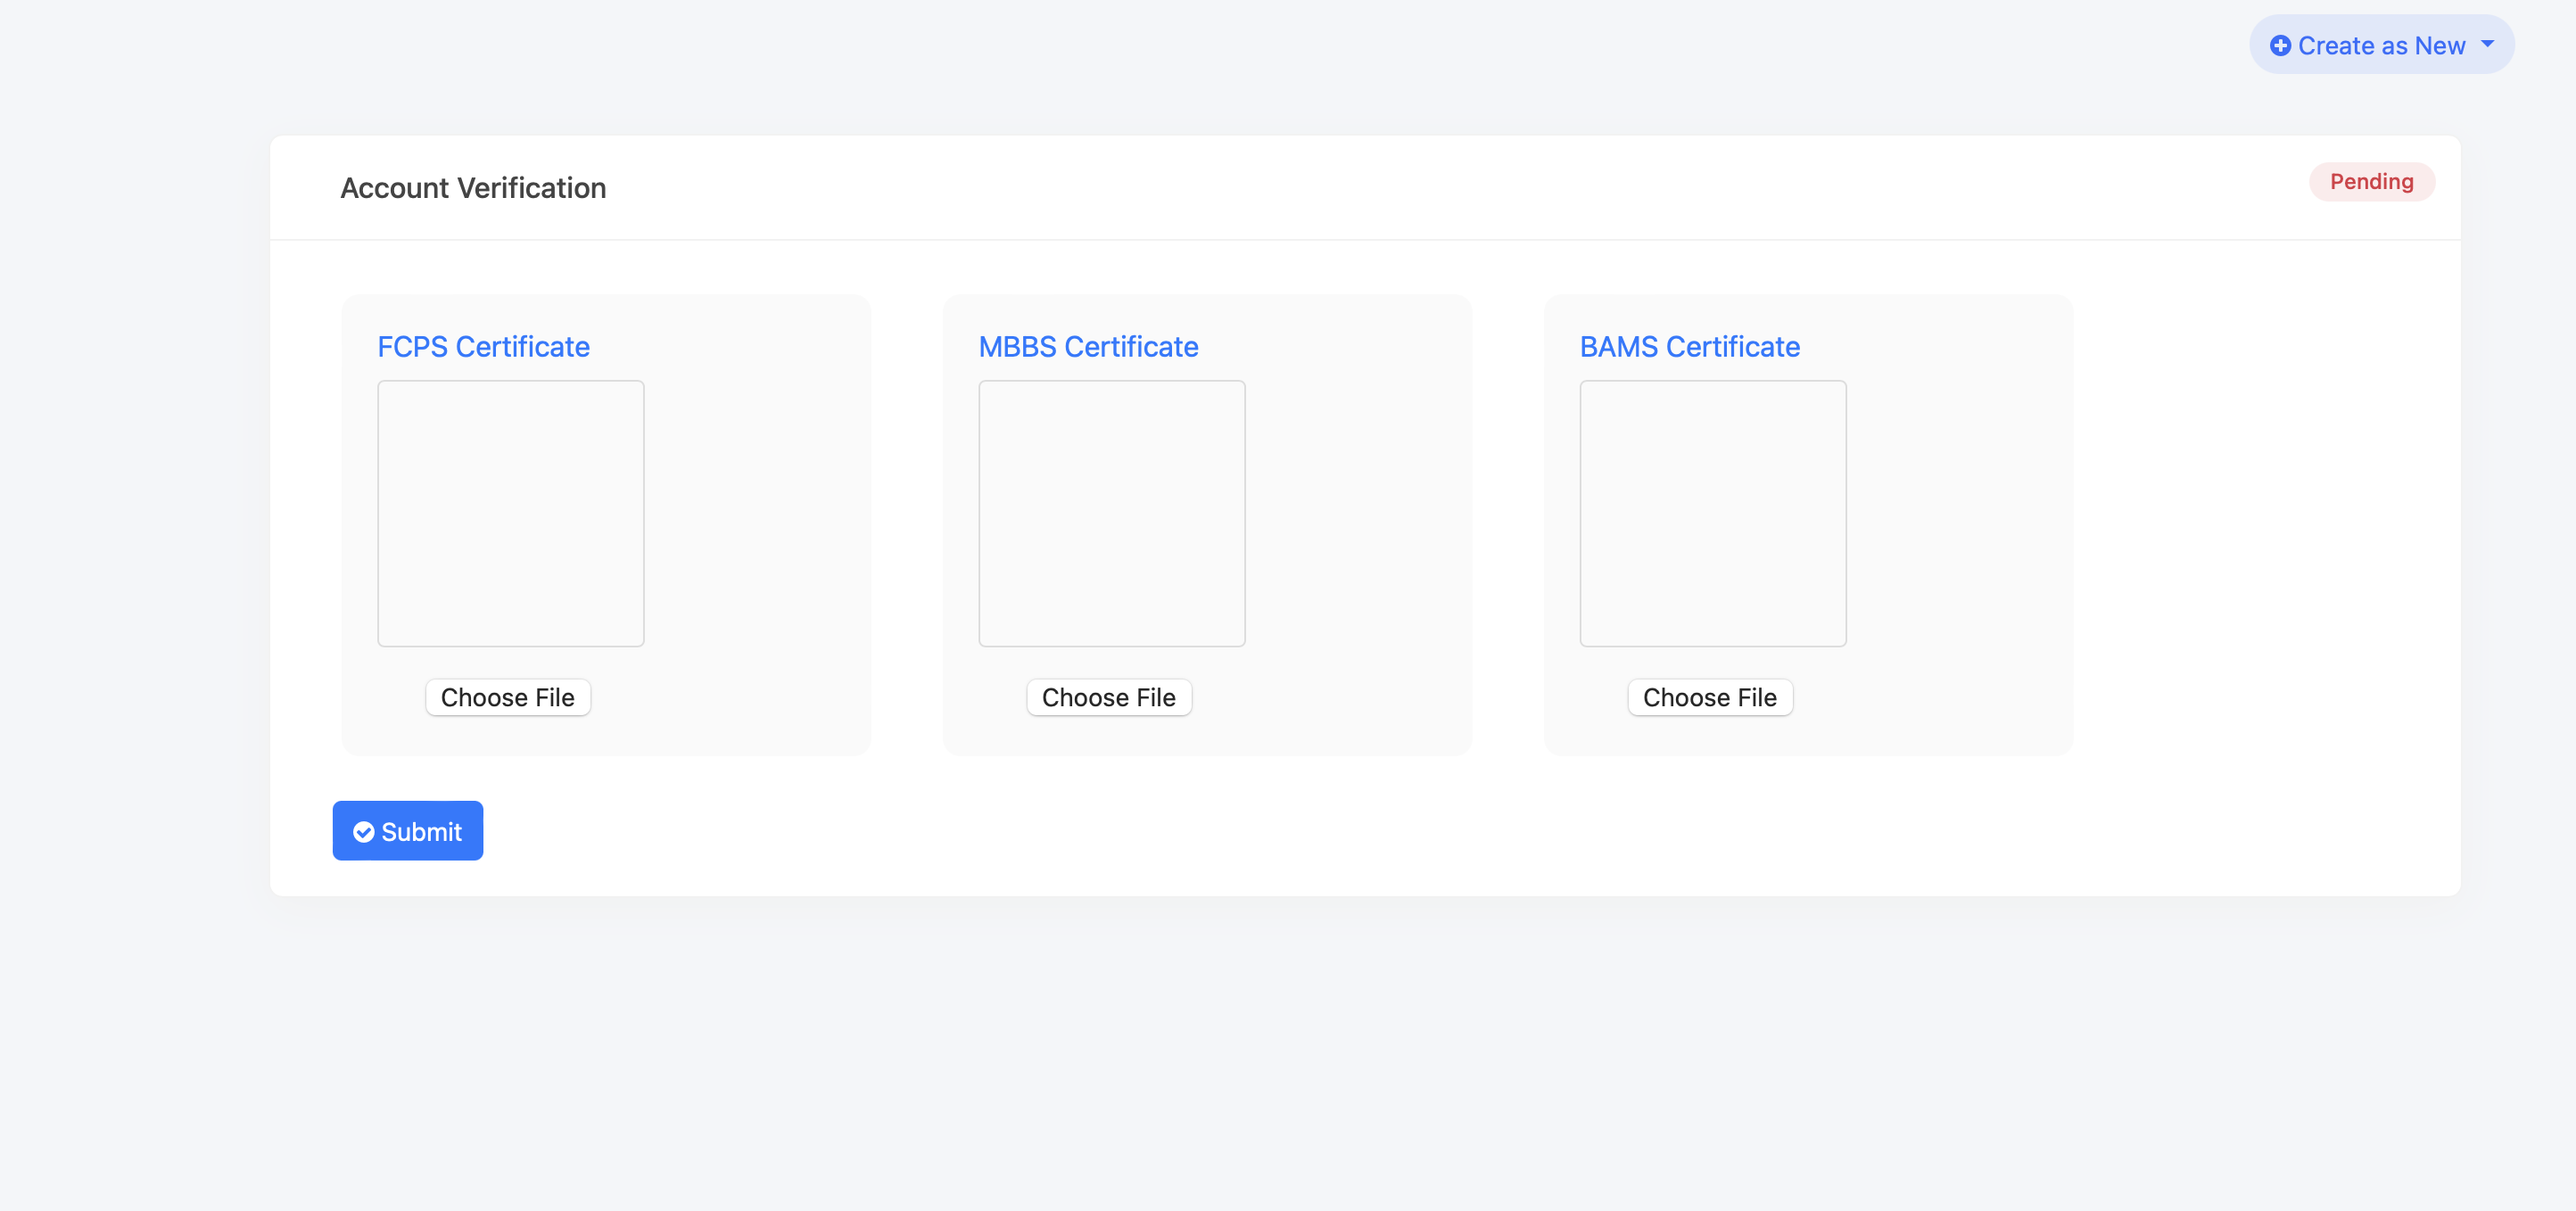
From Admin panel > users section you will see the verify button to submitted files

Staff Panel
Staff can access only selected chambers or All chambers which is assigned by the user.
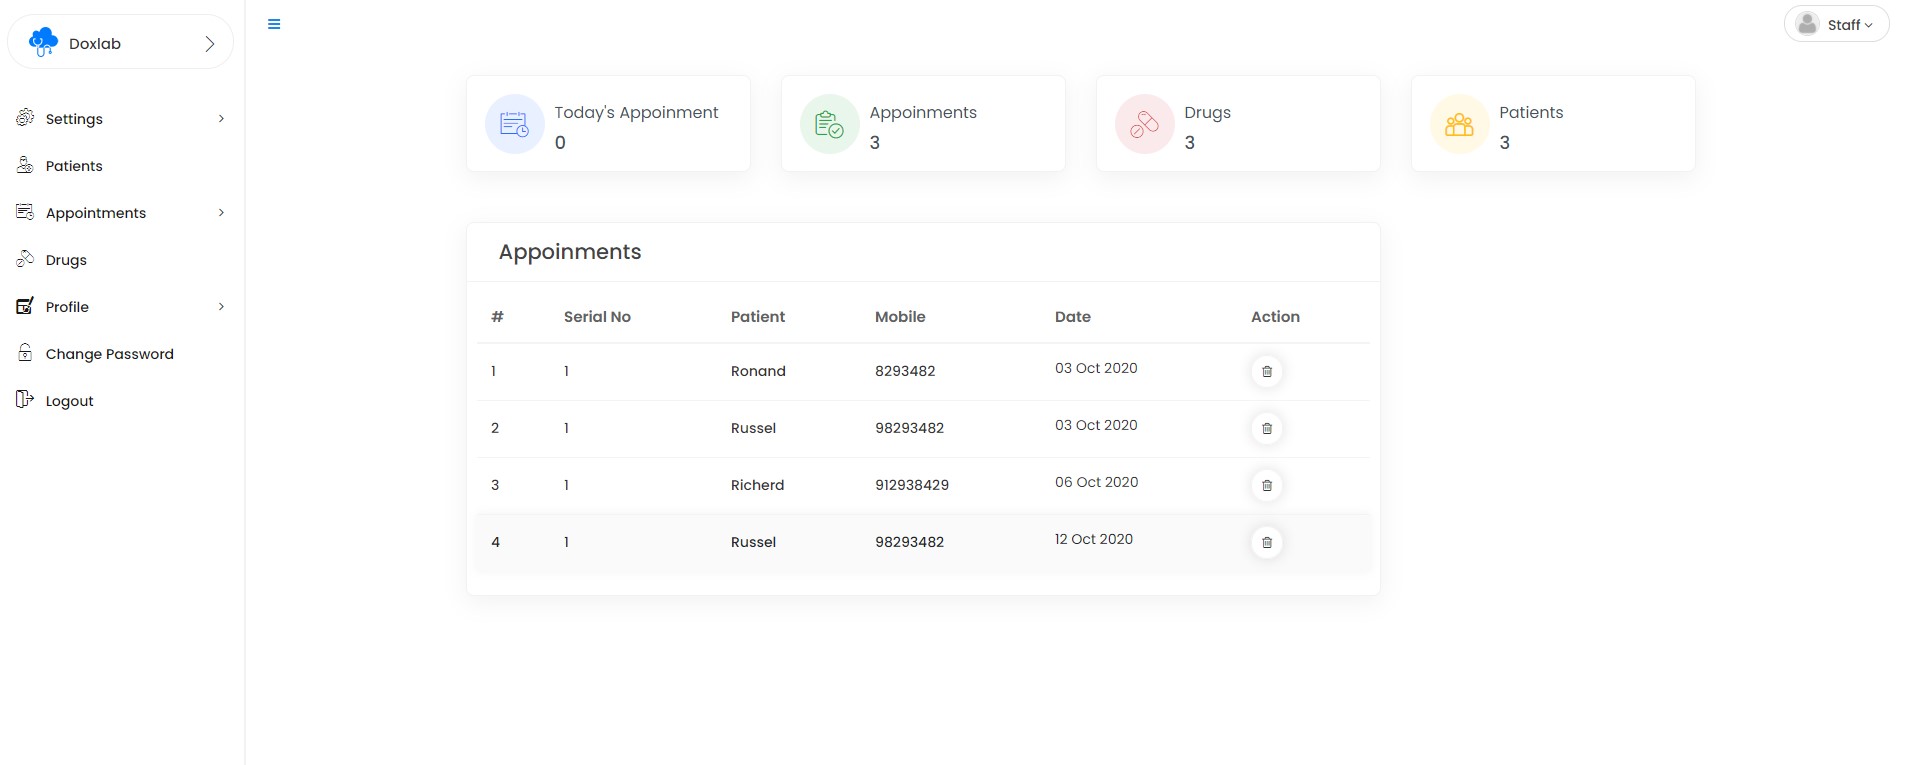
Staff can access Prescription settings, patients, drugs, appointments & dr profiles but they will not delete any data from their panel
Patient Panel
All Upcomming appoinments will be showing in there
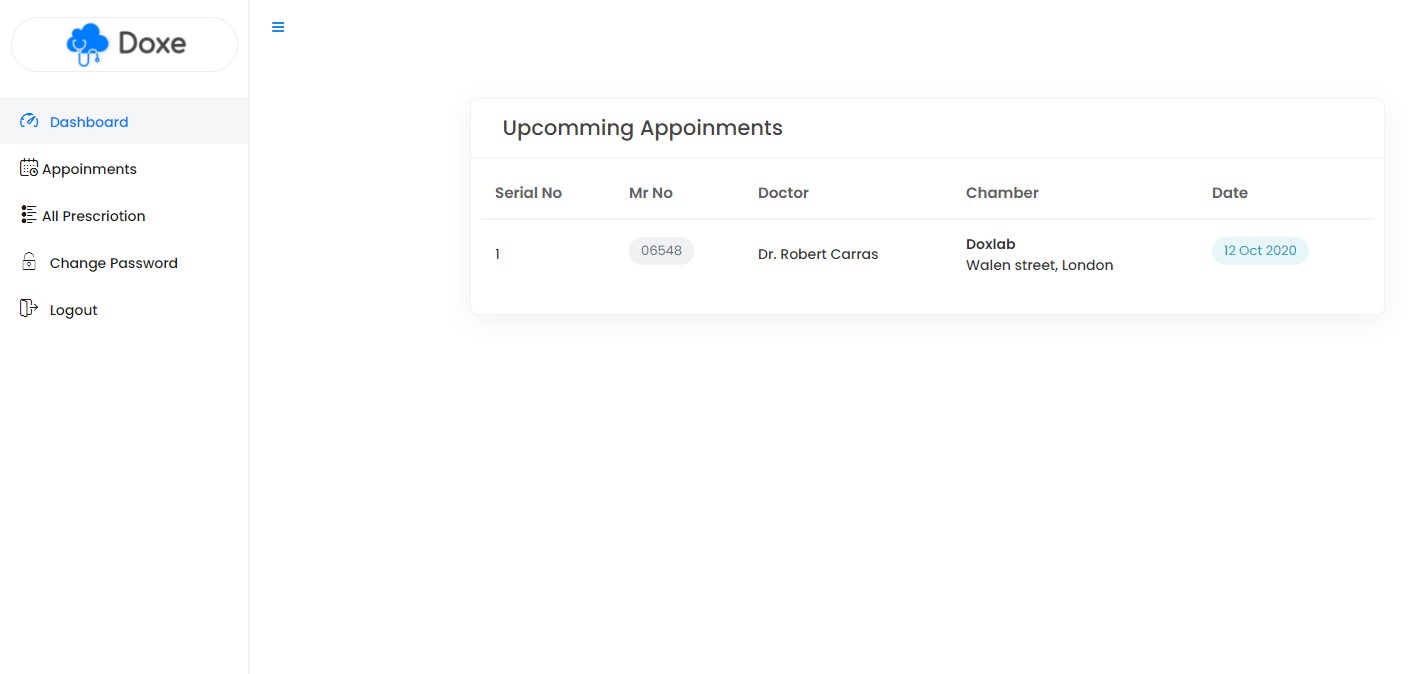
Appoinments - Patient can see their all appoinments here

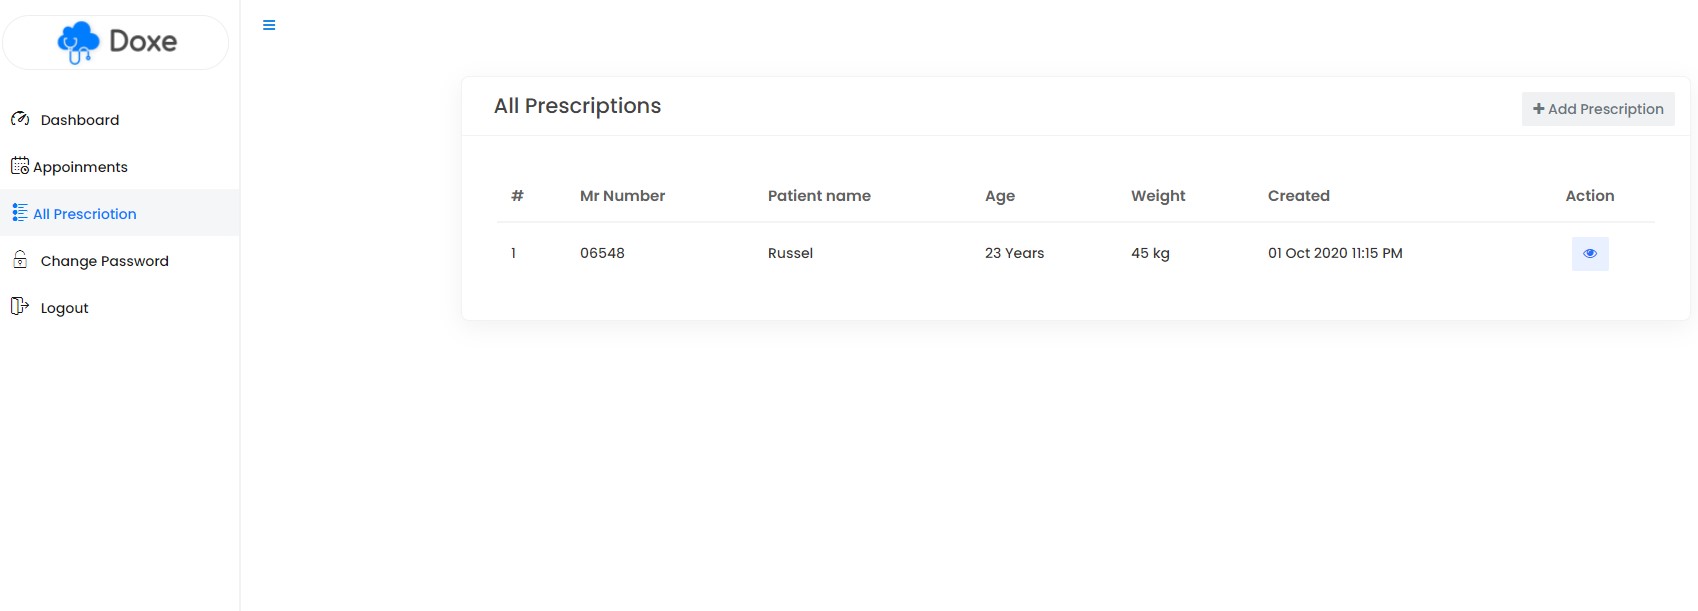
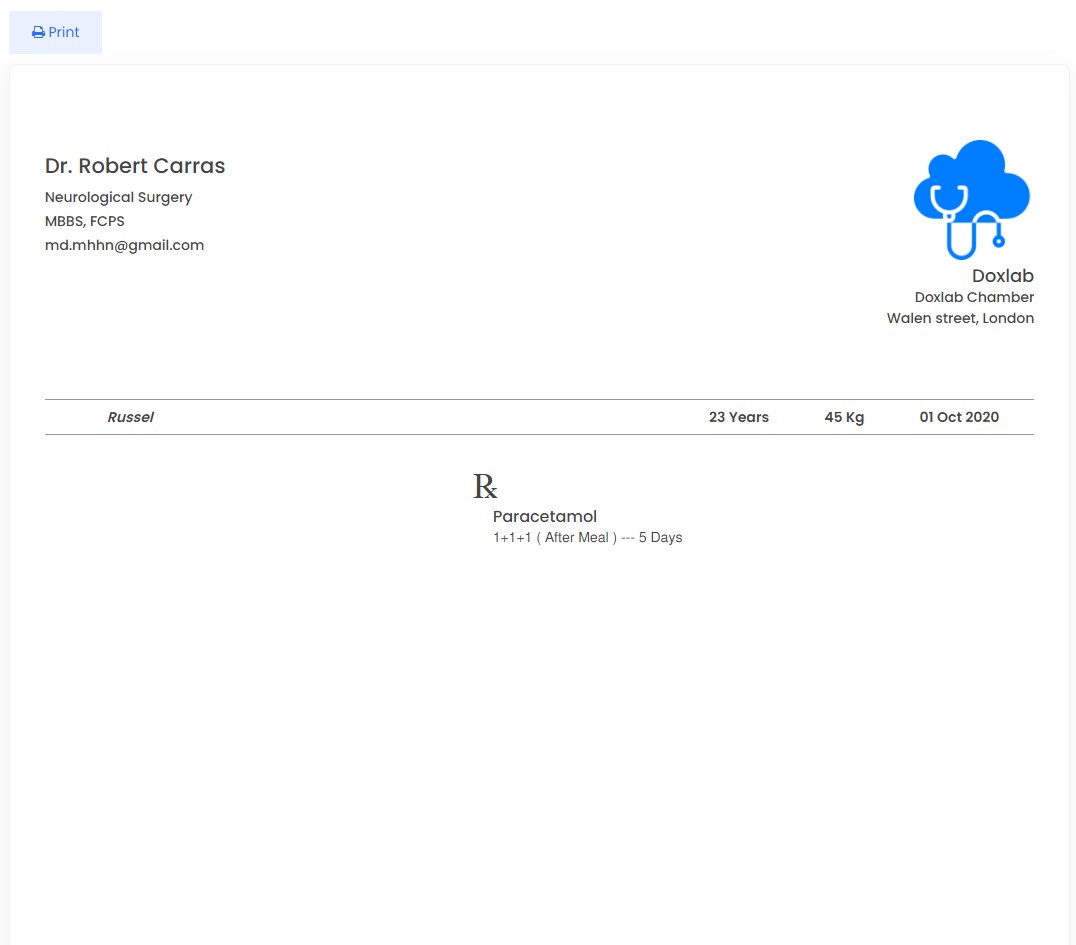
Prescription - Patient can see their all Prescriptions here, they can also print their prescription.
Setup cron jobs
For auto check your expire payments for once a day you can set a cron job to manage this options. Follow the steps:
Step 1: Go to your Cpanel and click cron jobs.
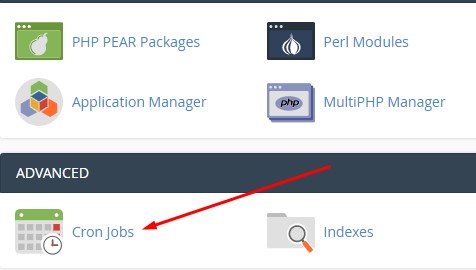
Step 2: Add new cron job.
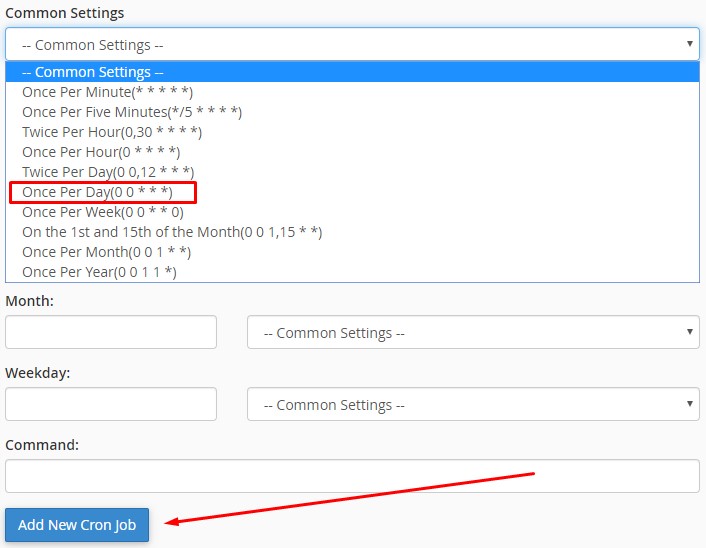
Add below command to your cron command line:
wget http://yourdomain.com/cron/expire_payments
Click Add New Cron Job button.
Frequently asked questions
After installation when I click on any link it returns 404 Not Found, why?
There are few reasons, this can be happend
- You do not have the
.htaccessfile uploaded on your project root folder - Your web host provider does not have
mod_rewriteenabled for Apache. - The
.htaccessfile exists, but the content is not the same as the original file from my product.
Emails are not sending / I have errors with my SMTP.
All errors related to the email sending system are caused by either
- Incorrect SMTP credentials
- not properly working SMTP server, or web host blocking the actual SMTP connection.
- For any of these issues, contact your SMTP or web host provider.
How to customize the frontend landing page, header or footer?
You can customize landing page contents from application views home.php
You can customize header / footer from application views include header.php / footer.php
Why payment gatewats are missing in my site?
Please make sure you have purchased the extended license for this script, If you purchased a regular license then you will not have access the payment gateways, check our item details page or See license terms here
How can I add a new language and translate texts?
You can add new language from Admin Panel Language Add New Language form, After that you can translate all texts from Admin Panel -> Language list > Edit Values
How can I update text on the website?
Any static text from the website can be changed from the Admin Panel Language Edit Values
How can I set my own language as a default?
You can set your language as a default from Admin Panel Language Set default language dropdown to update it